A website scrolling video is essentially a screen recording that captures the live motion of scrolling through a webpage. But it's more than just a simple screen grab; it’s a seriously effective way to create compelling marketing demos, helpful user guides, and social media content that actually gets noticed.
Why Bother Creating a Website Scrolling Video?
Let's be honest: static screenshots don't always cut it. They can feel flat and lifeless, failing to capture the real experience of using a site or app. A scrolling video solves this problem by showing your product in motion. This format is just better at grabbing—and holding—attention.
Think about it. A single image of a new app shows you the UI, sure. But a slick scrolling video demonstrates the user experience—how the menus animate, how content flows, and what the layout actually feels like to use. That motion makes even complex features feel intuitive and way more engaging.
Key Use Cases for Scrolling Videos
The real magic of a high-quality scrolling video is how versatile it is. I've seen developers and marketers use them for all sorts of things that a static image just couldn't handle.
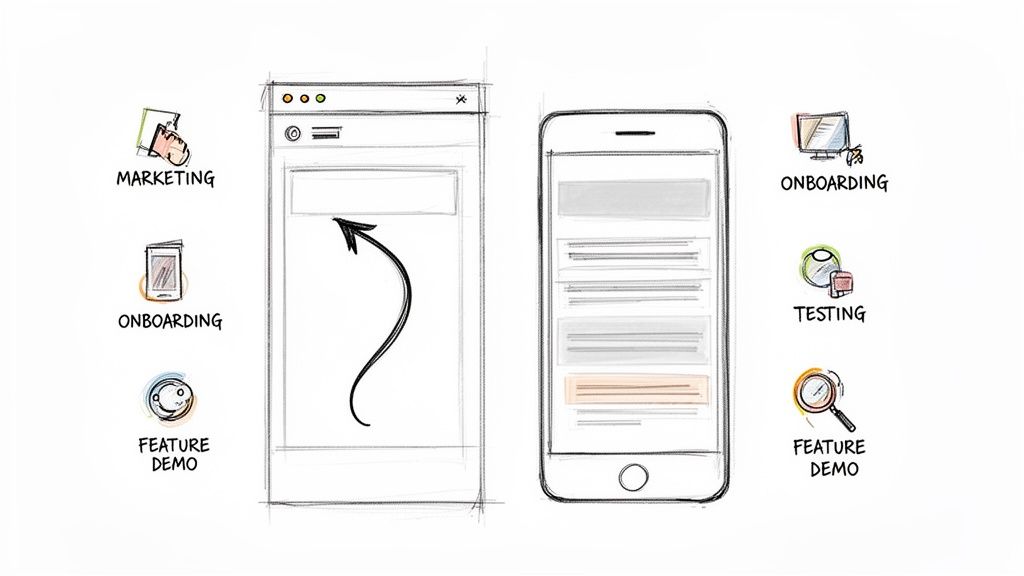
- Marketing and Sales Demos: Quickly show off your website’s killer design, unique features, and mobile responsiveness. These are perfect for landing pages or social media ads.
- User Onboarding and Tutorials: Walk new users through your platform step-by-step. A clear video demo can slash support tickets and get people to their "aha!" moment faster.
- Developer and QA Testing: Programmatically create visual regression tests. A scrolling video makes it painfully obvious when a UI bug or layout inconsistency pops up between builds.
- Content Promotion: Repurpose a long-form article or a data-heavy infographic into a quick, shareable video for LinkedIn or X (formerly Twitter).
To give you a clearer picture, here’s a quick rundown of the different methods you can use, each with its own pros and cons.
Comparing Methods for Creating Scrolling Videos
This table breaks down the main approaches, from simple screen recordings to more advanced, programmatic solutions. It should help you decide which path makes the most sense for your project.
| Method | Best For | Difficulty | Key Tools |
|---|---|---|---|
| Manual Screen Recording | Quick one-off demos, tutorials, bug reports. | Easy | OBS Studio, ScreenFlow, Chrome DevTools |
| Programmatic Capture | Automated visual testing, marketing assets, scalable video creation. | Intermediate | Puppeteer, Playwright, FFmpeg |
| Frame-Based API | High-quality, programmatic videos without managing infrastructure. | Easy-Intermediate | ScreenshotEngine |
| CSS/JS Animation | Highly stylized, perfect, and loopable animations for hero sections. | Advanced | GSAP, Framer Motion, CSS Animations |
Choosing the right tool really depends on what you're trying to achieve—a quick bug report has very different needs than a pixel-perfect marketing video.
The Engagement and SEO Advantage
The impact of video goes way beyond just being a better explainer; it directly affects your traffic and how long people stick around. We're all wired to consume content by scrolling, and video is the native language of that behavior.
A website scrolling video doesn't just show your site; it tells a story of interaction and flow. It’s the difference between showing someone a blueprint and giving them a virtual tour of the finished house.
This kind of dynamic content is exactly what search engines and social platforms are prioritizing now. In fact, video content has been shown to boost organic traffic from search engines by a massive 157%. Why? Because algorithms favor pages with rich, engaging media that keeps users on the page longer. You can dig into more data on how video impacts search rankings if you're curious.
For any developer or SEO specialist, a well-made scrolling video isn't just a nice-to-have anymore. It's a fundamental tool for improving visibility and communicating effectively.
The Hands-On Approach: Mastering Screen Recording
Sometimes, the simplest way is the best way. If you need to create a high-quality website scrolling video without touching a line of code, good old-fashioned screen recording is your best bet. But this isn't just about hitting a record button and hoping for the best. With a little prep work and the right tools, you can create a polished video that looks deliberate and professional.
The first step has nothing to do with recording software—it’s all about creating a clean, distraction-free environment. Nothing gives away an amateur recording faster than a cluttered bookmark bar, a dozen extension icons, or random desktop notifications popping into the frame.
To get around this, I always use a dedicated browser profile just for recording. It’s like having a fresh browser install, completely clean of personal bookmarks, history, and extensions. This one small trick instantly makes your final video look ten times more professional.
Setting the Stage for a Perfect Take
With a clean browser profile ready, you need to nail the viewport dimensions. This is absolutely critical for making sure your video fits perfectly wherever you plan to use it, whether that’s a widescreen YouTube embed or a vertical clip for Instagram Stories.
Your browser's developer tools are indispensable here. In Chrome, Firefox, or Edge, you can pop open DevTools, activate the device toolbar, and dial in the exact resolution you need.
- For social media (Instagram, TikTok): A 9:16 aspect ratio is what you want. Think 1080x1920 pixels.
- For standard HD video: Go with a classic 16:9 ratio, like 1920x1080.
- For specific website embeds: You can match the exact pixel dimensions of the container where the video will be displayed.
Getting this right from the start means you won't have to deal with awkward cropping or black bars later on. It’s a pro move that takes just a few seconds.
Nailing That Buttery-Smooth Scroll
The biggest giveaway of a manual recording is a jerky, hesitant scroll. It makes the whole video feel clumsy. Luckily, there are a few techniques to get that smooth, steady motion.
While you can use your mouse's scroll wheel, it's often tough to maintain a consistent speed. I find that using the keyboard's arrow keys (↓ and ↑) or the Page Down key gives you a much more uniform scroll.
My go-to trick? The middle mouse button. Click the scroll wheel to turn your cursor into a special scroll icon. Now, just gently move the mouse down, and the page will start scrolling at a perfectly smooth, constant speed. You can fine-tune the velocity with tiny mouse movements. It's the secret to that flawless, automated look.
If you need absolute precision and repeatability, a browser extension like AutoScroll for Chrome can be a lifesaver. It lets you set a specific scroll speed in pixels-per-second, guaranteeing a perfect take every single time.
Picking the Right Recording Software
Okay, your browser is prepped and you’ve mastered the scroll. Now it’s time to record. While both macOS and Windows have basic built-in screen recorders, a dedicated tool like OBS Studio gives you far more power and control.
OBS Studio is free, open-source, and an absolute workhorse for screen capture. Here’s why I recommend it:
- Isolate your recording: You can tell it to capture only the browser window, so Slack notifications or other desktop pop-ups won't ruin your shot.
- Set a high frame rate: Recording at 60 FPS is essential for capturing smooth animations and creating a fluid final video.
- Control the output: You can configure the bitrate and resolution to produce a high-quality source file, which gives you more flexibility during editing and compression.
By combining a pristine browser setup, a precise viewport, a smooth scrolling method, and a powerful recorder, you can turn a simple screen capture into a genuinely polished and professional-looking video.
The Programmatic Method: Automating Video With Code
For developers, creating a website scrolling video programmatically is the ultimate goal. Sure, manual recording is fine for a one-off task, but when you need consistency and scale, automation is king. This approach lets you generate dozens of pixel-perfect videos for marketing, regression testing, or documentation without lifting a finger.
The concept is straightforward: instead of you physically scrolling down a page, a script takes control of a browser. It navigates to a URL, scrolls down methodically, and snaps a high-resolution screenshot at each step. These individual images are then stitched together into a seamless video. This completely removes human error—no more wobbly scrolling or stray cursor movements—and guarantees a professional, repeatable result every time.
Getting Started With Puppeteer and Playwright
The real magic here comes from browser automation libraries like Puppeteer (for Chrome) and Playwright (which handles Chromium, Firefox, and WebKit). These Node.js tools are incredibly powerful, giving you a high-level API to command a browser, often in a "headless" mode without a GUI. You can script just about anything a user can do, including the scroll-and-capture sequence we need.
Let's say you want to make a demo video of a lengthy product features page. With Puppeteer, your script would essentially follow these steps:
- First, it would programmatically launch a fresh browser instance.
- Next, it would open a new page and point it to your target URL.
- You’d then define the exact viewport size, like 1920x1080 for a crisp HD video.
- Finally, the script enters a loop: it scrolls down a small, fixed distance (say, 100 pixels), pauses just long enough for content to render, and takes a screenshot. It repeats this until it hits the bottom of the page.
This process spits out a neat, numbered sequence of images: frame-001.png, frame-002.png, frame-003.png, and so on. The smaller the scroll increment, the more frames you get, which translates to a much smoother video in the end.
The big win here is precision. You dictate the scroll speed, the delay between captures, and the final dimensions down to the last pixel. That’s a level of control you just can't get by hand, and it's absolutely critical for things like visual regression testing where consistency is non-negotiable.
This programmatic approach is just a smarter way to execute the fundamental recording process, as shown below.
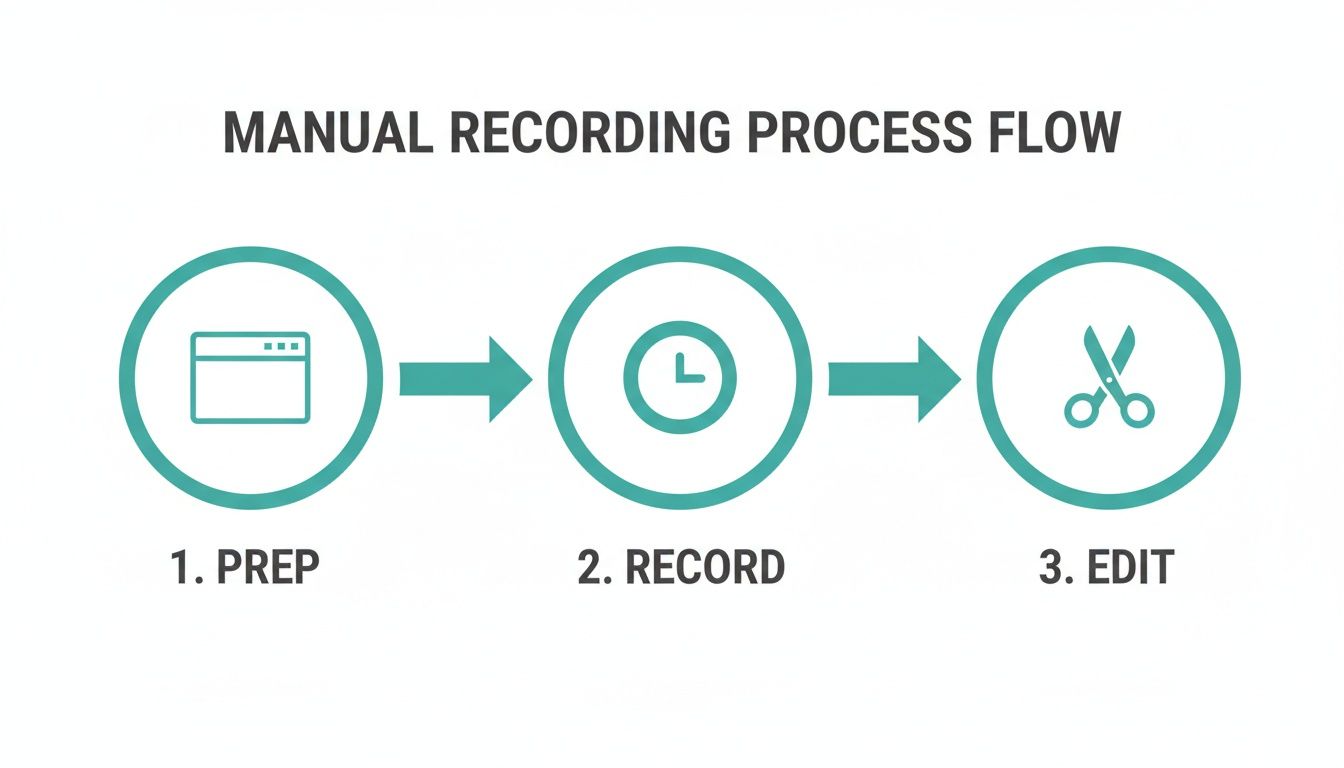
Code simply automates these prep, record, and edit stages, executing them flawlessly in seconds and cutting out all the tedious, error-prone manual work.
Stitching Frames Together With FFmpeg
Okay, so you have a folder full of perfectly captured PNGs. Now what? You need to assemble them into a video file, and for that, there's no better tool than FFmpeg. It’s the command-line Swiss Army knife for all things video and audio—it's free, open-source, and ridiculously powerful.
With a single FFmpeg command, you can take all those numbered images and encode them into a standard MP4. A basic command usually includes a few key parameters:
- Framerate (
-r): Sets how many images are shown per second. A framerate of 60 gives you an incredibly smooth result, while 30 is a solid standard for most web video. - Input Files (
-i): Tells FFmpeg where to find your images, using a pattern likeframe-%03d.pngto grab the numbered sequence. - Video Codec (
-c:v): Thelibx264codec is your best bet for creating H.264 MP4s, ensuring maximum compatibility across all browsers and devices. - Pixel Format (
-pix_fmt): Usingyuv420pis a must for ensuring your colors look right on everything from a phone to a desktop monitor.
Putting it all together, a simple FFmpeg command might look like this:
ffmpeg -r 60 -i frame-%03d.png -c:v libx264 -pix_fmt yuv420p output.mp4
Run that, and your static images are instantly transformed into a polished website scrolling video. You’ve now built a repeatable process you can run anytime, integrate into a CI/CD pipeline, or use to generate marketing assets at scale. For a more detailed breakdown, our guide on how to make a video of a website scrolling has more advanced examples.
Advanced Automation Considerations
Of course, the real world is messy. Modern websites are full of little complexities like lazy-loaded images, scroll-triggered animations, and annoying cookie banners that can trip up a simple script.
To build a truly robust solution, you'll need to account for these things.
- Handling Lazy Loading: You might need to add a slight delay after each scroll or, even better, tell your script to wait until the network is idle using a function like Playwright's
page.waitForLoadState('networkidle'). This ensures all assets are fully loaded before you take the shot. - Dealing with Popups: You can write logic to find and dismiss popups or cookie consents. Just target the element with a CSS selector and tell your script to simulate a click on the "close" or "accept" button.
- Capturing Specific Elements: Why capture the whole page when you only need one part? You can instruct Puppeteer or Playwright to screenshot just a single element, like an interactive chart or a specific product card.
Getting a handle on these techniques is what separates a basic script from a powerful automation workflow. If you want to go even further, learning how to automate AI video creation can help you build truly dynamic and sophisticated media pipelines. By scripting these nuanced interactions, you can produce a clean, focused video that shows off exactly what you intend, every single time.
Streamlining Frame Capture With a Screenshot API
While headless browsers like Puppeteer and Playwright are incredibly powerful, let's be honest—they can be a huge pain. You're suddenly juggling browser instances, wrestling with random popups, and trying to keep your environment from breaking. All that operational overhead can quickly pull you away from what you're actually trying to do: create a great website scrolling video.
This is where a dedicated screenshot API really shines. Instead of building and maintaining your own browser automation setup from scratch, you can hand off the entire frame-capturing process to a service built for the job. It’s a way to skip past all the backend complexity and get straight to the creative work.
The API-First Advantage
Going with an API-first approach means you’re no longer the one responsible for launching browsers, installing dependencies, or figuring out why a page renders differently this time. For anyone looking to automate this process, a solid screenshot API can be a game-changer. You just send a series of HTTP requests, and in return, you get perfectly rendered image frames. It’s that simple.
This method is a lifesaver for teams that need to generate videos reliably and at scale but don't want to burn engineering hours on DevOps. The API handles most of the common frustrations for you.
- No More Popups: Good screenshot APIs automatically block cookie banners, newsletter popups, and ads, so every frame comes out clean.
- Easy Authentication: Need to capture a page behind a login? Instead of scripting a tricky login flow, you can often just pass auth cookies or tokens right in the API request.
- Rock-Solid Consistency: Because the service manages the rendering environment, your results are consistent every time. No more weirdness from different operating systems, browser versions, or missing fonts.
The basic idea is to swap your local browser script for a simple loop that hits an API endpoint. You just tweak a scroll_to or y_offset parameter with each call, telling the API exactly what part of the page to snap next.
A Practical API Workflow
Let's say you're tasked with creating a video of a long, scrolling landing page. Your script would just make a sequence of API calls, each one grabbing the next slice of the page. The service sends back a high-res image for each request, which you save locally as frame_001.png, frame_002.png, and so on.
This image shows a typical API playground, which is a fantastic tool for dialing in your settings. You can experiment with the URL, viewport size, and image format before you even write a line of code. This kind of interactive testing saves a ton of development time.
The real beauty of using an API is the shift in focus from how to capture a frame to what you want to capture. You can spend more time perfecting the scroll increment and final video quality instead of debugging headless browser instances.
Once you have your collection of numbered frames, the final step is exactly the same as the Puppeteer method: stitch them together with FFmpeg. And because the API delivers pristine, consistently sized images, the assembly process is incredibly smooth. You can use the same FFmpeg commands to set your frame rate and video codec to produce a fluid and professional website scrolling video.
This approach gives you the programmatic control of a script but with the convenience of a managed service. For a deeper look at the specific API parameters and more advanced techniques, our complete guide to creating a website screenshot video has all the details. It's the perfect solution when you need speed, reliability, and scale without the infrastructure headache.
Getting Your Video Ready for the Web and Social Media
Okay, so you've created your scrolling video. That’s a huge first step, but now comes the part that makes or breaks the user experience: optimization. A raw video file is an absolute beast—it’s huge, slow to load, and will send your site's performance metrics plummeting.
The real art is in striking the perfect balance between file size and visual fidelity. You want to shrink that video down as much as you can without turning your crisp UI into a pixelated mess. When you get this right, your video looks professional and loads fast, respecting your visitor’s time and bandwidth.
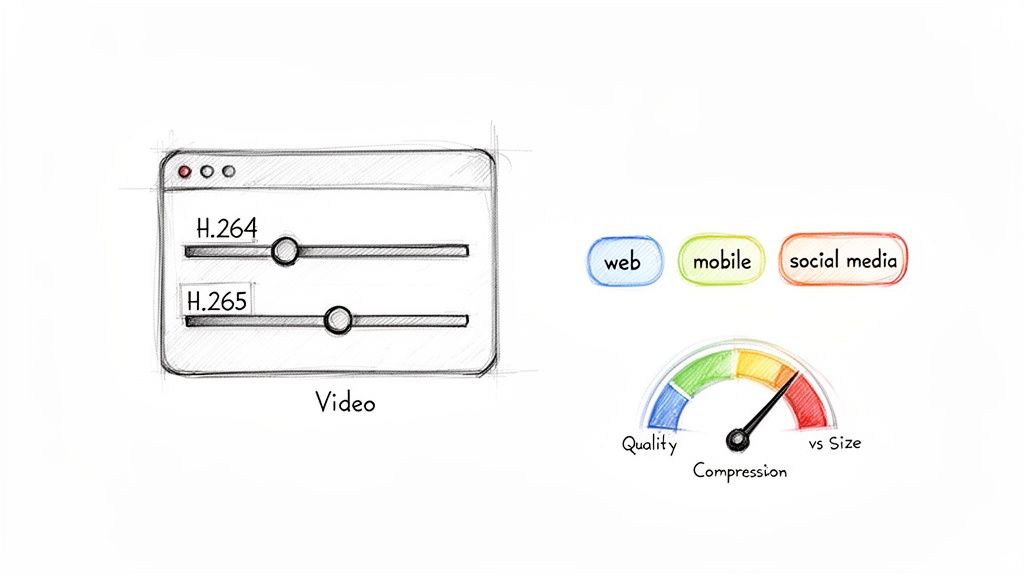
Choosing the Right Video Codec
First things first, you need to pick a video codec. Think of a codec as the language used to compress and decompress your video. While there are a bunch of them out there, two really matter for the web.
- H.264 (AVC): This is the old reliable. The undisputed champion of compatibility. If you encode your video as an MP4 with H.264, it’s going to play on pretty much every browser, device, and social platform out there. It's the safest bet, hands down.
- H.265 (HEVC): This is the newer, more efficient kid on the block. It offers much better compression, meaning you get the same quality at a smaller file size. The catch? Browser support isn't universal yet, so you absolutely need an H.264 version as a fallback.
My advice? Stick with H.264 for most projects. It just works, everywhere, for everyone.
Mastering Compression With FFmpeg
When you need precise control over your video compression, nothing beats the command line, and FFmpeg is the tool for the job. It gives you direct access to all the nerdy settings that let you dial in that perfect quality-to-size ratio.
The most critical setting you'll use is the Constant Rate Factor (-crf). It's a single number that controls the quality. Lower numbers mean higher quality and bigger files; higher numbers mean more compression and smaller files.
I've found that for high-quality web video, a
-crfvalue between 23 and 28 is the sweet spot. You get excellent compression without any ugly, noticeable artifacts.
Here’s a command I use all the time to optimize a video named output.mp4:
ffmpeg -i output.mp4 -vcodec libx264 -crf 25 -preset medium -pix_fmt yuv420p final_video.mp4
This takes your raw output, re-encodes it with a CRF of 25, and spits out a web-ready final_video.mp4. Simple and effective.
Putting Your Video on the Page
With a perfectly compressed video in hand, it's time to get it onto your website using the HTML <video> tag. A few key attributes are essential, especially for those sleek, auto-playing background videos.
Your implementation should always include these:
autoplay: To make it start playing automatically.muted: A modern browser requirement forautoplayto work. Don't forget this one!loop: So it repeats seamlessly for a continuous effect.playsinline: This prevents the video from hijacking the full screen on iOS, keeping it within your site's layout.
Let's face it, video is how people consume the internet now. It’s projected to make up 82% of all online traffic by 2025, with people watching an average of 17 hours a week. A slick scrolling video can tap directly into this, and marketers agree: 82% report that on-page videos increase the time visitors spend on a site, which is a huge signal for SEO. You can find more compelling video marketing statistics that paint a clear picture.
These embedded videos also influence how your site looks when shared. To make sure your link previews are just as polished, take a look at our guide on creating a dynamic Open Graph template.
Common Questions About Scrolling Videos
As you dive into creating these videos, you're bound to hit a few snags. It happens to everyone. Whether you're wrestling with a buggy script or just trying to get your manual recording to look right, a few common questions always seem to pop up. Let's get ahead of them.
What's the Best Video Format to Use?
This is usually the first question people ask. With all the codecs and containers out there, it's easy to feel a little lost.
For maximum reach, you can't go wrong with MP4 using the H.264 codec. Think of it as the universal standard. It works everywhere—from the oldest browsers to the latest social media apps—and strikes a great balance between quality and file size.
If you know your audience is on modern browsers and you want to squeeze out even better compression, WebM with the VP9 codec is a fantastic choice. The best practice? Use both. The HTML <video> tag lets you provide multiple <source> elements, so you can offer WebM as the primary and MP4 as a fallback. This way, everyone gets the best possible experience.
How Do I Get That Buttery-Smooth Scroll?
A choppy, stuttering video just looks amateur. This is an especially common headache with programmatic methods, but it’s solvable. Getting that smooth, professional-looking scroll comes down to two things: how many frames you capture and your final video's frame rate (FPS).
The trick is to capture a new screenshot for every small scroll increment. I'm talking every 50 to 100 pixels. This gives you a high density of frames to work with. Then, when you stitch them together using a tool like FFmpeg, aim for an output of 30 or 60 FPS. A higher frame rate will feel more fluid, but it also means you need more source images to keep the scroll speed from looking ridiculously fast. You'll likely need to play around with these numbers to find what feels right for your specific page.
A great website scrolling video feels effortless, almost like the viewer is the one doing the scrolling. Your goal is to make the technology disappear so the content can take center stage.
How Do I Handle Logins and Dynamic Content?
What happens when the awesome feature you want to show off is locked behind a login screen? This is a huge one for SaaS products and member-only sites.
You can absolutely record a video of a page that requires a login, but you'll almost certainly need a programmatic tool for it. This is where libraries like Puppeteer and Playwright really shine. You can write a script that automates the entire login process—entering credentials, clicking the submit button, and even navigating multi-factor authentication.
Alternatively, an API-based service like ScreenshotEngine can simplify this by letting you pass session cookies or custom authentication headers directly with your API request, bypassing the need to script the login flow yourself.
Lazy-loaded content is another classic problem. You run your script, and the resulting video is full of blank spots where images and other elements never had a chance to load. It's frustrating.
The fix is to build a pause into your capture script. After each scroll, you have to tell your script to wait for the assets to load before it takes the next screenshot. A simple delay might work, but a much more reliable method is to wait for network activity to go idle (Playwright’s waitUntil: 'networkidle' is perfect for this) or to wait for a specific lazy-loaded element to actually appear in the viewport. This guarantees every frame is picture-perfect.
Ready to automate your frame capture without the headache of managing headless browsers? ScreenshotEngine provides a developer-first API that delivers clean, reliable screenshots for your video projects, automatically blocking ads and cookie popups. Start for free and see how simple it can be.