You've probably seen them before—those super-smooth videos that glide down a webpage, showing off every feature and detail perfectly. That's a scrolling website video. It's not just a simple screen recording; it's a carefully crafted asset made by taking a series of screenshots while programmatically scrolling down a page. These shots are then stitched together to create a fluid, professional-looking video.
This approach is leagues ahead of a shaky, hand-scrolled screen capture, giving you a polished final product for marketing materials, app store previews, or technical demos.
The Real Impact of Scrolling Website Videos
Before we jump into the code and commands, let's talk about why this is worth your time. A slick, automated scrolling video is more than just eye candy; it's a serious tool for communication and engagement.
Think about the different ways you can use this kind of content:
- Demonstrate Complex Features: Need to show users how a specific workflow operates? A scrolling video can walk them through it step-by-step without requiring a live demo.
- Create Compelling Marketing Assets: A clean scroll-through of your homepage or product page is perfect for an ad, a social media post, or an email campaign.
- Showcase Polished UI/UX: For designers and developers, this is an ideal way to present a website's responsiveness and design in a portfolio.
Connecting to Business Outcomes
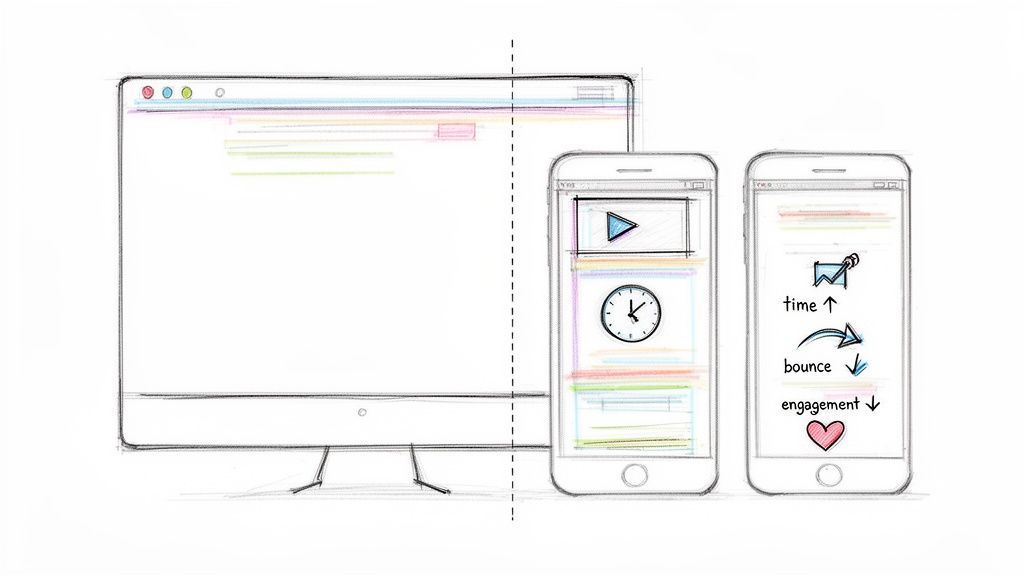
The real magic happens when you look at the numbers. High-quality video doesn't just look good—it fundamentally changes how people interact with your site. Research shows that users spend, on average, 88% more time on websites that have video content.
A typical page visit might last around 54 seconds. But throw a video into the mix, and that can jump to nearly 6 minutes. If you're curious, you can dig into more website statistics to see just how powerful video can be.
This huge leap in engagement isn't just a vanity metric. Longer visits signal value to search engines, which can help your rankings. It also gives people more time to actually understand what you're offering.
So, the technical effort we're about to dive into isn't just for show. A polished scrolling video can directly lead to lower bounce rates, more time on your page, and a clearer message for your audience. It turns a static webpage into a guided tour, making the automation process we’ll cover next a skill well worth mastering.
Mastering the Art of Website Capture
To create a great scrolling website video, you have to start with a flawless capture. Many of us instinctively reach for a screen recording tool and just manually scroll down the page. It seems simple enough, but this method is almost always a recipe for a low-quality, amateurish final product.
Think about it: manual recording inevitably leads to jittery, uneven scroll speeds. Your mouse cursor might accidentally drift into the shot, and getting the resolution perfectly consistent if you need multiple takes is a nightmare. Honestly, this old-school approach just doesn't have the precision we need for professional work.
A Modern, Programmatic Approach
Instead of wrestling with manual tools, a modern programmatic approach gives you total control and perfect consistency. By using a capture API like ScreenshotEngine, you can automate the entire process, taking pristine, frame-by-frame snapshots of a website. This is the real secret to that buttery-smooth scrolling effect.
This technique completely sidesteps the problems of manual recording. Every single captured frame is perfectly aligned and rendered at the exact same resolution, which gives you an incredibly clean and stable foundation for your video. It's a repeatable, automated process that produces high-quality results every single time.
When you script the capture process, you stop being a screen recorder and become an architect of visual content. You get fine-grained control over every aspect of the capture, ensuring the final output meets standards that are impossible to hit by hand.
Eliminating Distractions Automatically
One of the biggest pains of capturing a live website is all the visual clutter. Cookie banners, GDPR popups, and random ads can completely ruin a perfect shot. Closing them manually for every single capture is tedious and prone to error.
A robust capture API can handle all of this for you. ScreenshotEngine, for example, has built-in features that automatically block these common distractions right out of the box.
- Ad Blockers: Keep intrusive ads from ever appearing in your shots.
- Cookie Banner Removal: Automatically dismiss cookie consent popups for an unobstructed view.
- Popup Blocking: Suppress other pesky modal dialogs that might get in the way.
This ensures your source material is clean from the get-go, saving you a massive amount of time in post-production. If you want to dig deeper into the basics, our guide on how to take a web page screenshot covers more ground on getting clean captures.
Ultimately, the programmatic approach gives you a reliable system for generating perfect source frames. It automates the boring parts, gets rid of common visual noise, and delivers the high-fidelity images you need for the next step: scripting a smooth scroll and stitching it all together.
Scripting a Smooth Scroll and Capture Sequence
Having a folder full of perfect source frames is a great start, but now comes the fun part: automating the scroll itself. This is where we stitch those static images together to create the fluid motion of a scrolling website video. We're going to leave manual screen recording behind and script a capture sequence that feels intentional and, well, human.
For this, you'll want to lean on browser automation tools like Puppeteer or Playwright. These are powerful Node.js libraries that essentially give you a remote control for a headless browser. You can tell it to scroll a precise number of pixels, wait, and then fire off a screenshot. It’s this granular control that makes a polished final product possible.
The biggest rookie mistake I see is scripting a simple, linear scroll. It just looks wrong—jerky, mechanical, and totally unnatural. Nobody scrolls a webpage at a perfectly constant speed. Real user interaction has a bit of finesse; it accelerates and decelerates. We need to build that into our script.
Implementing Natural Easing Functions
To get that human-like motion, we’ll use easing functions. Think of it this way: instead of instantly jumping from one scroll position to the next, an easing function creates a smooth 'ease-in-out' effect. The scroll starts off a little slow, gets faster through the middle of the movement, and then gently coasts to a stop.
This small tweak makes a world of difference in the final video's quality. It’s what separates a quick-and-dirty screen grab from a professional marketing asset. If you’re deciding which tool to use for the job, you can see how they stack up in our Playwright vs Puppeteer in our detailed guide.
A smooth easing function is the secret sauce for a professional scrolling website video. It’s a tiny piece of code that has a massive impact on the final look and feel because it directly mimics how a real person would explore a page.
Structuring the Capture Loop
At the heart of your automation script is a simple loop. With each pass, it’s going to do two things:
- Scroll Incrementally: Programmatically move the page down by a set amount. I've found that scrolling one viewport height at a time works great, as it ensures you get full coverage without any gaps.
- Trigger a Capture: After the scroll animation completes, you’ll call your screenshot API to snap a picture of the current view. This image becomes the next frame in your sequence.
You just repeat this process until you hit the bottom of the page or whatever scroll limit you’ve defined.
The diagram below shows how this programmatic API approach compares to just manually recording your screen.
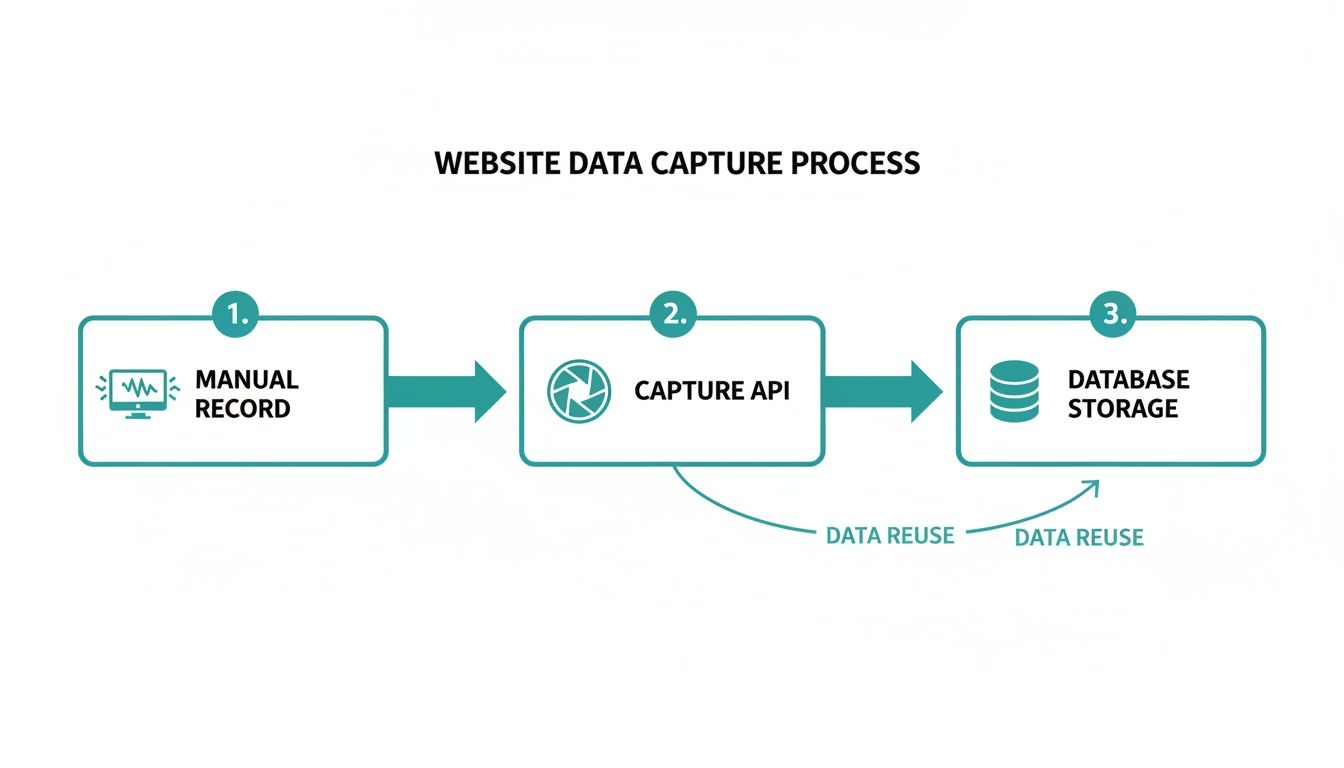
As you can see, the API method is what gives us those clean, consistent frames we need for a high-quality video. Manual recording almost always introduces jitter and other little imperfections you just can't avoid.
By scripting the whole sequence, you build a process that is both repeatable and reliable. You can point the same script at a dozen different pages and get perfectly consistent results every single time. That’s the real advantage of automating the capture workflow—it takes human error out of the equation and guarantees a professional outcome.
Now that your folder is filling up with pristine, sequentially captured frames, you’re ready to assemble them into a seamless video.
Turning Your Image Sequence into a Smooth Video with FFmpeg
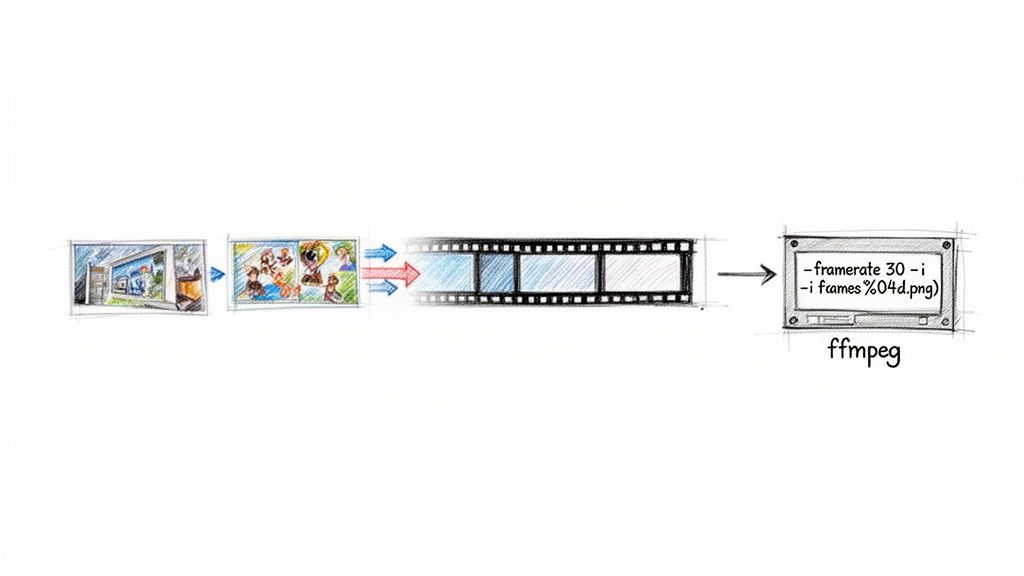
Alright, you've got a folder packed with sequentially named images—frame-001.png, frame-002.png, and so on. Now for the fun part: bringing them to life. This is where FFmpeg, the command-line Swiss Army knife for all things video, becomes your best friend.
It might look a little intimidating at first, but you only need a couple of simple commands to stitch those static frames into a professional-looking scrolling website video.
The main idea is to tell FFmpeg to treat your image sequence as individual video frames. If you're new to this, checking out a guide on how to convert an image sequence to video can provide some extra background. But for now, let's jump right in with a command that gets the basic job done.
This simple one-liner will find all the PNG files that start with "frame-" and combine them into a single MP4 video file called output.mp4. It works, but we can do much better.
Fine-Tuning Your Video Output
A basic conversion is a great starting point, but for a video that’s going on the web, you need more control. You'll want to dial in the frame rate, choose the right video codec, and set the pixel format to make sure it plays smoothly for everyone. This is where you can really see FFmpeg's power.
Let's look at a more advanced command and break down what each part does:
- Frame Rate (
-r 30): This sets the video to 30 frames per second. It's a sweet spot for web video, giving you fluid motion without bloating the file size. - Codec (
-c:v libx264): Here, we're using H.264, which is hands-down the most widely supported video codec online. It provides an excellent balance between quality and compression. - Pixel Format (
-pix_fmt yuv420p): This little flag is your secret weapon for compatibility. It ensures your video will play correctly on virtually any browser, even older ones. It’s the safest bet for web content.
By specifying these parameters, you're not just converting images anymore. You're engineering a video file that's perfectly optimized for its destination. This level of control is what separates an average video from a great user experience.
Video is everywhere for a reason. Scrolling through video-rich websites is completely normal now, especially when you consider that 75% of viewers watch short-form videos on their phones. It’s a habit reinforced by social media. Plus, pages that include video tend to get 157% more organic traffic from search engines, as Google loves to feature video content.
A Practical FFmpeg Command to Get You Started
So, let's put it all together. Here’s a robust command you can copy and paste to create your scrolling video. It includes all the optimized settings we just talked about to give you a high-quality, web-ready MP4 file.
With that single command, your static frames become a polished, optimized video.
When you integrate this into an automated workflow, you can generate a scrolling website video for any page, anytime. That's a powerful tool for any developer's toolkit. For more automation ideas, you can always explore different ways to create a website video from a screenshot sequence.
You've put in the work to create a beautiful scrolling video. Now for the most important part: making sure it doesn't kill your page speed. A massive video file is the fastest way to get a user to bounce before they ever see your masterpiece. The final step is all about smart optimization.
This isn't just about making the file smaller; it's about striking that perfect balance between sharp visual quality and a lean file size. A slow-loading video is a conversion killer.
We need to get this right. For a deep dive, you can learn how to optimize video for web, but I'll walk you through the essentials right here.
Compressing Without Compromise
Our goal is to shrink that file size without making the video look like a pixelated mess. My go-to tool for this is FFmpeg because it gives you precise control over the compression.
The magic setting here is the Constant Rate Factor (CRF). Think of it as a quality dial for the H.264 encoder. Lower numbers mean higher quality and bigger files; higher numbers mean more compression and smaller files.
Here’s a practical breakdown:
- CRF 18: This is pretty much visually lossless. It's fantastic for archiving but way too heavy for a website.
- CRF 23: Your starting point. This is the default value for a reason—it offers a fantastic trade-off between quality and size.
- CRF 28: This is more aggressive. You might start to notice some minor artifacts on close inspection, but the file size savings can be huge.
My advice? Start with CRF 23 and see how it looks. If the quality is perfect, try 24 or 25. If you see too much degradation, dial it back to 22. The ideal number really depends on your source video—a simple UI scroll can handle more compression than a video full of complex textures and gradients.
Getting It on the Page Correctly
Once your video is perfectly compressed, you need to embed it properly. For that slick, seamless background effect, the HTML <video> tag is your best friend, but the attributes are what make it work.
With users spending an average of 17 hours a week watching online videos, the stakes are high. You only have 0.5 seconds to make a good first impression, so a clean, fast-loading video is non-negotiable.
To ensure your video plays automatically and smoothly for everyone, you need to use autoplay, loop, and muted together. Modern browsers will flat-out block videos from auto-playing if they have sound, so muted is absolutely essential. This simple combination is the key to a reliable background video that just works.
Tackling Common Scrolling Video Challenges
Once you dive into automating scrolling website videos, you'll quickly discover that a simple, linear scroll isn't always enough. Real-world websites are messy, with dynamic content, infinite scrolling, and other quirks. Let's walk through some of the most common hurdles you'll face and how to clear them.
How Do I Handle Lazy-Loaded Content or Infinite Scroll?
This is probably the number one question I get. For pages with lazy-loaded images, the trick is to give the browser a moment to catch up. After your script performs a scroll, add a short pause—a second or two is usually plenty—before you snap the next screenshot. This tiny delay gives those off-screen images the time they need to load into the viewport.
Infinite scroll is a bit more complex because your script needs to know when it has hit the bottom. The most reliable way to do this is to check the page's height after each scroll. If the document height stops increasing, you’ve probably reached the end. It's also smart to set a hard limit, like a maximum number of scrolls, just in case. You don't want your script running forever on a never-ending feed.
A patient script is a successful script. Build in pauses and checks that imitate how a real person waits for content to load. This small change makes your automation a whole lot more robust.
What’s the Best Frame Rate for a Smooth Video?
For almost any scrolling video you'll create for the web, 30 frames per second (fps) is the sweet spot. It delivers that buttery-smooth motion everyone wants without bloating your file size.
You might be tempted to aim for 60 fps, and while it can look even smoother, the trade-offs usually aren't worth it. Doubling the frame rate means you have to capture and process twice as many images. This not only makes your final video file much larger but also significantly increases the time it takes to render. Unless you're trying to capture incredibly fast UI animations, stick with 30 fps. It’s the perfect balance between quality and performance.
Should I Make a GIF Instead of an MP4?
You can definitely tweak the FFmpeg commands to spit out an animated GIF, but you need to know what you're getting into. GIFs come with some serious limitations.
- Limited Colors: GIFs can only display 256 colors. On a modern website with subtle gradients and vibrant photos, this often results in ugly color banding and dithering.
- Massive File Size: For the same duration and dimensions, a GIF will almost always be drastically larger than a properly compressed MP4 video.
Honestly, a muted, auto-playing MP4 is almost always the superior choice for website showcases or background videos. You get far better visual quality at a fraction of the file size, which is a huge win for keeping your page load times fast.
Ready to create pixel-perfect website captures without writing complex scripts? ScreenshotEngine offers a powerful, developer-first API that handles all the tricky parts for you—from blocking ads to managing dynamic content. Give it a try for free at https://www.screenshotengine.com.