Creating a website screenshot video isn't about hitting "record" on your screen. It’s a programmatic process where you capture a sequence of website images—or frames—over a set period and then stitch them together into a video file. This automated approach is a game-changer, offering a far more scalable and consistent way to create visual documentation compared to manual screen recording.
It's a powerful technique for developers, marketers, and QA teams who need to see how a website behaves over time. The key is using a specialized tool, like the ScreenshotEngine website video screenshot API, to automate the entire workflow from capture to creation.
Why Automate Website Screenshot Videos?
Think of it this way: a single screenshot is just a moment. An automated video, on the other hand, tells a story. It provides a dynamic visual record of a site's state, its behavior, or even its evolution over days or weeks. This programmatic method transforms what used to be a tedious, manual chore into a highly efficient and scalable workflow.
This isn't just a niche trick; it's part of a much bigger trend. The market for full-screen website screenshot software is on track to hit USD 0.30 billion by 2032. This growth is fueled by a huge demand for better visual documentation tools as more of our work moves online.
The Power of Programmatic Visuals
Imagine you're running regression tests and need to spot subtle UI bugs. A video compiled from a rapid series of automated screenshots will instantly highlight flickers, misaligned elements, or broken animations that a single static image would almost certainly miss.
Or maybe you need to document a complex user journey for a bug report. Instead of writing out a long, confusing list of steps, a video created from sequential screenshots gives developers clear, undeniable proof of the problem. That’s where automation really shines—it adds clarity and cuts down on hours of back-and-forth emails. If you're wondering how to do a video screenshot, this guide will walk you through a powerful, programmatic approach for websites.
The real advantage here is turning abstract data into a concrete visual story. Whether you're monitoring a competitor's pricing page or creating a slick social media preview of a new feature, automation gives you a level of consistency and scale that manual efforts just can't touch.
Key Benefits of an Automated Workflow
This method is about more than just saving a few minutes. It unlocks entirely new possibilities. Using an API to generate these videos gives you several clear advantages over old-school screen recording software.
- Scalability: You can generate hundreds of videos at once without any human input. This is perfect for large-scale monitoring projects or extensive testing environments.
- Consistency: Every single video is created with the exact same parameters—resolution, timing, and browser state. This ensures your results are always reliable and comparable.
- Integration: The entire video generation process can be embedded directly into your existing CI/CD pipelines, marketing automation platforms, or internal dashboards. You can find more ideas on our guide to https://www.screenshotengine.com/blog/automated-website-screenshot.
- Precision: You can zero in on specific page elements, like a live data graph or a rotating ad banner, to create focused, highly relevant content.
Practical Use Cases for Automated Website Videos
The applications for this technology are surprisingly broad, offering clear advantages over static images or manual recordings in many scenarios. Here's a look at where programmatic videos can make a real impact.
| Use Case | Primary Benefit | Target Audience |
|---|---|---|
| Regression Testing | Quickly spot visual bugs like flickering or layout shifts. | QA Engineers, Developers |
| Competitor Monitoring | Track changes to pricing, promotions, or landing pages over time. | Marketers, Product Managers |
| Marketing Content | Create dynamic social media previews or animated feature GIFs. | Marketing Teams, Content Creators |
| Bug Reporting | Provide clear, reproducible evidence of complex user-flow issues. | Support Teams, End-Users |
| Onboarding Tutorials | Generate consistent, up-to-date visual guides for new users. | Product & CS Teams |
| Performance Audits | Visualize page load times and rendering performance from a user's perspective. | DevOps, Frontend Developers |
Ultimately, turning website snapshots into videos allows teams to communicate more effectively, test more thoroughly, and monitor their digital assets with greater precision. It’s a simple concept with a surprisingly powerful impact.
Building Your Automated Frame Capture Script
Alright, this is where we roll up our sleeves and move from theory to practice. We're going to build a script that automatically snaps a sequence of website frames using the ScreenshotEngine API. The goal is simple: generate a series of perfectly numbered images that we'll stitch together into a video.
Before diving into a complex script, I always recommend starting with a single API call. Think of it as a sanity check. A simple script in Node.js or Python that captures just one, full-page screenshot confirms that your API keys are working and your basic setup is solid. Get that one successful capture, and then you're ready to scale.
From a Single Shot to a Frame Sequence
Once you've nailed the single capture, the real fun begins: automation. You’ll want to wrap your API call inside a loop. This loop will run over and over, capturing a new frame at whatever interval you decide, until you have all the images you need.
This is the core of the whole process. Instead of manually taking screenshots, your script becomes a tireless machine, churning out a clean, consistent set of frames.
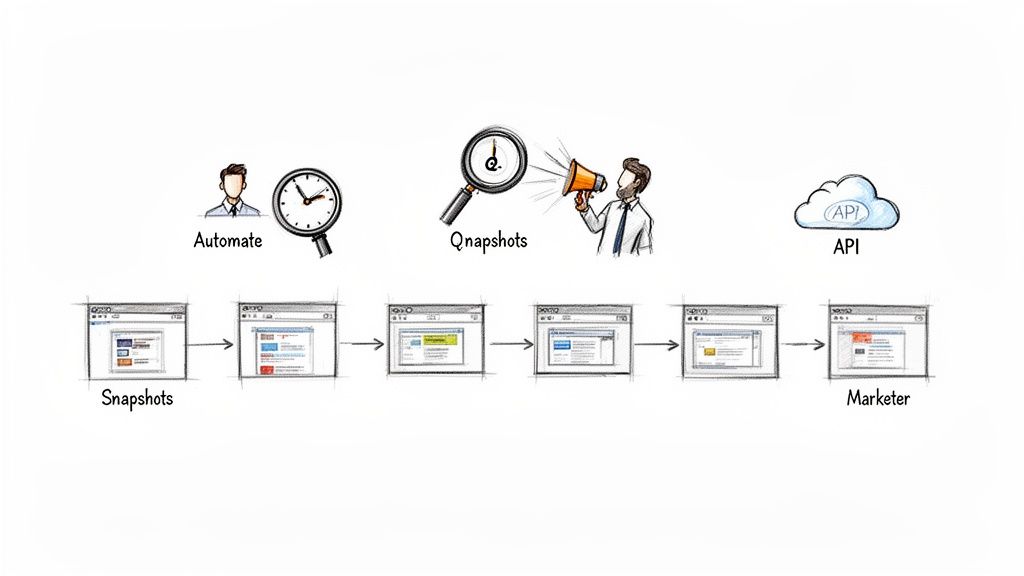
Here’s a simple visual of how this capture loop works in practice.

As you can see, your script just keeps feeding the target URL to the API, which in turn sends back a stream of numbered images. It's an elegant and powerful workflow.
Fine-Tuning Your Capture Parameters
The real magic of using an API for this is the level of control you get. You can tell it exactly what to capture and how. ScreenshotEngine has a couple of parameters that are absolutely essential for creating a great website video.
full_page: Set this totrueif you need to capture everything from the header down to the footer. This is perfect for archiving a page, running visual regression tests, or creating a video that scrolls through an entire article.element: This is my personal favorite for targeted monitoring. You can specify a CSS selector, like#dashboard-widgetor.live-chart, to capture just that specific part of the page. It's incredibly efficient for tracking dynamic components without wasting resources capturing the static layout around them.
Getting comfortable with these two parameters is the difference between generic screen recording and surgical visual data collection. You can isolate exactly what matters, which makes your final video far more impactful and your API usage much more efficient.
Choosing the Right Capture Cadence
How often should you capture a frame? This is your "capture cadence," and it directly affects how smooth your final video will look. It's measured in frames per second (fps). A higher fps gives you buttery-smooth motion, but it also means more API calls and a lot more image files to manage.
Here’s a quick breakdown based on my experience:
- 1-2 fps: This is ideal for slow-moving targets, like monitoring pricing tables, tracking text changes on a news site, or checking ad placements. It’s very light on API usage.
- 10 fps: I find this to be the sweet spot for most website animations and user interactions. It's smooth enough to look professional without going overboard. This translates to capturing one frame every 100 milliseconds.
- 24-30 fps: You'll want to crank it up this high only when recording fast, complex animations or video-like elements to get that truly cinematic feel.
The trick is to find the right balance between quality and resources. For most web animations, 10 frames per second is a fantastic starting point.
If you're a developer working with Node.js, a great next step is to check out our guide on the ScreenshotEngine SDK for Node.js to help you build your script. Once your script runs its course, you'll have a folder filled with neatly named images—frame_001.png, frame_002.png, and so on—all set for the next step.
Stitching Your Frames Together with FFmpeg
Alright, you've run your script and now have a folder full of sequentially numbered images. Those static frames are the building blocks. The next step is where the magic happens: turning that sequence into a smooth, professional website screenshot video. For this job, we'll turn to a tool that’s a true workhorse in the multimedia world: FFmpeg.
FFmpeg is the undisputed powerhouse of media processing. It's a free, open-source command-line tool that can chew through just about any video or audio task you throw at it. For our needs, it's the perfect way to stitch our captured frames into a single, cohesive video file.
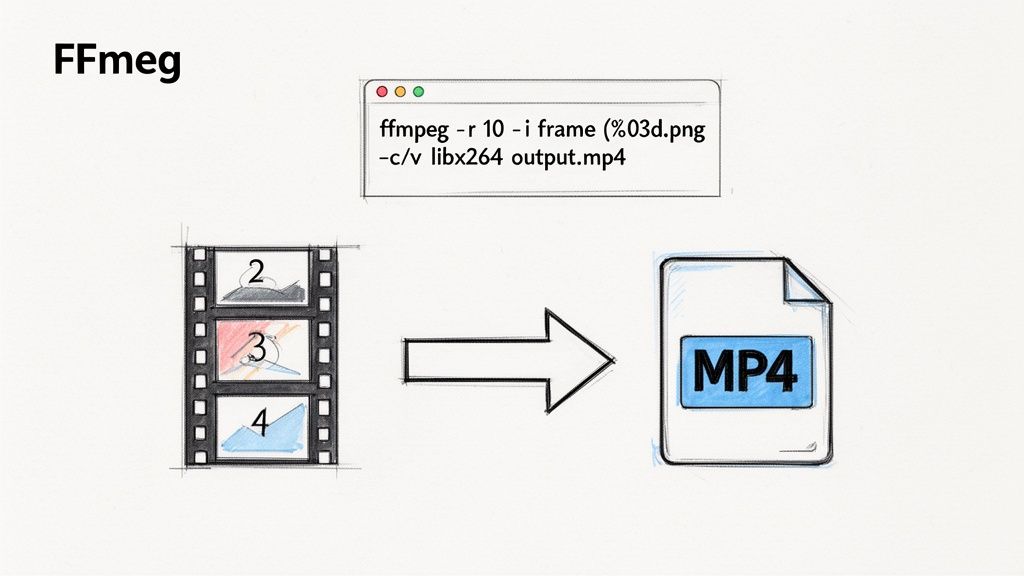
This screenshot captures the essence of FFmpeg: it’s a no-nonsense, cross-platform solution for recording, converting, and streaming audio and video. It's the engine behind a huge portion of the internet's video content.
Your First FFmpeg Command
Jumping into a command-line tool like FFmpeg can feel a bit daunting at first, but the basic command for this task is surprisingly simple. All we're doing is telling FFmpeg to grab an image sequence, set a frame rate, and encode it into a standard video format.
Here's a simple, effective command you can copy and paste right into your terminal. Just make sure you run it from inside the directory where all your images are saved.
ffmpeg -framerate 10 -i frame_%03d.png -c:v libx264 -pix_fmt yuv420p output.mp4
That one line is incredibly powerful. For a complete solution that handles both screenshot capture and video rendering, you can explore the website video from screenshots feature from ScreenshotEngine, which simplifies this entire process into a single API call.
Decoding the Essential Parameters
So, what's actually happening in that command? Let's break it down piece by piece. Understanding these parameters is the key to tweaking your output and getting the exact result you want.
-framerate 10: This sets the video's frame rate to 10 frames per second. It's crucial that this matches the capture cadence we used earlier to get a true-to-life playback speed.-i frame_%03d.png: This is the input flag. It tells FFmpeg to look for files namedframe_001.png,frame_002.png, and so on. The%03dis a nifty pattern matcher for a three-digit number padded with leading zeros.-c:v libx264: This specifies the video codec. We're usinglibx264, which is the go-to H.264 codec. It offers fantastic quality and is universally supported by pretty much every modern web browser.-pix_fmt yuv420p: This sets the pixel format. Usingyuv420pis a smart move for ensuring maximum compatibility, as it prevents weird playback issues on certain browsers or older devices.output.mp4: And finally, the easy part. This is just the name of the video file you want to create.
Think of this command as a recipe. The images are your ingredients, and each parameter is an instruction that tells FFmpeg exactly how to cook them into a finished video. Change one instruction, and you get a slightly different result.
Balancing Quality and File Size
One of the classic trade-offs in video production is finding that sweet spot between visual quality and file size. A pristine, high-quality video is great, but not if it takes ages to load on the web. FFmpeg gives you fine-grained control over this with the Constant Rate Factor (-crf) parameter.
The -crf value can range from 0 (completely lossless, huge file) to 51 (heavily compressed, poor quality). The default is 23, which is actually a fantastic starting point for most projects.
- Want to increase quality (and file size)? Try a lower value, like
-crf 18. - Need to shrink the file size (at a slight quality cost)? Use a higher value, like
-crf 28.
From my experience, a CRF value between 22 and 28 provides an excellent compromise for most web-based videos. Experimenting with this single number is the quickest way to optimize your video for your specific use case.
Taking Your Screenshot Videos to the Next Level
Once you’ve got the basics of capturing frames and stitching them together, it's time to refine your process. This is where you move from a simple script to a production-ready workflow that’s fast, efficient, and can handle just about anything you throw at it.
We're not just taking pictures anymore. We're building a smart, scalable system for creating professional-grade videos.
Zoom In on What Matters: Isolate Key Elements
One of the slickest features in an API like ScreenshotEngine is the ability to screenshot a specific part of a page. Instead of grabbing the entire website, you can use the element parameter to target a single CSS selector. Think about isolating a live stock ticker, a dynamic dashboard, or a real-time analytics chart.
Why is this so useful?
- Clarity: Your video instantly becomes more focused. You're showing the viewer exactly what they need to see, without any distracting clutter.
- Speed: Capturing a smaller element means smaller image files. Smaller files mean faster API responses and less data to wrangle later on.
- Cost: Less processing and smaller data transfers often translate to lower costs, which is a huge win if you're capturing frames frequently.
Imagine you're tracking a live scoreboard on a sports site. Instead of capturing the whole page with ads and navigation, you just point your script at the scoreboard's div ID. The result is a clean, tight video that’s perfect for sharing or embedding.
Building a Production-Ready Workflow
When your script graduates from a personal project to a production system, you have to think about real-world problems. A production workflow needs to be tough and intelligent, capable of handling hiccups without falling over.
A big one is managing API rate limits. Instead of just firing off requests as fast as possible, a smarter script will include a backoff strategy. If a request fails, it should pause for a moment—and maybe a little longer each time—before retrying. This simple trick prevents you from getting blocked and helps your system recover from temporary network issues.
The goal here isn't just to make something that works, but something that keeps working. Building in asynchronous requests and smart file management from the start will save you countless headaches down the road.
Another huge performance boost comes from using asynchronous requests. Don't wait for one screenshot to finish before starting the next. By sending multiple requests in parallel, you can slash the time it takes to gather all your frames.
Finally, think about cleanup. A script capturing hundreds of frames will leave behind a lot of temporary image files. A good practice is to build a routine that automatically deletes these images once FFmpeg has finished creating the final video. It keeps your server tidy and prevents your storage from filling up.
This kind of optimization is more important than ever. The short-form video market was valued at an incredible USD 53.7 billion in 2025 and is on track to hit USD 132.9 billion by 2035. This shift toward quick, visual content is massive, and having an efficient video pipeline puts you in a great position to meet that demand. You can dig into the numbers yourself in the full short video platform market report. By mastering these techniques, you're not just making videos—you're building a content creation engine.
Creative Applications for Your Generated Videos
Now that you've got the technical side down for creating a website screenshot video, let's talk about how this actually translates into real-world results. This isn't just a neat developer trick; it's a surprisingly powerful tool for marketing, e-commerce, and even your compliance team.
Automating video creation means you can finally ditch the inconsistent, time-sucking process of manual screen recording. This opens the door to creating polished, relevant content at a scale you couldn't manage before.
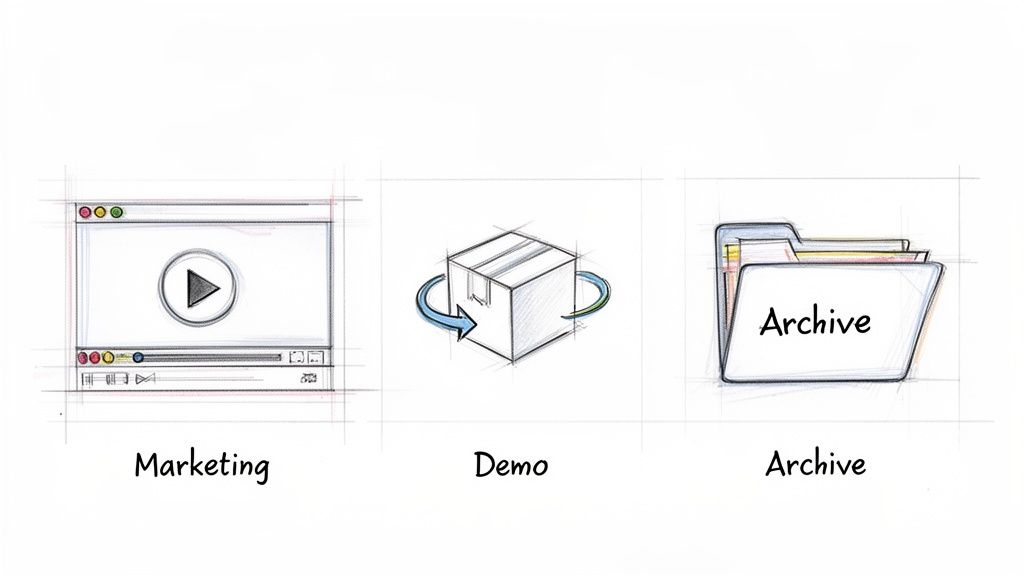
Dynamic Marketing and Social Content
For marketing teams, this is a game-changer for generating fresh social media content. Think about it: you could automatically create a slick video showing off a new website feature the instant it launches. Or, you could generate a time-lapse showing how a landing page evolved over a week-long campaign.
Once you have your base video, you can take it a step further. Tools like AI reel generators can help you quickly chop up and reformat your content into engaging, short-form videos perfect for social media. This programmatic approach keeps your marketing visuals current and pixel-perfect every time.
Engaging E-Commerce Demonstrations
If you run an e-commerce site, these videos are a fantastic way to showcase interactive product features. Imagine creating a seamless video that walks a shopper through a product customization tool, showing them exactly how to personalize their item. It’s a powerful way to build confidence.
The data backs this up. Video content is on track to account for 82% of all internet traffic by 2026. More importantly, we see that product pages with video content get 47% higher engagement rates. It’s a clear path to boosting sales and clearing up customer confusion.
By automating these demos, you can churn out unique videos for hundreds of products without lifting a finger for each one. This ensures a consistent, high-quality experience across your entire catalog.
Visual Archives for Compliance and Records
Beyond the flashy marketing stuff, this technique has serious value for compliance and legal record-keeping. By setting up a script to generate a daily or weekly video of a key webpage, you create an undeniable, time-stamped visual archive.
This can be incredibly useful for:
- Regulatory Adherence: Need to prove that your terms of service or privacy policy were displayed on a specific date? You've got it on video.
- Legal Evidence: In a dispute, you can provide a clear visual record of your website's state at a precise moment in time.
- Internal Audits: Create a historical log to track changes and make sure brand guidelines are being followed consistently.
This automated archival system gives you a level of detail and reliability that a folder of random screenshots just can't compete with. It effectively turns your video generation tool into a robust system of record.
Common Questions Answered
Once you start programmatically creating videos from website screenshots, you’ll inevitably run into a few practical questions. These are the little details that can make or break your project, so let's walk through some of the most common hurdles I've seen developers face.
Getting this process dialed in is all about striking the right balance between performance, cost, and the final quality of your video.
What’s the Best Frame Rate for My Video?
The ideal frame rate, or frames per second (fps), really boils down to what you're trying to capture. There's no single magic number, but these guidelines are a great starting point.
- 10-15 fps: This is the sweet spot for most web animations and UI interactions. It’s fluid enough to look professional without generating a mountain of images and driving up your costs.
- 1-2 fps: If you're just monitoring slow-moving content, like a news feed or a stock ticker, a super low frame rate is your best bet. It's incredibly efficient and keeps your API calls to a minimum.
- 24-30 fps: Save this for the heavy stuff. Think fast, complex animations where every bit of motion fidelity matters. Just be ready for the higher costs and processing load that come with it.
How Can I Reduce the Final Video File Size?
Nobody likes dealing with massive video files, especially for web playback. The most direct way to tackle this with FFmpeg is by tweaking the Constant Rate Factor (-crf).
Think of the
-crfvalue as a quality dial. A lower number (like 18) gives you higher quality and a larger file. A higher number (like 28) means more compression and a smaller file. For most web videos, a-crfvalue between 22 and 28 hits that perfect balance of quality and size.
Can I Capture Interactions Like Scrolling or Clicks?
This is a great question. While an API like ScreenshotEngine is fantastic at capturing the visual state of a page, it doesn't perform the actions itself. To capture user interactions like clicks and scrolls, you'll need to pair it with a browser automation tool like Puppeteer or Playwright.
Here’s how that workflow typically looks:
- Your script uses Playwright to perform an action, like clicking a button or scrolling down the page.
- Immediately after that action completes, your script calls the ScreenshotEngine API to grab a snapshot of the new page state.
- You just repeat this loop to build a sequence of frames that beautifully illustrates the interaction.
Should I Capture the Full Page or a Specific Element?
This really just comes down to your goal.
Capturing a full_page screenshot is non-negotiable for things like visual regression testing or creating a complete website archive. You need the full context.
But if you're zeroing in on a specific component—say, a live data graph or an interactive product customizer—then using the element selector is way more efficient. It produces smaller images, processes faster, and creates a focused video that highlights exactly what you care about.
Ready to put this all into practice? ScreenshotEngine gives you a robust, developer-first API designed for creating high-quality website screenshot videos with precision and control. You can explore the features and start a free trial to see for yourself.