Let’s be honest: taking website screenshots by hand is a massive time sink. Before you even think about writing code, it's crucial to understand why this old-school method just doesn't cut it anymore. Manual captures are slow, inconsistent, and often riddled with human error. For any serious work like continuous testing or brand monitoring, they're a non-starter.
Why Manual Screenshots No Longer Scale
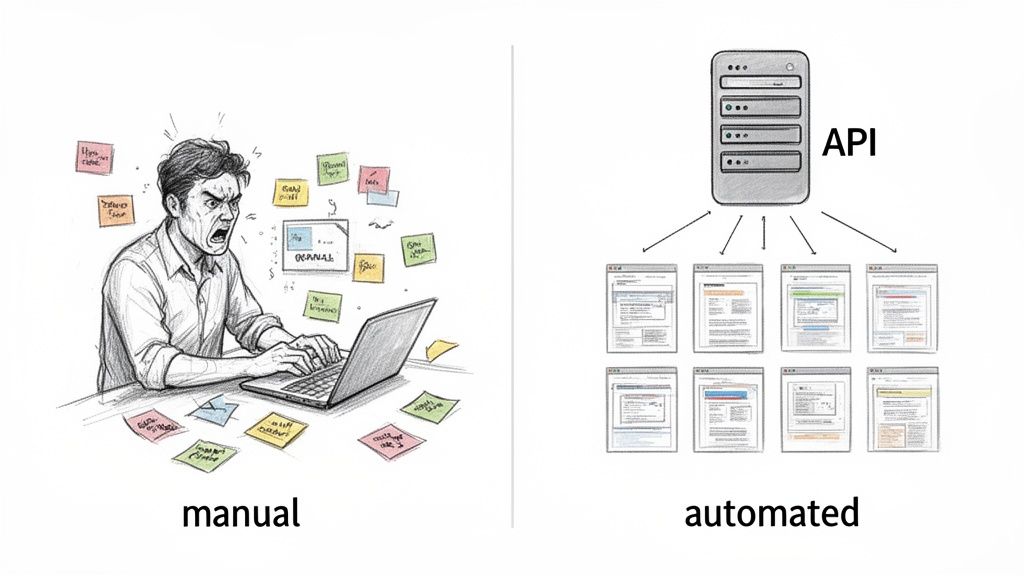
The real push for an automated website screenshot solution comes from the simple fact that we're all tired of automating repetitive tasks by hand. Imagine you need to capture daily shots of competitor homepages, archive how your links look on social media, or check for UI bugs after every single deployment. Doing that manually isn't just boring—it's a terrible use of a developer's time and talent.
Switching to an API isn't just a quality-of-life improvement; it solves real, tangible problems:
- Flawless Consistency: An API captures every screenshot with the exact same viewport, device settings, and rendering engine. This delivers pixel-perfect consistency that a human could never hope to match.
- Unmatched Speed and Volume: While you're manually taking a handful of screenshots, an automated system can crank out hundreds, or even thousands. This makes high-volume workflows not just possible, but easy.
- Built-in Reliability: A good API takes care of all the annoying stuff—blocking ads, dismissing cookie banners, and handling popups—to give you a clean, usable image every time. You can read more about how this works in our guide on screenshot as a service.
Manual Screenshots vs Automated API Workflows
To see the difference in black and white, here's a quick comparison of what you're leaving behind and what you gain by automating this process.
| Feature | Manual Screenshots | Automated API Screenshots |
|---|---|---|
| Speed & Scalability | Extremely slow; limited to one at a time. Impossible to scale. | Lightning-fast; can generate thousands of screenshots in minutes. Scales effortlessly. |
| Consistency | Highly inconsistent; results vary based on screen size, browser, and user. | 100% consistent; every capture uses identical, predefined parameters. |
| Error Rate | Prone to human error, forgotten steps, and missed details. | Near-zero error rate. Follows the exact same logic every time. |
| Resource Cost | High developer time and labor cost; drains focus from core tasks. | Low operational cost; frees up developers for high-value work. |
| Scheduling | Requires manual intervention for every scheduled task. | Fully automated. "Set it and forget it" with CRON jobs or schedulers. |
| Integration | A standalone, disconnected task. | Easily integrates into CI/CD pipelines, monitoring tools, and custom applications. |
The takeaway is clear: automation isn't just about saving time, it's about building more reliable, scalable, and powerful systems.
The Growing Demand for Visual Automation
This shift isn't just a niche trend; it's a market-wide necessity. The global website screenshot software market, already valued around USD 500 million, is on track to hit USD 1.2 billion by 2033. This explosion is driven by the relentless demand for digital marketing and visual content. After all, visuals are 40 times more likely to be shared on social platforms, making a reliable screenshot API an indispensable tool in any modern tech stack.
By letting a dedicated API handle the nitty-gritty of managing headless browsers, developers can finally focus on building what matters: robust systems for visual regression testing, SEO monitoring, or compliance archival, all while knowing the visual data they're working with is consistently accurate and timely.
Taking Your First Screenshot with an API
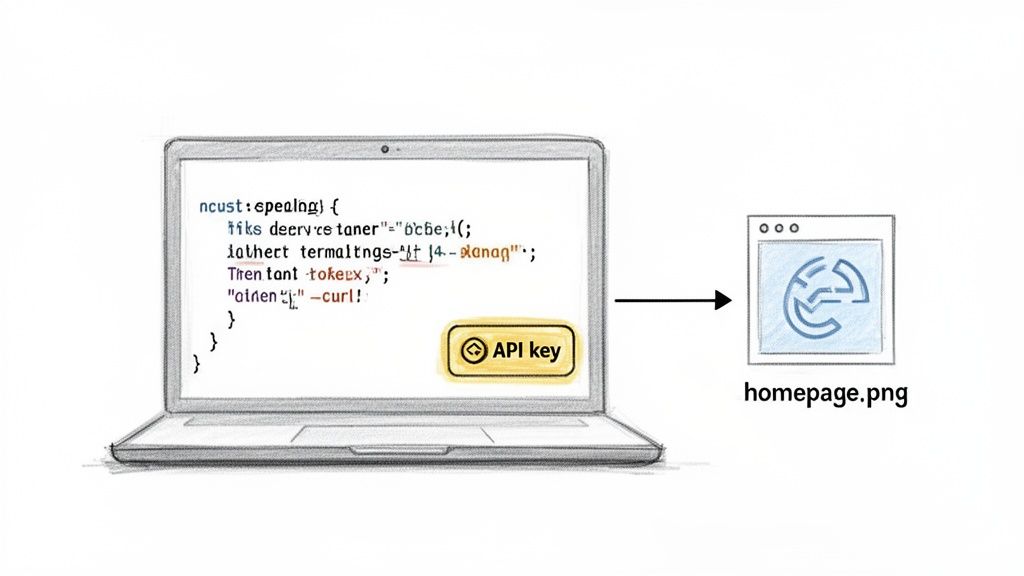
Alright, let's get our hands dirty and actually generate a screenshot. The image above shows the two key pieces you'll be working with: an API key for authentication and a bit of code to make the request. Getting this up and running is surprisingly quick.
Your API Key and Authentication
First things first, you need to prove you have permission to use the service. This is where your API key comes in. Think of it as a unique password for your application. When you sign up for a service like ScreenshotEngine, you'll find this key waiting for you in your account dashboard.
To use it, you'll pass the key inside the request headers. It's a secure, standard practice that keeps your credentials safe.
A Quick Word of Advice: Treat your API key like you would any password. Never hardcode it directly into your scripts. Instead, use environment variables (like
process.env.API_KEYin Node.js) to keep it out of your codebase, especially if you're using a public repository like GitHub.
Once you have your key, you're ready to make your first call. The beauty of a good screenshot API is that it handles all the messy backend work—like spinning up and managing headless browsers—so you can just focus on the task at hand.
Making Your First API Request
The easiest way to see if everything is connected properly is by using cURL. It’s a command-line tool that comes pre-installed on most operating systems, making it perfect for firing off a quick test without writing a full script.
Here’s a simple cURL command that grabs a screenshot of Google's homepage and saves it as capture.png:
curl "https://api.screenshotengine.com/v1/screenshot?url=https://google.com"
-H "Authorization: Bearer YOUR_API_KEY"
--output capture.png
Just pop your own API key in place of YOUR_API_KEY and run it in your terminal. If you see a new capture.png file appear, you've officially automated your first screenshot. Pretty cool, right? For a deeper dive into more advanced options, check out our guide on how to capture a website.
Practical Code Examples
While cURL is great for a quick check, you’ll eventually want to build this functionality into a real application. Let's look at how to do that in Node.js and Python, two of the most popular languages for this kind of automation.
Node.js Example (using axios):
const axios = require('axios'); const fs = require('fs'); const path = require('path');
const apiKey = 'YOUR_API_KEY'; // Best practice: use process.env.API_KEY const urlToCapture = 'https://www.screenshotengine.com';
async function takeScreenshot() {
try {
const response = await axios.get(https://api.screenshotengine.com/v1/screenshot?url=${urlToCapture}, {
headers: { 'Authorization': Bearer ${apiKey} },
responseType: 'stream'
});
const writer = fs.createWriteStream(path.resolve(__dirname, 'screenshot.png'));
response.data.pipe(writer);

return new Promise((resolve, reject) => {
  writer.on('finish', resolve);
  writer.on('error', reject);
});
} catch (error) { console.error('Something went wrong while capturing the screenshot:', error); } }
takeScreenshot();
Python Example (using requests):
import requests
api_key = "YOUR_API_KEY" # Best practice: load from environment variables url_to_capture = "https://www.screenshotengine.com" api_endpoint = f"https://api.screenshotengine.com/v1/screenshot?url={url_to_capture}"
headers = {"Authorization": f"Bearer {api_key}"}
response = requests.get(api_endpoint, headers=headers, stream=True)
if response.status_code == 200: with open("screenshot.png", "wb") as f: for chunk in response.iter_content(chunk_size=8192): f.write(chunk) print("Screenshot saved successfully!") else: print(f"Error: {response.status_code} - {response.text}")
As you can see, integrating a screenshot API is incredibly straightforward. Modern APIs running on major cloud platforms have cut down response times to just milliseconds, which is a big reason why development teams are increasingly using them to automate their workflows. It's often necessary to convert HTML to JPG with precision when you need to capture the exact visual state of a webpage, and an API simplifies that process immensely.
Customizing Screenshots for Specific Needs
Getting a basic screenshot of a website is one thing, but the real magic happens when you start customizing the capture to fit exactly what you need. This is where a good screenshot API separates itself from a simple tool. The customization options are what let you tackle complex, real-world problems.
Think of it as the difference between a generic, one-size-fits-all snapshot and a surgically precise image that gives you exactly the data you're looking for. These parameters let you handle everything from testing responsive designs to pulling out specific content for analysis.
Capturing More Than What You See
One of the most frequent needs is to capture content that’s "below the fold"—the stuff you have to scroll to see. This is where full-page screenshots are a game-changer.
A full-page screenshot essentially tells the API to scroll all the way down the page, capturing everything and stitching it together into one long, continuous image. From my experience, this is indispensable for a few key tasks:
- Website Archival: You get a complete, permanent record of a page's entire content, from the header right down to the footer.
- Design Reviews: It’s so much easier for designers and stakeholders to see the full layout in a single file instead of having to scroll through a live page.
- Content Audits: You can create a complete visual inventory of a page for review without missing a single element.
On the other hand, you might want to see how your site looks on a specific screen. By setting a viewport size—say, 1920x1080 for a typical desktop or 375x812 for an iPhone—you can instantly check how your responsive design is holding up.
Isolating Specific Page Elements
Sometimes the whole page is just noise. You might only care about one tiny, but critical, piece of it. That’s when you’ll want to grab a screenshot of a specific element. By passing a CSS selector to the API, you can tell it to capture just that one part of the page.
Imagine you're tracking a dynamic pricing chart on a competitor's site, monitoring a dashboard widget, or archiving a specific user review. Instead of grabbing the whole screen and messing with cropping later, you can just target the element directly.
For instance, if you send a request with a parameter like
selector=#main-content, the API will ignore the navigation, sidebars, and footer, capturing only the<div>or<section>with that specific ID. It's an incredibly efficient way to do targeted monitoring and visual regression testing.
Think about how a typical webpage is structured. It’s built from distinct blocks and containers, like the <div> element. This structure is what makes targeting possible.
This example from the MDN Web Docs shows a common HTML container. By targeting the selector for a block like this, you can get a clean, focused screenshot of just the main article content.
Fine-Tuning Image Output and Appearance
What the screenshot looks like is often just as important as what it contains. A flexible screenshot API should give you plenty of control over the final output.
The most common parameters let you tweak and refine your automated website screenshot until it’s just right. Here’s a quick rundown of the options I find myself using most often.
Key Screenshot API Parameters
| Parameter | Description | Example Values |
|---|---|---|
full_page |
Captures the entire scrollable length of the page. | true, false |
viewport |
Sets the screen dimensions for the browser. | 1920x1080, 1366x768, 375x812 |
selector |
Targets a specific element using its CSS selector. | #price-chart, .user-comment, article |
format |
Defines the output image file type. | png, jpeg, webp |
quality |
Sets the compression level for JPEG/WebP (1-100). | 75, 90, 100 |
dark_mode |
Renders the page in dark mode if supported. | true, false |
delay |
Waits a set number of milliseconds before capturing. | 2000 (for 2 seconds), 5000 |
These parameters are your control panel for getting the perfect shot. You can also fine-tune the image format to strike the right balance between quality and file size:
- PNG: The best choice for crisp, pixel-perfect images, especially if you need transparency. I use this for UI components and design checks.
- JPEG: A workhorse for keeping file sizes down when absolute pixel accuracy isn't critical. Great for general-purpose captures.
- WebP: A modern format from Google that offers fantastic compression without sacrificing much quality. Perfect for web use.
And don't forget dark mode. Many APIs can toggle this on, which is a lifesaver for testing user themes or grabbing screenshots that match a specific brand aesthetic. Having these options at your fingertips ensures the final image is ready for whatever you plan to do with it, from developer testing to a high-level marketing report.
Building Practical Automation Workflows
Once you've got the hang of making individual API calls, the real fun begins. It's time to chain those requests together to build powerful, real-world solutions. An automated website screenshot isn't just a static image; think of it as a data point. It's a snapshot in time you can use to create systems that save hours, prevent mistakes, and deliver crucial business insights.
From QA engineers to marketers, teams are building incredibly useful workflows around this simple concept. Let's dig into a few scenarios where screenshot automation goes from a cool party trick to a core business process.
Fortifying Releases with Visual Regression Testing
One of the most impactful uses for screenshot automation is visual regression testing. The idea is straightforward: take pictures of your key UI components before and after a code change, then use a program to compare them. This simple check is a lifesaver, catching unintended visual bugs before they ever make it to your customers.
We've all seen it happen—a small CSS change accidentally breaks a layout, hides a button, or messes up the font on a completely different page. Visual regression testing puts a stop to that.
Here's how a typical workflow plays out:
- Set a Baseline: Before a new release, you run a script to capture screenshots of your most important pages and components—the checkout form, user dashboard, pricing table, you name it. These are your "golden" images, the source of truth.
- Capture the "New" Version: In your CI/CD pipeline, right after a new build gets pushed to a staging server, the same script runs again. It takes a fresh set of screenshots of the exact same elements.
- Compare and Alert: A tool like Pixelmatch then programmatically compares the new images against the baseline ones. If the difference is bigger than a tiny threshold you've set, the build fails, and an alert gets fired off to the team in Slack or via email.
This process turns a tedious, manual QA task into a reliable, automated safety net. It's how you ensure visual consistency with every single release.
The first step in any good testing workflow is deciding exactly what to capture. Do you need the entire scrolling page, just what the user sees in their browser window, or a single button?
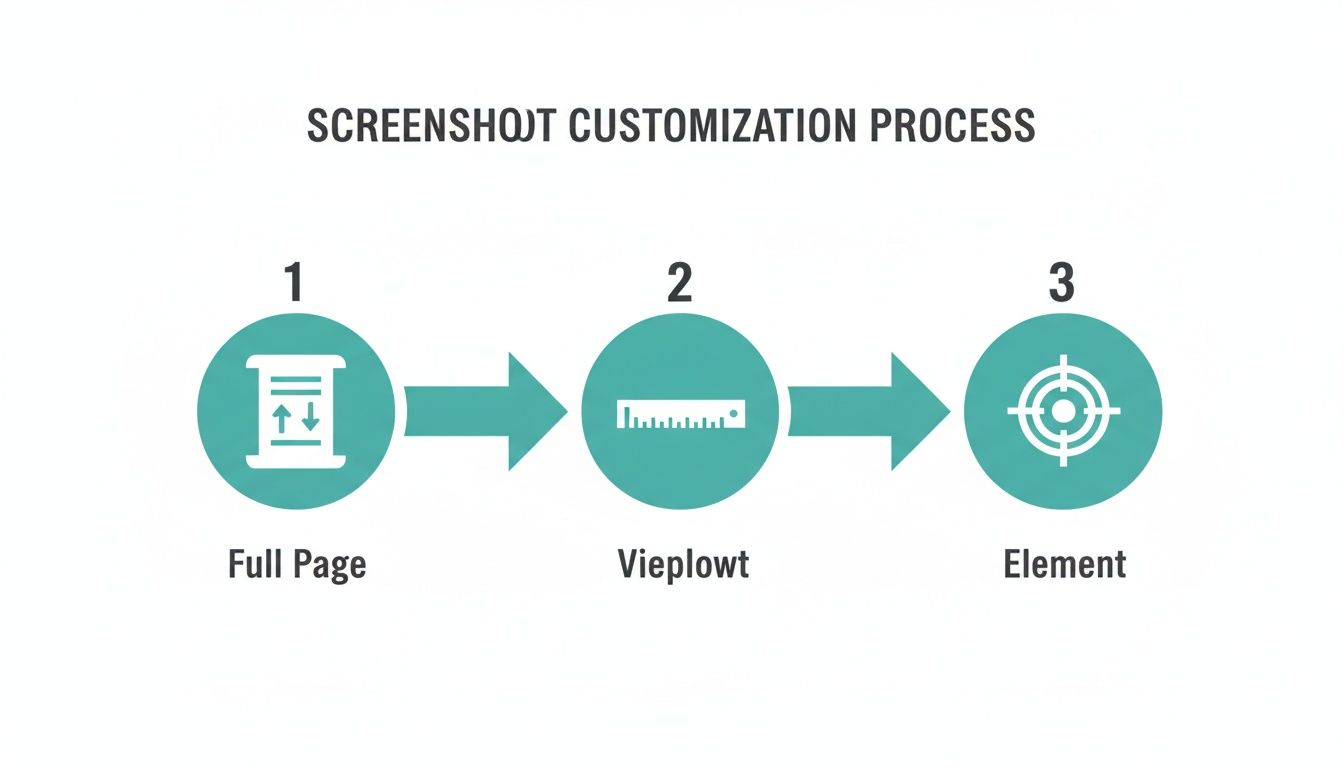
As you can see, narrowing your focus from the full page down to a specific element is crucial for creating precise and efficient tests.
Monitoring SEO and Brand Presence
For marketing and SEO teams, automated screenshots are a game-changer for tracking performance and how the brand appears out in the wild. Manually checking Google search results or social media previews is not only mind-numbing but also wildly inaccurate due to personalization.
A scheduled job fixes this by capturing what a neutral audience actually sees. For example, you could set up a daily CRON job that snaps a screenshot of the Google results for your top 10 keywords. This creates a visual history, letting you track your ranking and see exactly how your page title and meta description look day after day.
You can do the same for social media, automatically capturing how your articles look when shared on Twitter or LinkedIn to make sure your Open Graph tags are working perfectly. If you want to dive deeper, our guide on how to schedule website screenshots has some great, practical steps for getting these recurring tasks up and running.
Ensuring Compliance and Archival
In industries with heavy regulations, keeping a verifiable record of your website is non-negotiable. If you're in finance, healthcare, or the legal field, you often have to prove exactly what was on your site at a specific moment in time.
An automated archival system provides an indisputable, timestamped visual record. By scheduling daily or weekly captures of critical pages—like terms of service, privacy policies, or product disclosure statements—you build a robust compliance archive.
Just store these images in a secure cloud bucket like Amazon S3 (with versioning turned on), and you'll have a durable, auditable trail ready for any inquiry. This automated system is far more scalable and defensible than relying on someone to manually save PDFs now and then. It provides peace of mind and makes audits a whole lot simpler.
Optimizing for Performance and Cost
When you go from grabbing a few dozen screenshots to thousands, efficiency stops being a nice-to-have. It becomes absolutely critical for keeping your process fast and affordable. Just blasting out API calls might work at first, but a truly robust system needs to be much smarter about performance and your budget.
Part of that smarts is planning for the inevitable hiccups. You're going to run into transient network issues or temporary server timeouts that cause API calls to fail. A naive approach just gives up. A much better pattern is to build in retries with exponential backoff.
This is a battle-tested strategy where you wait a progressively longer time between each retry—say, 1 second, then 2, then 4. It gives temporary glitches a chance to resolve themselves without hammering the API with a flood of repeated requests.
Fine-Tuning Your API Calls
Beyond just handling errors, you can get a huge performance boost by being intentional about what you ask the API to do. Every single parameter you set impacts the speed and file size of the final image, which directly ties into your costs and storage needs.
Think carefully about the image format you're choosing:
- PNG: Stick with this for visual regression testing. When you need pixel-perfect accuracy to spot tiny changes, PNG is the only way to go.
- JPEG: This is your workhorse for general-purpose captures. You trade a little fidelity for much smaller file sizes, and a quality setting of 80-90 is usually the sweet spot.
- WebP: For web delivery or storing massive archives, this modern format is fantastic. Its compression is excellent, saving you a ton on storage costs over time.
Here’s the most overlooked optimization I see: caching. If you find yourself needing to capture the same URL multiple times in a short window, a simple caching layer can save you from making redundant API calls. Just store the fresh screenshot and serve it directly for any identical requests that come in right after.
Scaling Smartly and Managing Your Spend
At the end of the day, a cost-effective strategy is about more than just tweaking API calls; it’s about smart architecture. Most screenshot API providers, including ScreenshotEngine, give you a generous free tier. It's smart to architect your non-critical, low-volume tasks to stay within those free limits whenever you can.
For the heavy-duty, high-volume stuff, you need a system that scales predictably. Instead of making synchronous API calls that block your main application thread, offload the work to a job queue system like RabbitMQ or Redis.
This decouples the screenshot generation from your core application. You can process jobs in the background, control how many run at once, and keep your main app responsive. It's the key to making sure your screenshot workflow hums along efficiently while keeping your costs predictable and firmly under control.
Common Questions About Screenshot Automation
Once you start integrating an automated screenshot solution, you'll inevitably run into a few practical questions. I've seen these pop up time and time again with developers, and they aren't just edge cases—they're common hurdles that can trip you up. Let's walk through the most frequent ones.
How Do APIs Handle Complex JavaScript and SPAs?
This is a big one. Modern screenshot APIs aren't just taking a simple, static snapshot. They're spinning up real, full-featured headless browsers—usually Chrome—under the hood. These browsers are designed to execute JavaScript and are smart enough to wait for network activity to die down.
What this means for you is that single-page applications (SPAs) built with frameworks like React, Vue, or Angular get captured correctly. The API patiently waits for all the dynamic content to load and the page to fully render before snapping the picture. The end result is a true representation of what a real user actually sees.
What’s the Best Way to Store Thousands of Screenshots?
When you start generating images at scale, your local storage isn't going to cut it. The industry-standard solution here is cloud storage. Services like Amazon S3, Google Cloud Storage, or Azure Blob Storage are built for this exact scenario—they're cheap, reliable, and can handle basically infinite files.
My go-to workflow is to have my script call the API to generate the screenshot, and then immediately push the resulting image file directly to a cloud storage bucket. This keeps the image assets separate from my application logic and makes everything much easier to manage down the road.
Can I Automate Screenshots for Pages Behind a Login?
Absolutely, but you have to be smart about it. The trick is to securely pass authentication details along with your request. The most common approach involves programmatically logging into the site within your own environment, grabbing the necessary session cookies, and then including those cookies in the header of your API request.
The API then uses your authenticated session to render the page just as a logged-in user would see it. Just be sure to handle your credentials and session tokens safely. Use environment variables; never hardcode them into your scripts.
How Do I Ensure Screenshots Are Consistent Across Captures?
Consistency is king, especially for things like visual regression testing. While a good API provides a stable foundation, you still need to control the variables. To get reliable, comparable results every single time, you need to do a few things:
- Fix the Viewport: Always, always specify a fixed viewport width and height in your API calls. This stops responsive design breakpoints from causing annoying variations.
- Block Dynamic Elements: Make use of the API’s features to hide or block ads, cookie pop-ups, and live chat widgets. These are the usual suspects that change between captures and throw off your comparisons.
- Standardize Parameters: For any task where pixel-perfect consistency matters, it's non-negotiable to use the exact same API parameters for every shot.
Nailing these details ensures every automated website screenshot you take is a data point you can actually trust.
Ready to stop wrestling with headless browsers and start generating clean, reliable screenshots in seconds? ScreenshotEngine provides a powerful, developer-first API that handles the complexity for you. Get your free API key and start building today at https://www.screenshotengine.com.