Let’s be honest: manually taking screenshots is a frustrating, slow, and totally unscalable way to handle modern development tasks. When you're dealing with visual testing or content monitoring, you need a way to capture a website that’s both accurate and efficient. A programmatic approach saves an incredible amount of time and delivers results you can actually trust.
Why Manual Screenshots No Longer Cut It
In any serious development workflow, speed and consistency are king. The moment you rely on a human to hit PrtScn, you introduce a ton of variables that automation just wipes away. Manual captures are a minefield of potential errors—grabbing the wrong window, using inconsistent browser sizes, or accidentally including your personal bookmarks bar. This whole process completely breaks down when you need to snapshot hundreds, or even thousands, of pages for something like visual regression testing.
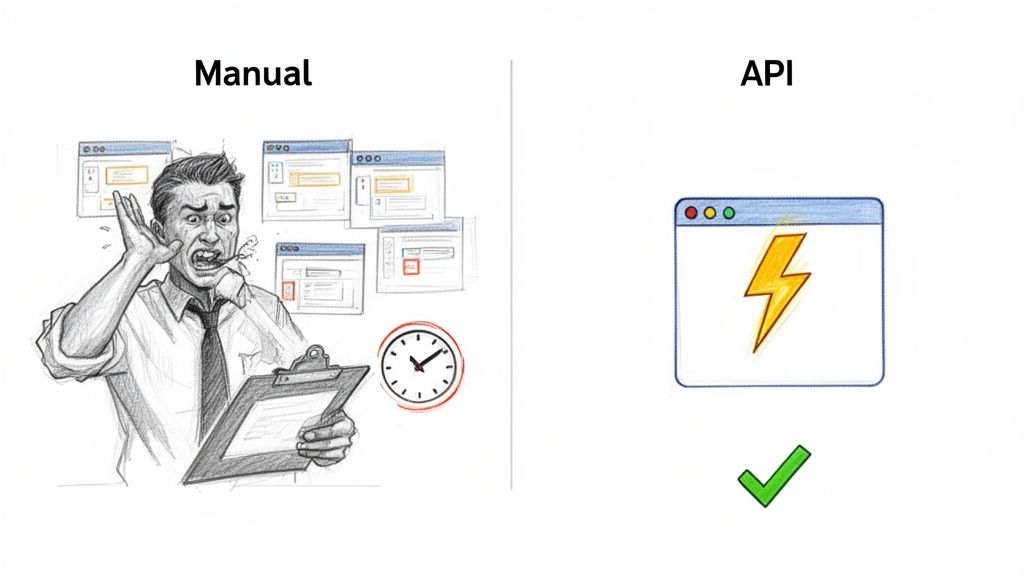
This is the exact reason many teams first look to headless browsers like Puppeteer or Playwright. They’re powerful, no doubt, but they come with their own baggage. Suddenly, you’re on the hook for maintaining complex scripts, managing server infrastructure, and fighting an endless war against anti-bot defenses, CAPTCHAs, and all those cookie banners.
The True Cost of DIY Automation
Think about the engineering hours that go into writing and debugging browser automation scripts. They add up fast. Every time a website gets a minor update, it can completely shatter your capture logic, turning what should be a simple task into a chronic maintenance headache. This is where a dedicated screenshot API changes the game by handling all that complexity for you.
A single, well-formed API call replaces dozens of lines of browser automation code. This shift lets your developers get back to building features instead of wrestling with browser rendering engines.
This isn’t just a niche tool anymore; it’s becoming a critical part of the modern tech stack. The global website screenshot software market is on track to hit roughly $1.2 billion by 2033, growing at a solid 8.5% each year. This growth is a clear signal that more businesses need reliable, scalable ways to capture web content. You can read more research on the website screenshot software market growth to see where the industry is headed.
Shifting to a Smarter Workflow
Instead of you managing all the moving parts, a service like ScreenshotEngine takes care of everything behind the scenes. The API is built to automatically block ads, dismiss cookie pop-ups, and wait for the page to fully render before it ever takes the shot. The result is a clean, production-ready image, every single time, without any babysitting or script updates on your end. It just works.
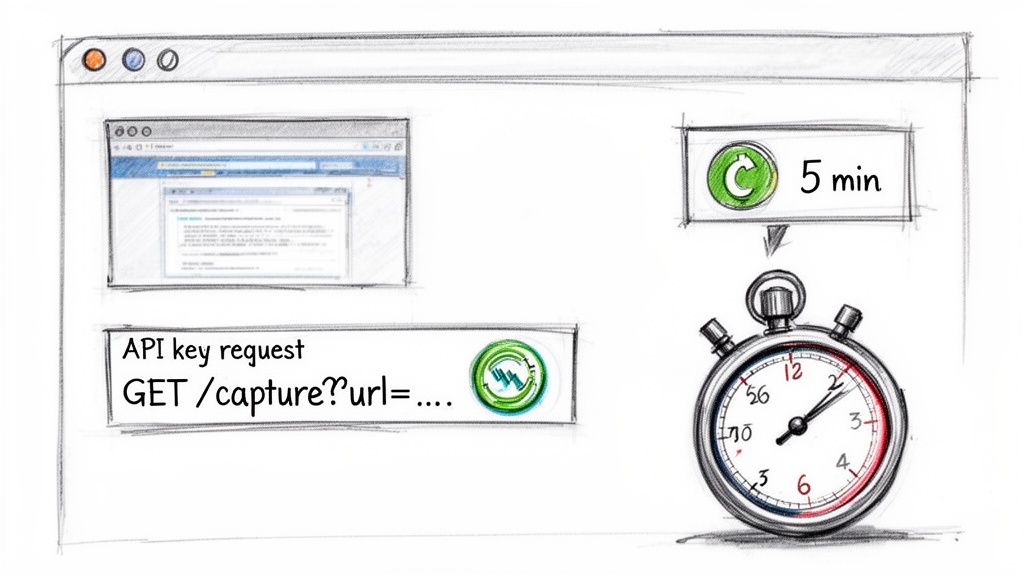
Your First Website Capture in Five Minutes
Ready to see just how quickly you can programmatically capture a website? Let's walk through it. My goal here is to get you from zero to your first high-quality screenshot in about five minutes, without getting lost in the weeds of complex configurations.
The entire process really just comes down to building a single URL. You don’t even need to install an SDK or library to get started. All you need is your unique API key and the web address you want to capture.
Grab Your API Key
First thing's first: you’ll need an API key to authenticate your requests. This is simply a unique identifier that tells ScreenshotEngine who's making the call.
- Sign up for a free account: Head over to the ScreenshotEngine website and sign up. The free tier is pretty generous and doesn’t require a credit card, so you can start playing around immediately.
- Find your key: Once you log into your dashboard, your API key will be right there waiting for you. It's a long string of characters—this is what you'll use in every request.
Just be sure to keep this key handy and treat it like a password.
Build Your First API Request
With your key in hand, you're ready to put together the request URL. The structure is incredibly straightforward. You'll combine the base API endpoint with two essential parameters: your key and the target URL.
Let's say you want to capture https://example.com. Your request URL would look exactly like this:
https://api.screenshotengine.com/v1?key=YOUR_API_KEY&url=https://example.com
All you have to do is replace YOUR_API_KEY with the actual key you just copied from your dashboard.
Go ahead and paste that complete URL into your web browser's address bar and hit Enter. The API will process the request, and within a few seconds, you'll see a perfectly rendered PNG image of the website. That's it—you've officially captured a website!
For a more detailed look at what the API returns, check out our guide on how to retrieve a screenshot.
Pro Tip: I highly recommend bookmarking the ScreenshotEngine API Playground. It's an interactive tool that lets you build and test API calls in real time. You can experiment with different parameters like image formats (PNG, JPEG), full-page captures, and even dark mode without writing a single line of code. It’s the fastest way to see what's possible.
Advanced Controls for Perfect Screenshots
Getting a basic snapshot is a great start, but the real magic happens when you start fine-tuning your captures. Once you move past the default settings, you can capture a website with incredible precision. This is how you get the exact image you need for any project, whether it's for visual testing, content archiving, or anything in between.
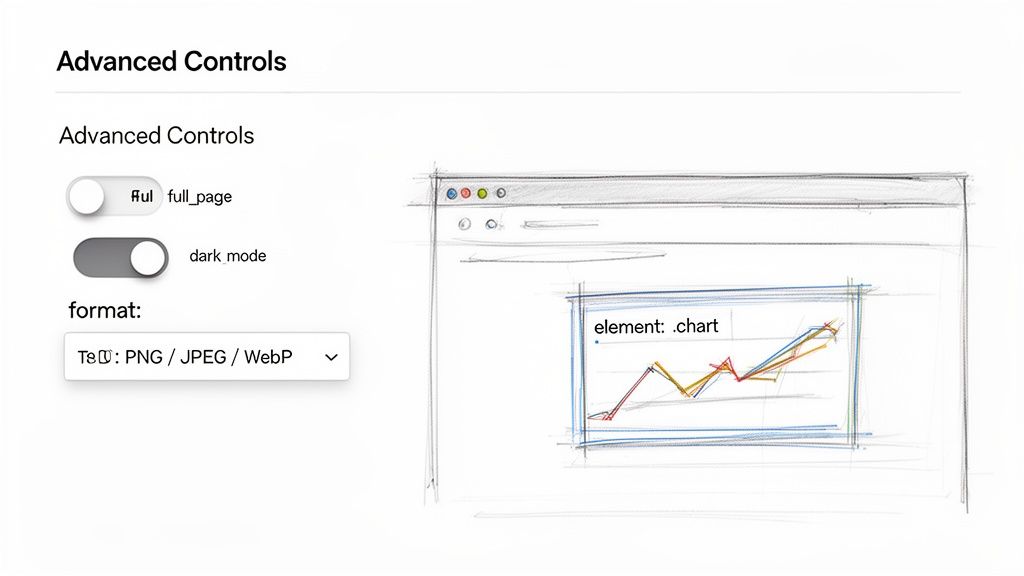
These advanced parameters are what turn a generic screenshot into a production-ready asset. Just by tacking on some simple key-value pairs to your API request, you can control everything from the image dimensions to the specific part of a page you want to zero in on.
Capture an Entire Landing Page
Let's be honest, a screenshot that only shows what's "above the fold" often isn't enough. If you need to archive a competitor's entire landing page, document a long user flow, or save a full article for compliance reasons, the full_page=true parameter is your best friend.
Flipping this switch tells the rendering engine to scroll all the way down the page, meticulously stitching everything together into one seamless image. It’s the perfect way to capture long-form content without any tedious manual work.
Control Image Format and Quality
There's always a trade-off between performance and quality, right? ScreenshotEngine gives you the knobs to dial in the perfect output format for your specific needs:
- PNG: This is the default for a reason. It delivers lossless compression, giving you the highest possible image quality. It's the go-to for visual regression testing where every single pixel has to be perfect.
- JPEG: A fantastic choice when you're watching file sizes. You can even use the
qualityparameter (likequality=80) to strike the right balance, which is great for generating social media previews or thumbnails. - WebP: This modern format is a game-changer. It offers excellent compression and quality, often creating files that are way smaller than both PNG and JPEG. If you're focused on web performance, this should be your first pick.
Test User Interfaces with Dark Mode
Dark mode is pretty much a standard feature these days, and testing it properly is a must. Instead of fumbling with your system settings for every test, you can just add dark_mode=true to your API call. This instantly simulates the user preference, letting you capture the dark theme of any site that supports it.
By the early 2020s, the industry's focus sharpened to support complex JavaScript-heavy websites and single-page applications (SPAs). This evolution reflects a growing demand for developer-friendly tools and intelligent automation capable of rendering modern web experiences accurately. Discover more insights about the evolution of screenshot software on datainsightsmarket.com.
Isolate Specific Page Elements
This is, without a doubt, one of the most powerful features for targeted captures. The element parameter lets you feed it a CSS selector to screenshot just one specific piece of a page. The use cases for this are practically endless.
Imagine you need to monitor a specific stock chart on a financial news site, or you want to grab just the user review section from an e-commerce product page. Maybe you need to pull a data visualization from a dashboard for a report. Instead of capturing the whole page and then messing around with cropping, you can just target the element directly.
For instance, to capture an element with the ID main-chart, you’d simply add element=%23main-chart to your request URL. (Remember, %23 is just the URL-encoded version of the # symbol). This kind of precision saves a ton of post-processing time and gives you a clean, focused image that's ready to use right away.
Getting Clean Captures, Every Time
Nothing wrecks a perfect website screenshot faster than a giant "Accept Cookies" banner chewing up the bottom third of the image. When you're trying to capture sites at scale, these interruptions—from ad overlays to surprise subscription pop-ups—become a real nightmare. They turn what should be clean data into a cluttered mess.
A well-designed screenshot API should see these problems coming and solve them for you. Instead of forcing you to write brittle scripts to hunt down and click "dismiss" buttons, ScreenshotEngine handles the most common annoyances automatically. It's set up to intelligently block ads and get rid of consent banners before the screenshot is even snapped.
The Before and After Is Striking
The difference this makes is night and day. Think about capturing the homepage of a major news site. Without this kind of smart blocking, you're almost guaranteed to get an ad overlay and a cookie banner obscuring the very content you were trying to save.
With ScreenshotEngine, the API does the dirty work. It renders the page, identifies and strips out those junk elements, and then captures the clean version. This all happens in a single API call, with no extra work on your end.
This built-in intelligence is what makes it reliable enough for production. It means the images you generate for visual testing, social media previews, or compliance archives are professional and ready to use, no manual editing required.
If you've run into these kinds of roadblocks before, you might find our article on common website screenshot challenges a useful read. It goes much deeper into these issues.
Handling More Stubborn Scenarios
But what about interactions that are unique to a specific site? Sometimes you need to deal with a custom-built modal or even log into a page before you can get the shot you need. This is where injecting your own scripts comes in handy.
ScreenshotEngine lets you run your own JavaScript snippets just before the capture process kicks off, giving you fine-grained control over the browser's state.
- Dismissing Custom Modals: You can write a quick script to find a unique pop-up using its CSS selector and then trigger a click on its close button.
- Logging Into a Website: For pages hidden behind a login wall, you can automate filling in the username and password fields and submitting the form—all before the screenshot is taken.
This level of control is the bridge between simple, fire-and-forget automation and the precision needed for those tricky edge cases. It ensures that even the most interactive or complex pages can be captured cleanly, every single time.
Integrating Website Capture Into Your Codebase
Playing around with parameters in an API playground is great for getting a feel for things, but the real magic happens when you start automating captures directly within your own applications. This is where you move from one-off screenshots to building powerful, data-driven workflows.
Think about automatically generating social media preview images for new blog posts, or setting up a CI/CD pipeline that runs visual regression tests on every push. That’s what direct integration makes possible.
Let’s get our hands dirty with some practical, production-ready code snippets for a few popular languages. These examples show you exactly how to build a request, call the API, and save the resulting image right to your local system. This is the core skill you'll need for any project that requires programmatic website captures.
Python Example Using Requests
For anyone working in Python, the requests library is a fantastic, straightforward choice for this job.
This snippet sets up your API key and the target URL, then efficiently streams the image data directly into a new file. Streaming is a great habit, as it handles binary data like images without hogging memory.
import requests
Your ScreenshotEngine API key
api_key = 'YOUR_API_KEY'
The URL you want to capture
target_url = 'https://example.com'
The output file name
output_file = 'website_capture.png'
Construct the API request URL
api_url = f"https://api.screenshotengine.com/v1?key={api_key}&url={target_url}"
try: # Make the request and stream the response response = requests.get(api_url, stream=True) response.raise_for_status() # This will raise an exception for HTTP errors
# Save the image content to a file
with open(output_file, 'wb') as f:
    for chunk in response.iter_content(chunk_size=8192):
        f.write(chunk)
print(f"Successfully captured website and saved to {output_file}")
except requests.exceptions.RequestException as e: print(f"An error occurred: {e}")
Node.js Example with Axios
If you're in the JavaScript world, axios is probably your go-to for HTTP requests. It works beautifully here.
This Node.js example shows how to make the API call and handle the response as a stream, piping it directly into a file write stream. It's a clean, high-performance way to get the job done.
const axios = require('axios'); const fs = require('fs'); const path = require('path');
const apiKey = 'YOUR_API_KEY'; const targetUrl = 'https://example.com'; const outputFile = path.resolve(__dirname, 'website_capture.png');
const apiUrl = https://api.screenshotengine.com/v1?key=${apiKey}&url=${targetUrl};
async function captureWebsite() { try { const response = await axios({ method: 'get', url: apiUrl, responseType: 'stream', });
const writer = fs.createWriteStream(outputFile);
response.data.pipe(writer);

return new Promise((resolve, reject) => {
  writer.on('finish', resolve);
  writer.on('error', reject);
});
} catch (error) {
console.error(Error capturing website: ${error.message});
}
}
captureWebsite().then(() => {
console.log(Successfully captured website and saved to ${outputFile});
});
This flow diagram gives you a quick visual of how the API can take a messy, ad-filled page and turn it into a clean, professional screenshot.

That automated cleaning is a huge time-saver. It means the images you generate are ready to use immediately, without any manual editing to remove pop-ups or banners.
PHP Example Using cURL
For my fellow PHP developers, cURL is the old reliable. It's built-in and gets the job done perfectly.
The script below fires up a cURL session, points it at our API URL, and writes the image data it gets back straight into a local file. Simple and effective.
A Quick Tip for Integration: These examples are literally copy-and-paste ready. Just swap in your API key, change the
targetUrl, and start tacking on any of the advanced parameters we discussed earlier. You’ll be automating high-quality screenshots in minutes.
This is what a solid https://www.screenshotengine.com/blog/screenshot-as-a-service is all about—it handles all the browser rendering headaches so you can focus on building your application.
For those looking to build even more complex integrations, getting a handle on the underlying network requests can be super helpful. If you're curious, this guide on how to capture network traffic programmatically is a great resource for advanced use cases.
Practical Applications and How to Solve Common Problems
So, what can you really do with a screenshot API? Once you move beyond the basic "hello world" examples, you open up a ton of powerful ways to automate tasks and gather visual data. A simple screenshot can become a serious business asset.
Let's look at a few common scenarios where this really shines.
Real-World Use Cases
Visual Regression Testing is a huge one for development teams. Imagine this: you can plug API calls directly into your CI/CD pipeline. Every time new code is pushed, the system automatically takes screenshots of key pages. By comparing the "before" and "after" images, you can instantly catch visual bugs—a wonky layout, a misplaced button, a weird font change—before they ever make it to your users. It’s a lifesaver.
Digital marketing is another area where this is incredibly useful. SEOs can set up a daily job to capture screenshots of Google search results for their most important keywords. This gives you a visual timeline of how your rankings change, what your competitors are doing, and how Google is tweaking its SERP features. Sometimes, seeing the change is far more insightful than just looking at a rank number in a spreadsheet.
Many platforms also use this to generate those nice link previews you see on social media. When someone pastes a link, an API call in the background grabs a clean, visually appealing snapshot of the page to show in the feed.
And for businesses in regulated industries, like finance or healthcare, automated screenshots are a game-changer for compliance and archiving. You can create a complete, timestamped visual history of your website to meet legal requirements, all without anyone having to do it manually.
How to Handle Common Headaches
Even with a great API, you're bound to hit a few snags. It’s just the nature of the web. Knowing how to quickly diagnose and fix these issues will keep your projects running smoothly.
Here are the most frequent problems I see and how to fix them:
- Slow-Loading Pages and Timeouts: Some sites are just plain slow, loaded with heavy scripts and massive images. If your requests are timing out, the easiest fix is to bump up the
delayparameter. This gives the page extra time to finish rendering before the screenshot is taken. - Getting Behind a Login Wall: Need to capture a members-only area? You'll have to log in first. ScreenshotEngine lets you inject custom JavaScript to handle this. You can write a short script to find the username and password fields, fill them in, click the "submit" button, and then capture the page once you're in.
- Decoding Error Messages: Get comfortable with HTTP status codes. They’re your best friend for debugging. A
401 Unauthorizederror almost always means your API key is missing or wrong. Seeing a400 Bad Request? You've likely misspelled a parameter or messed up the URL format.
One of the toughest hurdles you might face is sophisticated anti-bot protection. It’s important to remember that some sites actively try to block automated access. For instance, understanding how Cloudflare blocking AI crawlers works can give you context on why some requests might fail. This is where a professional service really helps, as it's built to navigate these kinds of defenses.
Ready to stop wrestling with headless browsers and start building? ScreenshotEngine handles all the complexity of rendering, ad-blocking, and scaling so you can get clean, reliable screenshots with a single API call. Try it for free today at https://www.screenshotengine.com.