Taking a screenshot seems so simple, right? You press a button, and you've got an image. But trying to automate that process for thousands of websites? That's when you discover a whole new world of technical headaches.
The biggest website screenshot challenges aren't just about taking the picture. It’s about wrestling with dynamic content that pops up after the page loads, dodging annoying cookie banners and pop-ups, and making sure your captures look the same no matter the device or location. This stuff requires a lot more than a simple screen grab; you need a smart, robust capture strategy.
Why Website Screenshots Are Deceptively Complex
On the surface, telling a program to capture a website seems easy. In reality, it’s a lot trickier than just rendering a URL and saving it as a JPEG. Modern websites aren't static pages anymore. They're interactive applications that shift and change based on who you are, where you are, and what you click.
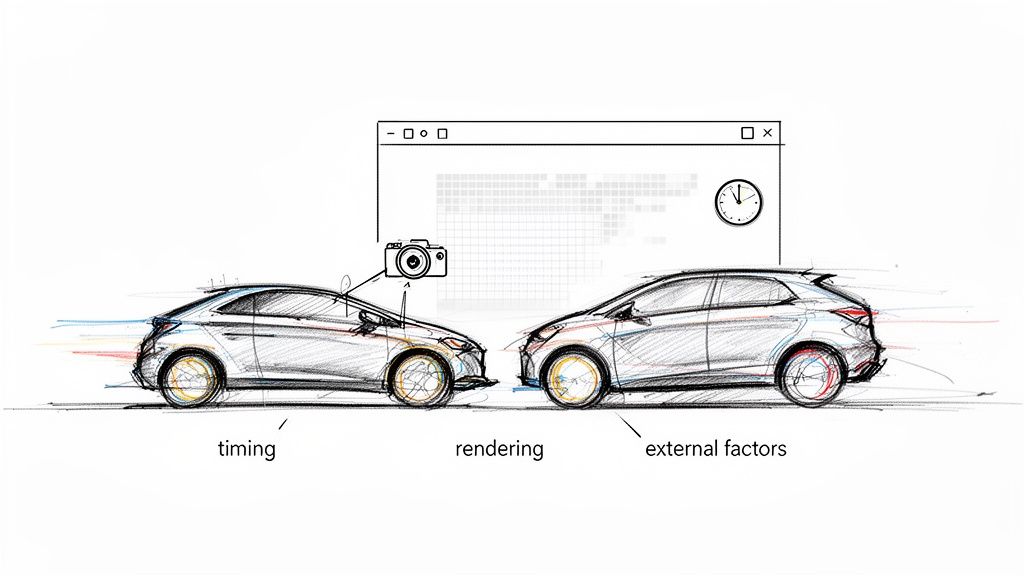
I like to think of it like this: you're trying to take a crystal-clear photo of a race car while you're driving in another one. Everything has to be perfect—the timing, the focus, the lighting. If you're off by even a split second, you get a blurry, unusable mess. That’s exactly what taking automated website screenshots feels like.
The Moving Target Problem
The core issue with automated screenshot tools is that they’re aiming at a moving target. What you see when you load a page in your browser is the final result of a complex dance of code. Capturing it at the wrong moment means you get an incomplete or broken picture.
Most of the time, the culprits are things like:
- Dynamic Content: So many sites use JavaScript to load things after the initial page is visible. That hero image, product list, or pricing table might not even exist for the first few seconds. If your tool is too fast, it captures an empty space.
- Third-Party Scripts: Think about all the ads, analytics trackers, and chat widgets a site runs. These are all loaded from somewhere else and can easily interfere with the page, block content, or just slow everything down to a crawl, leading to timeouts.
- Environmental Differences: A website can render completely differently based on the device, screen size, geographic location, or even browser language settings. What looks perfect in your test might look broken for a user in another country.
Capturing a website isn't about snapping a single moment in time. It's about orchestrating a perfect render where dozens of independent, asynchronous events have successfully completed.
If you’ve wrestled with these issues, you’re not alone. This guide is here to validate those frustrations and give you a clear roadmap for getting around them. We're going to dive deep into the real technical and practical hurdles of capturing the modern web, with actionable strategies to help you get pixel-perfect results every single time.
Handling Dynamic Content and Lazy Loading
Capturing a modern website is a bit like trying to photograph a flower that only blooms after you look away. You snap the picture instantly, but the final image is missing all the good stuff—the petals, the vibrant colors, the very thing you wanted to capture in the first place. This is one of the biggest headaches in automated screenshots today, and it's all because of dynamic content.
Unlike the static pages of the past, today's websites are more like living applications. They use JavaScript, API calls, and frameworks like React or Vue.js to pull in and display content after the initial page skeleton loads. This turns the website into a moving target for any screenshot tool.
Your capture script might load the page and take a snapshot in under a second, but the website's most important content—product images, pricing tables, or user reviews—might not show up for another two seconds. The result? You get an incomplete or, even worse, a completely blank screenshot. This timing mismatch is the number one reason automated captures fail.
The Problem with Fixed Delays
The most common first attempt to fix this is to just add a fixed delay. You tell your tool, "Wait three seconds, then take the picture." While it sounds simple, this approach is incredibly fragile and unreliable. A 3-second delay might work just fine today, but what happens tomorrow when the server is a bit sluggish? Or when a developer adds a new, heavy script to the page?
Relying on a simple timer leads to one of two bad outcomes:
- Too Short a Delay: You still miss the content, and your screenshot is useless.
- Too Long a Delay: You waste precious processing time and slow down your entire workflow, waiting around for pages that loaded instantly.
This inefficiency becomes a massive bottleneck when you're trying to capture thousands of pages. It also makes your process unpredictable, which is a deal-breaker for any serious operation. Reliability is everything; independent comparisons of screenshot API providers show wildly different failure rates. One provider might have a 6% failure rate, while others hit 28% or even 75% on the exact same tasks. It just goes to show how small technical decisions can have a huge impact.
The goal isn't just to wait; it's to wait intelligently. A reliable screenshot process knows precisely what it's waiting for, ensuring it captures the page at the exact moment it's fully rendered and ready.
Intelligent Waiting and Interaction Strategies
The real solution is to shift from passively waiting to actively observing. Instead of guessing with a timer, a robust screenshot tool should be told to wait for specific conditions to be met before it takes the shot.
This means using the full power of a headless browser, which can run JavaScript and interact with a page just like a person would. By doing this, you can set up much more dependable triggers for your captures.
Here are a few of the most effective strategies:
Wait for a Specific Element: This is easily the most reliable method. You can tell your script to hold off until a particular HTML element—like a
<div>in the footer, the main<h1>title, or a "Buy Now" button—is actually visible on the page. This is your green light that the critical content has loaded.Wait for Network Idle: This is a more advanced technique where you monitor the page's network activity. The script waits until there are no new network requests for a short period, which is a strong signal that the page has finished loading all its dynamic parts.
Programmatically Trigger Scrolls: A lot of sites use lazy loading to save bandwidth, which means images and other content only load as you scroll down. To get a complete full-page screenshot, you have to mimic this behavior. This involves programmatically scrolling the page from top to bottom, pausing just long enough after each scroll for new content to load in. Our guide on how to take a full page screenshot in Chrome digs deeper into how this works under the hood.
Bypassing Pop-Ups and Content Blockers
Nothing ruins a perfectly good automated screenshot faster than a massive cookie banner or a "Subscribe to Our Newsletter!" pop-up plastered over the page. These overlays are a constant headache in automated visual testing, turning what should be a clean capture into a useless picture of a consent form. Learning how to get around them is a non-negotiable skill for reliable screenshot automation.
It’s like trying to take a photo of a beautiful landscape, only to have someone step right in front of your camera at the last second. Your automation script needs to be smart enough to politely ask them to move before snapping the picture. Just waiting a few seconds won't cut it; these pop-ups are designed to demand attention and won't go away until they're dealt with.
This little flowchart nails the core logic: always check if the content is complete and unobstructed before you hit the capture button.
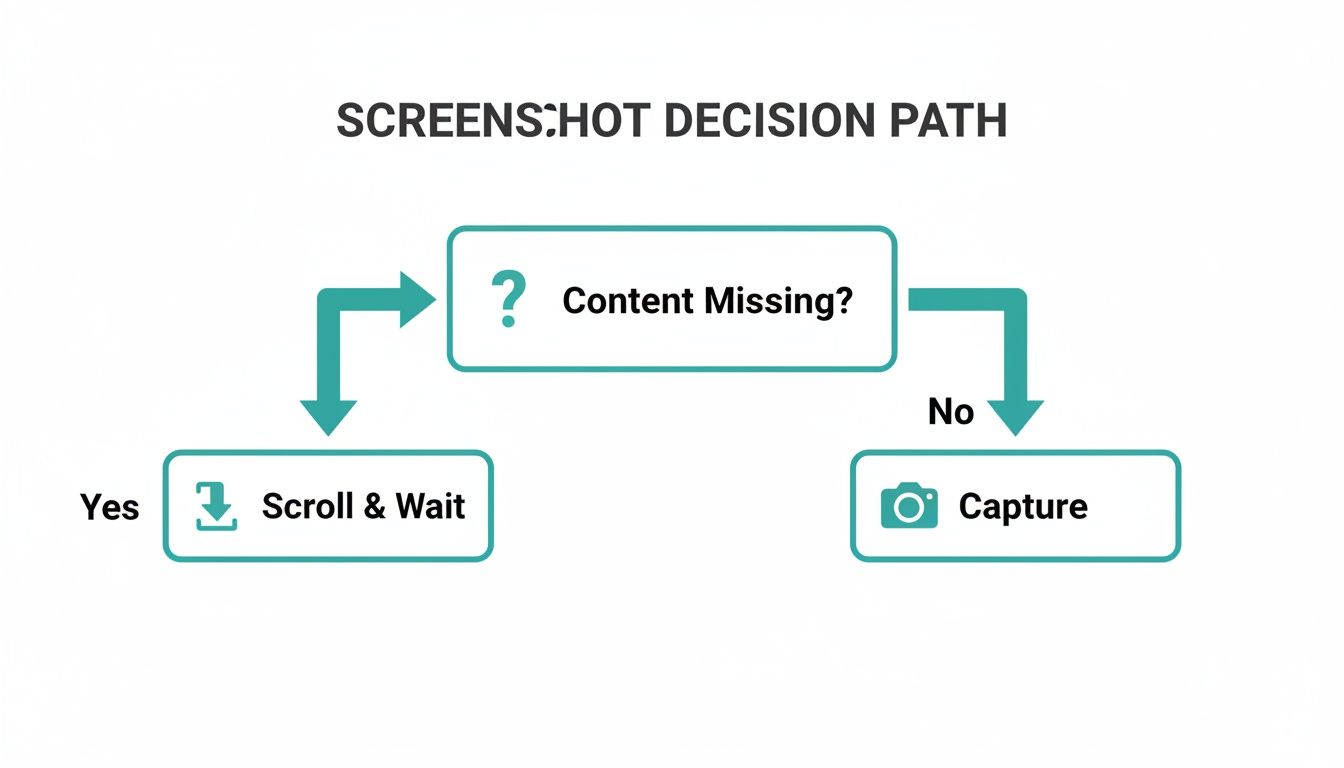
This decision-making process is the foundation for handling unexpected overlays and ensuring you only capture what you intend to.
Simple Fixes With CSS Injection
Often, the most direct approach is the best one. You can tell the browser to simply ignore these visual roadblocks by injecting a tiny bit of CSS right before you take the screenshot. By targeting the pop-up's specific class or ID, you can make it vanish from view.
For example, if you find a pesky cookie banner with a class like .cookie-consent-banner, you can inject a CSS rule to hide it entirely.
A word of caution: This method is fast and incredibly effective for overlays you see all the time. But it's also a bit of a blunt instrument. If the website's developers change the CSS classes, your script will suddenly stop working, and those blockers will start popping up in your screenshots again.
This strategy works great for common culprits like:
- Cookie Banners: Usually the first thing to appear on a page load.
- Subscription Pop-Ups: Those modal windows asking for an email.
- Live Chat Widgets: Floating buttons that love to cover up footer content.
- Promotional Banners: Sticky bars at the top of the page announcing a sale.
Advanced Interaction With JavaScript
When just hiding an element won't do the trick, it's time for a more hands-on approach. Many modern overlays, especially for GDPR compliance, are more than just simple banners. If you just hide the pop-up, your script might never "accept" the cookies, which could stop other parts of the page from loading correctly.
In these situations, the most reliable solution is to make your script behave like a human. You can execute JavaScript to find and "click" the right button—whether it’s 'Accept All', 'Dismiss', or a little 'X' icon in the corner.
For every type of pop-up, there's a different way to tackle it. This quick-reference table breaks down the most common ones and how to handle them.
Common Screenshot Blockers And Mitigation Strategies
| Blocker Type | Technical Challenge | Primary Mitigation Strategy | Secondary Strategy |
|---|---|---|---|
| Cookie Banners | Simple modals requiring consent to proceed. | Interact with the "Accept" button via JavaScript. | Hide with CSS if no critical cookies are needed. |
| Newsletter Pop-ups | Timed or scroll-triggered overlays. | Click the 'close' icon or 'No thanks' link. | Manage cookies to prevent it from reappearing. |
| Live Chat Widgets | Persistent floating elements. | Inject CSS to set display: none !important;. |
N/A (CSS is usually sufficient). |
| Full-Screen Interstitials | Blocks all page interaction until an action is taken. | Replicate user action (e.g., click "Continue to Site"). | Cookie management after the first interaction. |
Ultimately, a combination of these strategies will give you the most resilient automation workflow.
Managing Cookies For a Cleaner Experience
For a truly robust solution, you can get ahead of the problem by managing the browser's cookies directly. Think about it: once you accept a site's cookie policy, it stores your consent in a cookie so it doesn't have to ask again. You can make your automation script do the exact same thing.
The workflow is pretty straightforward:
- First Visit: Your script loads the page, clicks the "Accept" button on the cookie banner, and then saves all the browser cookies to a file.
- Subsequent Visits: Before loading the page to take the screenshot, your script injects those saved cookies back into the browser.
This approach tricks the website into thinking your script is a returning visitor who has already given consent. It's an incredibly effective way to get clean captures because the overlays never even get a chance to appear. The key to a bulletproof capture system is layering these techniques—starting with a simple CSS hide and escalating to JavaScript clicks or cookie management as needed.
Achieving Geographic and Device Consistency
A website isn't a single, static thing. It's more like a chameleon, changing its appearance based on who is looking and where they are in the world. While this adaptability is great for business, it creates a massive headache for automated screenshots. What you capture on your screen in New York might be completely different from what a user sees on their iPhone in Tokyo.
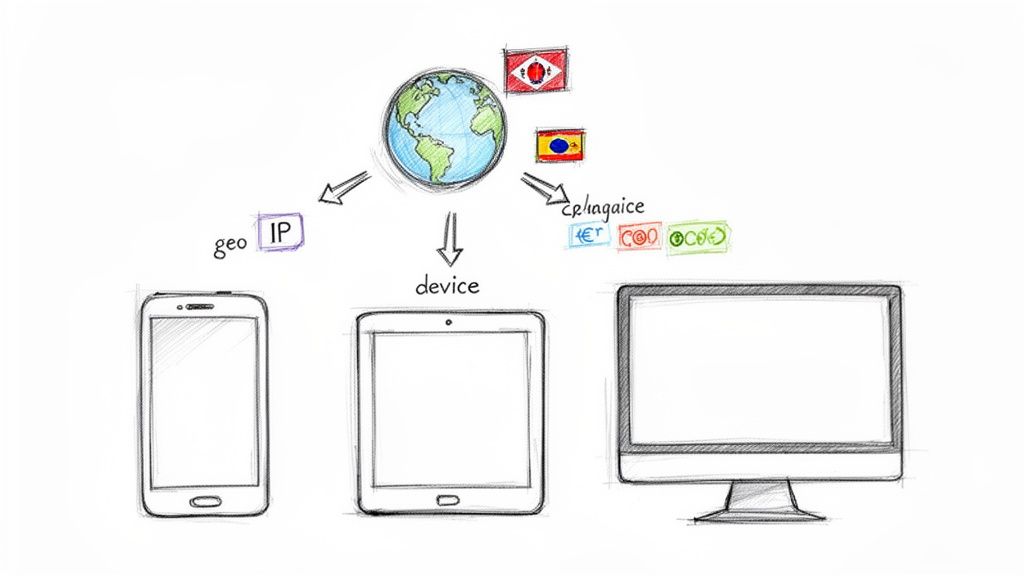
This inconsistency boils down to two powerful web technologies: geotargeting and responsive design. Geotargeting lets a site serve up different content—like languages, currencies, or special promotions—based on a visitor’s IP address. At the same time, responsive design completely reshuffles a page's layout to fit any screen, from a sprawling 4K monitor to a tiny phone.
If you don't account for these variables, your screenshots will be a lie. They won't accurately represent the real user experience you're trying to capture. The key is emulation—basically, telling your capture tool to pretend it's a specific user, in a specific place, on a specific device.
Simulating Different Geographic Locations
To capture content meant for a different country, you have to make your screenshot tool look like it’s actually there. The trick is to use a proxy server. A proxy acts as a middleman, taking your web request and routing it through its own IP address, effectively masking your server's true location.
By sending your screenshot request through a proxy server based in, say, Germany, the target website will treat your tool like any other German visitor.
- For an e-commerce site: Using a German proxy might suddenly switch all prices to Euros (€) and reveal shipping options only available within the EU.
- For a media site: A request through a UK proxy could unlock content that's normally blocked elsewhere due to licensing deals.
This is non-negotiable for any business that needs to check international ad campaigns, monitor local pricing strategies, or just make sure their brand messaging is consistent everywhere. Without it, you're only seeing one small piece of a much larger, global picture.
A website's content is tailored to its audience's location and device. Accurate screenshots require you to step into the shoes of that audience by precisely emulating their browsing environment.
Mimicking Various Devices and Screen Sizes
Just as location changes what a user sees, their device completely changes how they see it. A screenshot taken with a standard desktop viewport is totally useless for understanding how a site looks and feels for the over 60% of people browsing on their phones.
To get device consistency right, you have to configure your headless browser to mimic the specific traits of different devices. This is about more than just setting the width and height of the viewport.
Proper device emulation means tweaking several key parameters:
- Viewport Dimensions: This is the visible screen area, like
375x812for an iPhone 13. - Device Scale Factor: This handles high-resolution screens (think Apple's Retina displays) to make sure text and images are sharp, not blurry. Many modern phones have a scale factor of 2 or 3. Our guide on making high resolution screenshots dives deeper into this.
- User-Agent String: This is a bit of text the browser sends to identify itself, telling the server "I'm Chrome on Android" or "I'm Safari on an iPhone."
- Touch Emulation: This setting signals that the device has a touch screen, which can change how interactive elements like sliders or menus behave.
When you dial in these settings correctly, you can generate pixel-perfect screenshots that truly reflect the user experience on any device, from a Samsung Galaxy to a 27-inch iMac. This level of detail is critical for visual regression testing, QA, and simply confirming that your responsive design actually works for everyone.
Managing Automation: Scale, Performance, and Cost
Taking a single website screenshot is easy. But what about a hundred? A thousand? Or a million? Suddenly, a simple task explodes into a huge operational and financial headache. As you scale up from a few tests to enterprise-level automation, the conversation has to shift from technical hacks to the real-world business problems of performance, reliability, and cost.
At this point, you're facing a fundamental fork in the road: do you build a solution in-house, or do you subscribe to a third-party API? This isn't just a coding decision. It's a strategic trade-off between control and convenience, between a big upfront investment and a predictable monthly bill. Each path will dramatically affect your budget, your team's workload, and your ability to handle all the other challenges that come with website screenshots.
Getting this right is more important than ever. The global market for this kind of software was pegged at around USD 250 million in 2023 and is on track to more than double to about USD 550 million by 2032. That's a huge jump, and it shows just how much marketing, QA, and even legal teams are coming to rely on automated visual records. You can dig into the numbers yourself in this market analysis on DataIntelo.
The "Do It Yourself" Approach
Building your own screenshot system gives you total control, but that control comes with a hefty, often hidden, price tag. At first, it might seem cheap to just spin up a few servers running Puppeteer or Playwright. But as your volume climbs, the complexity skyrockets.
Before you know it, your team is on the hook for:
- Managing a Browser Fleet: You're now in the business of maintaining and scaling a fleet of headless browsers, which eats up a ton of server resources.
- Wrangling Proxy Networks: To get around IP blocks and capture localized content, you'll have to subscribe to and manage pricey residential or data center proxy networks.
- Building Smart Retry Logic: Captures will inevitably fail. It's on your team to build sophisticated queuing and retry systems to handle network blips or rendering errors.
- Endless Maintenance: Websites are a moving target. Your engineers will be constantly pulled away to update scripts for new cookie banners, layout shifts, and all the other curveballs the web throws.
This path turns a straightforward business need into a complicated, never-ending infrastructure project that requires dedicated engineering time.
The Third-Party API Advantage
On the flip side, using a dedicated service like a website screenshot API makes all that complexity just… disappear. Instead of building and babysitting an entire system, your team makes a single API call and gets a perfect screenshot back in seconds.
The real value of a screenshot API isn't just taking pictures. It's offloading the massive operational burden of doing it reliably at scale. You're buying back your developers' time and focus.
With a commercial API, the benefits are obvious right away. You get predictable, pay-as-you-go pricing without getting blindsided by a massive server bill. All the messy backend work—managing browser instances, rotating proxies, handling errors—is completely handled for you. Advanced features like ad blocking, dismissing cookie pop-ups, and grabbing full-page captures are often just simple parameters you add to the API call.
For most companies, it boils down to one question: is your core business building screenshot infrastructure, or is it building your actual product? By outsourcing the task, you get a more reliable and feature-rich solution at a lower total cost, freeing up your team to focus on the work that actually moves the needle for your customers.
Navigating Privacy Regulations and Compliance
It's easy to get lost in the weeds of technical glitches and rendering bugs, but one of the biggest challenges with programmatic screenshots has nothing to do with code—it's about the law. In a world where regulations like GDPR and CCPA carry serious weight, automated screenshots can quickly turn into a major compliance headache if you're not careful.
The heart of the problem is accidentally capturing personally identifiable information (PII). Picture this: your script snaps a shot of a checkout page where a user's details are pre-filled, or a personalized welcome banner displays a customer's name. Suddenly, your image archive is no longer just pixels; it's a database of sensitive information, and you're on the hook for protecting it.
The Hidden Risk of Personal Data
This isn't just a hypothetical scenario. For many businesses that depend on visual data, navigating privacy and compliance is becoming a genuine roadblock. As companies capture visual records of their websites, they can unintentionally store personal data, which immediately triggers legal duties under global privacy laws. It's a growing hurdle for any kind of automation, as noted in market analysis on how privacy shapes the screenshot software market on Verified Market Reports.
Grabbing a screenshot isn’t always a clean, anonymous act. PII has a sneaky way of showing up where you least expect it:
- Pre-filled Forms: Usernames, email addresses, or phone numbers already sitting in form fields.
- Personalized Content: Dynamic greetings like, "Welcome back, Jane!"
- Session-Specific Details: Information displayed only when a user is logged in.
- Location-Based Elements: Banners that change based on a user's detected city or region.
You simply can't afford to ignore this. A single misstep could lead to massive fines and do lasting damage to your company's reputation.
Building a Compliant Screenshot Workflow
To stay out of trouble, you have to build privacy into your screenshot process from the very beginning. The goal isn't just to get the shot, but to do it in a way that respects data protection principles from the ground up. You want the visual information you need, without ever touching personal data.
A compliant screenshot process operates on a simple principle: capture the website as an anonymous visitor would see it. This default state is your safest and most reliable baseline.
Here are a few practical strategies to build a privacy-first workflow:
- Use Incognito or Logged-Out States: This is your first and best line of defense. Always run your headless browser in an incognito or private mode to ensure no existing cookies or user sessions can personalize the page.
- Automate Data Redaction: For situations where some data might still slip through, you can write scripts to automatically find and blur sensitive areas before saving the image. This is often done by targeting specific HTML elements known to contain PII, like form inputs or user profile sections.
- Establish Clear Retention Policies: Don't be a data hoarder. Create a clear policy that dictates how long screenshots are kept and when they are securely deleted. The less data you hold onto, the lower your long-term risk.
Got Questions? We've Got Answers
Taking screenshots of websites automatically sounds straightforward, but as you get into it, a lot of questions pop up. Let's tackle some of the most common ones we hear from developers and QA teams who are deep in the trenches with this stuff.
What's The Best Tool For Automated Website Screenshots?
This is the big one, and the honest answer is: it depends entirely on what you're trying to do and the resources you have.
If you're a developer who loves to get your hands dirty and needs granular control over every little detail, open-source libraries like Puppeteer (for Node.js) or Playwright (which works with multiple languages) are fantastic. They put you directly in the driver's seat of a headless browser, so you can script out complex user journeys. The tradeoff? You're on the hook for everything—managing the servers, handling proxies, and writing your own error-handling logic. It’s powerful, but it's a lot of work.
For most businesses, the goal is just to get reliable, high-quality screenshots at scale without the DevOps headache. That's where a dedicated screenshot API really shines. These services manage all the tricky infrastructure behind the scenes, so you can get a perfect capture with a simple API call.
How Can I Capture The Entire Web Page, Not Just What's Visible?
You're talking about a "full page" screenshot, and it's a super common need. The part of a website you see without scrolling is called the "viewport." A full page screenshot grabs everything, all the way down to the footer.
Thankfully, most tools have a built-in option for this. In a library like Puppeteer, it’s as simple as adding a flag to your options, like fullPage: true. Screenshot APIs work the same way, usually offering a parameter you can set in your request. Under the hood, the tool cleverly resizes the browser window to match the page's total height right before it snaps the picture.
Why Do My Screenshots Sometimes Come Out As Blank White Images?
Ah, the dreaded blank screenshot. This is almost always a timing issue. It means your tool took the picture before the website’s JavaScript had a chance to finish rendering all the content. Essentially, you captured the initial blank HTML shell before the good stuff loaded in.
The solution is to use a smarter waiting strategy.
Don't just tell your script to wait for a fixed time, like 3 seconds. That's a recipe for failure. A much better approach is to instruct the tool to wait until a specific element on the page—like the main content div (
#content) or the site footer (<footer>)—is actually visible.
This simple change ensures you're only taking the screenshot after the page is truly ready.
Is It Possible To Take Screenshots That Look Like They're From Different Countries?
Absolutely. The magic behind this is using proxy servers. A huge number of websites change their content, language, or currency based on a visitor's IP address, which reveals their geographic location.
To get around this, you just route your request through a proxy server in the country you want to simulate. For example, by using a proxy in Germany, your screenshot tool looks like a local German visitor to the website. The best screenshot APIs build this feature right in, letting you simply pass a country code in your API request. They handle all the complex proxy routing for you.
Ready to skip the headaches and get perfect screenshots every time? ScreenshotEngine offers a powerful API built for developers. It handles dynamic content, blocks annoying ads, and delivers pixel-perfect captures in milliseconds. Get started for free today.