When you need to get a screenshot, you're really looking at three main paths: hitting a keyboard shortcut, writing code to control a browser, or using a specialized screenshot API.
Sure, manual captures work fine for grabbing a quick image here and there. But for anything serious in development, testing, or data gathering, you need an automated solution that’s fast, scalable, and won't fall over when you need it most.
Choosing Your Screenshot Retrieval Method
So, how do you decide which way to go? It all comes down to your end goal. Are you just snagging an image for a blog post, or are you building a visual testing suite that needs to process thousands of URLs a day?
Each approach has its own set of trade-offs—complexity, cost, and how well it scales. Getting a handle on these differences is the first real step to building a workflow you can count on.
Manual methods, like the built-in shortcuts on Windows and macOS, are dead simple and always available. They're perfect for those one-off tasks where you're right there to press the keys. But for anything more demanding, you'll need to turn to a more programmatic solution.
Screenshot Retrieval Methods at a Glance
To make it even clearer, I've put together a quick comparison table. This should help you see at a glance which method fits your project best.
| Method | Best For | Complexity | Scalability | Reliability |
|---|---|---|---|---|
| Manual OS Shortcuts | Quick, one-off captures for personal use. | Very Low | None | High (for single use) |
| Headless Browsers | Custom automation, complex interactions. | High | Medium | Varies; needs constant upkeep. |
| Screenshot API | High-volume, reliable, and automated captures. | Very Low | High | Very High |
As you can see, the right tool really depends on the job. A simple shortcut is great for a personal note, but it's not going to cut it for a production-level application.
Breaking Down the Options
The choice between running your own headless browsers and using a commercial screenshot API often feels a lot like the classic custom software vs off-the-shelf solutions debate. Do you want total control at the cost of constant maintenance, or would you rather have a managed service that just works?
Let's look at each one.
Manual OS Shortcuts: These are the instant, built-in tools perfect for capturing exactly what you see on your screen. They're straightforward, but that’s about it. If you’re a Linux user looking for more power, our guide on how to take screenshots in Linux dives into some handy command-line options.
Headless Browsers (Puppeteer/Playwright): With tools like these, you get complete programmatic control over a real browser. They are incredibly powerful for custom automation scripts but come with a steep learning curve and a ton of overhead. You're on the hook for setup, server maintenance, and handling all the errors that pop up.
Screenshot API (ScreenshotEngine): This is the "done for you" approach. A dedicated service handles all the complex infrastructure. You just make a simple API request and get a clean, high-quality screenshot back. The best ones even automatically deal with annoying cookie popups and ads.
This decision tree gives you a great visual for picking the right method based on how much automation and simplicity your project requires.
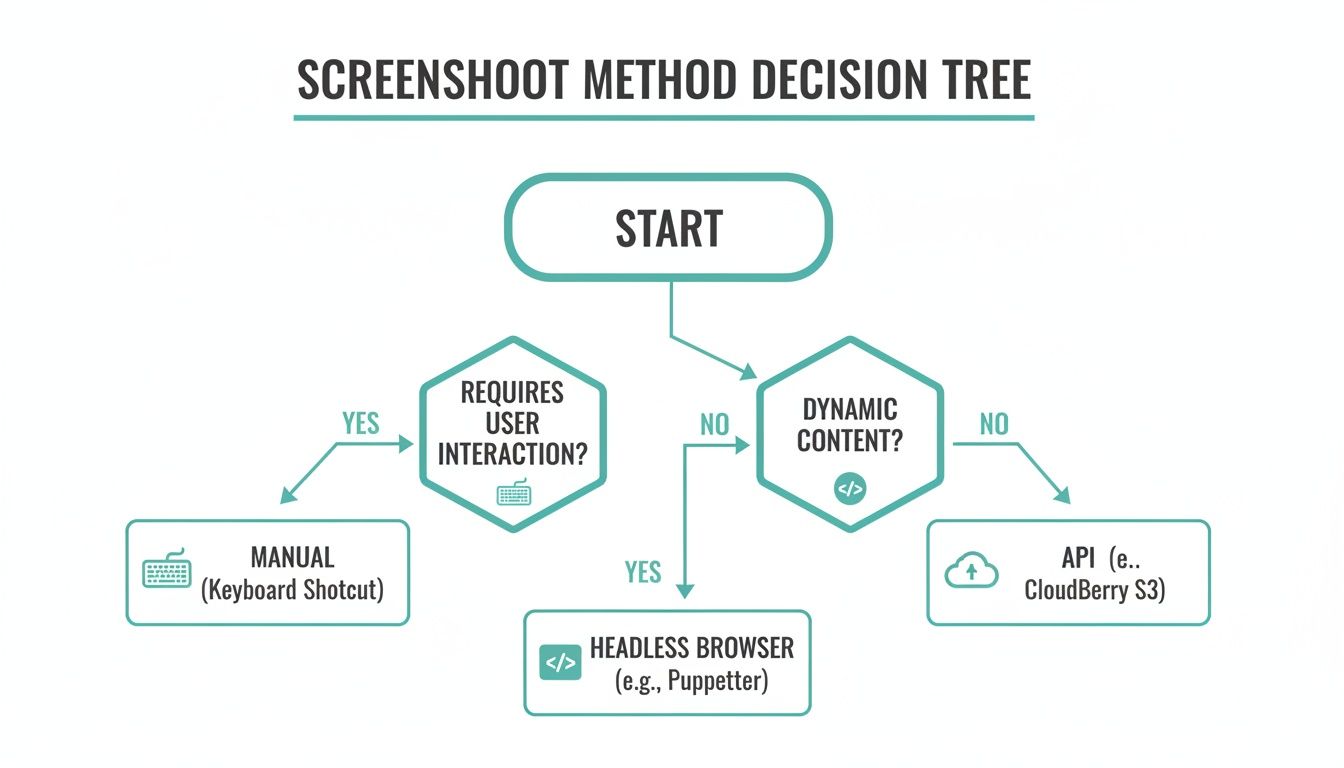
It’s pretty clear: the more you need to scale and automate, the more sense it makes to move from manual methods to a dedicated API. For developers building serious applications, an API frees you from the headache of managing your own browser automation scripts and all the infrastructure that comes with it.
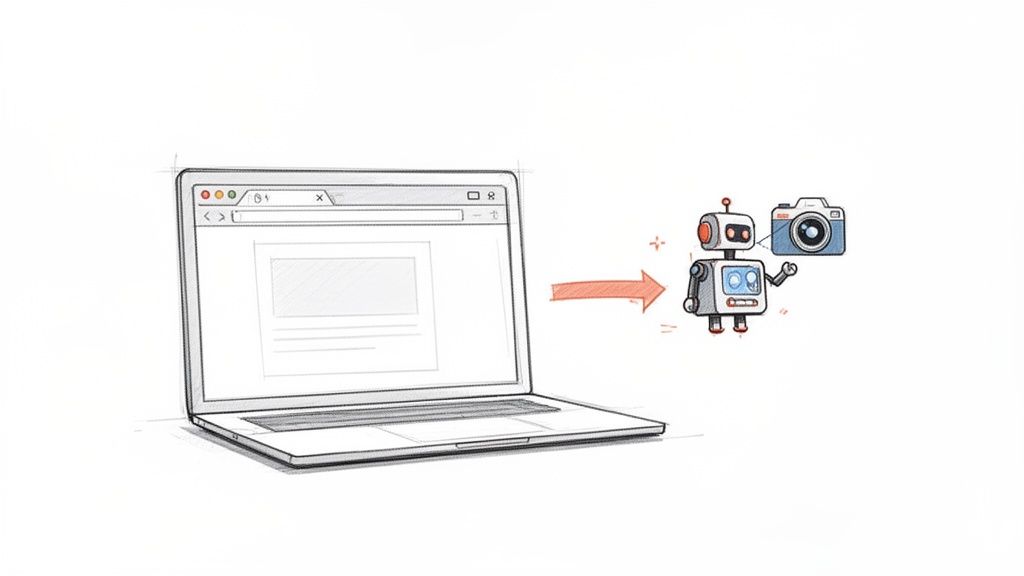
Taking Screenshots Programmatically with Headless Browsers
When you need to automate screen captures, manual methods just won't cut it. This is where headless browsers come in—they are the workhorses for programmatic screenshotting. A headless browser is a real browser, like Chrome or Firefox, but it runs in the background without any visible user interface. You control it entirely with code.
Think of it as having a silent, invisible robot that can open a browser, navigate to any URL, wait for the page to fully load, and then snap a perfect picture. This capability is the backbone of countless automated workflows, from visual regression testing and website monitoring to generating those slick social media link previews we see everywhere. The three main players in this field are Puppeteer, Playwright, and Selenium.
Getting Started with Puppeteer
If you're in the Node.js world, Puppeteer is often the first tool you'll reach for. It's maintained by the Google Chrome team and gives you a clean, high-level API to control Chrome or Chromium. The setup is straightforward, and the documentation is excellent.
Here’s what the official Puppeteer documentation website looks like, giving you a sense of its developer-focused approach.

The site immediately throws a simple code example at you, which is a great sign. It shows you just how quickly you can get up and running.
Let's look at a quick JavaScript example to grab a full-page screenshot. This script will launch a browser, open a new tab, go to a URL, and save the image.
const puppeteer = require('puppeteer');
(async () => { // Launch the browser in headless mode const browser = await puppeteer.launch(); const page = await browser.newPage();
// Navigate to the target page await page.goto('https://example.com');
// Take a screenshot of the full page await page.screenshot({ path: 'example-puppeteer.png', fullPage: true });
// Close the browser await browser.close(); })();
A Pro Tip: That
fullPage: trueoption is absolutely essential. If you leave it out, Puppeteer only captures the visible portion of the page (the "viewport"), which is rarely what you want for archiving or comprehensive testing. For a deeper dive, check out our guide on how to take a full screenshot of a website.
Exploring Playwright for Cross-Browser Automation
Playwright is a newer tool from Microsoft that has been gaining a ton of momentum. Its killer feature is its out-of-the-box support for multiple browsers. With a single API, you can automate Chromium, Firefox, and WebKit (the engine behind Safari). This makes it a fantastic choice for testing how your site looks and feels across different rendering engines.
The API is intentionally similar to Puppeteer's, which makes it easy to switch if you're already familiar with one. Here's how you'd perform the exact same task with Playwright:
const { chromium } = require('playwright');
(async () => { // Launch the browser const browser = await chromium.launch(); const page = await browser.newPage();
// Navigate to the page await page.goto('https://example.com');
// Capture the full page await page.screenshot({ path: 'example-playwright.png', fullPage: true });
// Close the browser await browser.close(); })();
See how similar that was? It's a smart design choice. Playwright also boasts excellent "auto-waiting" capabilities, meaning it intelligently waits for elements to become available before trying to interact with them, which can make your scripts far more robust and less flaky.
The Role of Selenium in Web Automation
Selenium has been the undisputed king of browser automation for years. It supports a huge variety of programming languages (like Java, C#, Python, and Ruby) and has a massive, mature community. While tools like Puppeteer and Playwright are often faster and simpler for basic screenshotting in Node.js, Selenium is still a titan in large-scale, enterprise-level testing across many platforms.
Using Selenium with JavaScript is a bit more involved, mainly because it requires managing a separate WebDriver executable.
const { Builder } = require('selenium-webdriver'); const chrome = require('selenium-webdriver/chrome'); const fs = require('fs');
(async () => { let driver = await new Builder() .forBrowser('chrome') .setChromeOptions(new chrome.Options().headless()) .build();
try { await driver.get('https://example.com'); // Selenium's screenshot returns a Base64 string let encodedString = await driver.takeScreenshot(); await fs.promises.writeFile('example-selenium.png', encodedString, 'base64'); } finally { await driver.quit(); } })();
One important difference to note here is that Selenium’s takeScreenshot() method doesn't save a file directly. Instead, it returns a Base64-encoded string of the image, which you then have to write to a file yourself. For a more technical breakdown, you can find more details about programmatic screenshot capture returning Base64.
Handling Real-World Challenges
Unfortunately, just navigating to a page and snapping a picture rarely works perfectly on modern websites. You'll quickly hit roadblocks that require more clever solutions.
Common Problems and How to Solve Them
- Lazy-Loaded Images: Many sites don't load images until you scroll them into view. To capture everything, you need to write code that simulates scrolling to the bottom of the page before taking the screenshot.
- Dynamic Content: If content is loaded with JavaScript after the initial page load, your script might take the picture too early. The solution is to make your script wait for a specific element to appear or for all network activity to settle down.
- Cookie Banners and Popups: These are the bane of automation. They block the view and can ruin your screenshot. Your script will need logic to find and click the "accept" or "close" button to dismiss them first.
The need to solve these problems is growing fast. The global daily average screen time is projected to hit 6 hours and 58 minutes in 2025, fueling a massive Website Screenshot Software market expected to grow from $500 million in 2025 to $1.2 billion by 2033—a 12% CAGR. Developers often find themselves wrestling with headless browsers that timeout on 18% of JavaScript-heavy sites. This is a significant bottleneck, especially when compared to dedicated screenshot APIs that render cleanly, automatically block distractions on 80% of cluttered sites, and easily scale for AI data collection where visual datasets have grown 35% annually.
The Hidden Costs of Self-Hosting Headless Browsers
At first glance, using a headless browser like Puppeteer or Playwright to grab a screenshot feels like a win. You get total control, you can build custom scripts, and it seems free. But what often starts as a simple script can quickly spiral into a major infrastructure headache, saddling your team with hidden costs you only discover when you're in too deep.
The initial appeal is obvious—why pay for a service when you can build it yourself? The problem is, you're not eliminating the cost; you're just shifting it from a predictable subscription to your engineering team's valuable time and your server budget.
The Heavy Toll on Infrastructure
Running a single headless browser instance isn't too bad. The real trouble starts when you need to scale up for concurrent requests, which is a must for any serious application doing visual testing or large-scale data gathering.
Each browser instance is a resource glutton, chewing up a surprising amount of CPU and memory. Firing up just a handful of simultaneous Chrome instances can easily bring a standard server to its knees, causing jobs to fail and performance to plummet. Before you know it, you’re provisioning bigger, more expensive servers just to keep things from falling over.
Here's where your resources will go:
- High CPU Usage: Modern, JavaScript-heavy websites require a lot of processing power to render correctly.
- Intensive Memory Consumption: Every browser tab can eat up hundreds of megabytes of RAM. This adds up incredibly fast when running jobs in parallel.
- Complex Networking: You'll be on the hook for managing network rules, handling outbound requests, and dealing with the inevitable IP blocking.
This constant resource juggling can become a full-time job, pulling your engineers away from building your actual product. Your focus shifts from solving a business problem to just keeping the screenshot service online.
The Endless Cycle of Maintenance
Beyond the raw hardware costs, the maintenance overhead is a beast. The web is constantly changing, and so are browsers. They're updated frequently to patch security holes and add features, which puts you on a perpetual maintenance treadmill.
An outdated browser driver can bring your entire screenshotting pipeline to a screeching halt. I’ve personally burned hours debugging a critical failure that turned out to be a tiny version mismatch between Chrome and ChromeDriver. It's a maddeningly frustrating problem that a managed service would have prevented entirely.
Your team suddenly becomes responsible for a lot of tedious work:
- Updating Browser Binaries: Constantly installing new versions of Chrome, Firefox, or WebKit.
- Managing WebDriver Versions: Making sure your drivers (like ChromeDriver or GeckoDriver) are in perfect sync with the browser versions.
- Patching System Libraries: Headless browsers lean on a ton of underlying system libraries that also need to be kept secure and up-to-date.
If you fall behind on this cycle, you introduce instability and security risks into your application. Your "simple" task has morphed into a complex piece of infrastructure with its own burdensome release schedule.
Unpredictability and Reliability Nightmares
Perhaps the biggest hidden cost is the sheer unpredictability of it all. Headless browsers weren't built for massive, unattended automation, and it shows. They are susceptible to a whole host of bizarre issues that are incredibly difficult to diagnose in a server environment.
You'll quickly become familiar with common reliability headaches:
- Random Crashes: A browser instance might crash for no discernible reason, killing your job and leaving you without a screenshot.
- Memory Leaks: If browser contexts aren't managed perfectly, they can lead to memory leaks that slowly degrade server performance until it finally gives up.
- Zombie Processes: Failed browser sessions often leave behind "zombie" processes that sit there consuming server resources while doing absolutely nothing.
These aren't just edge cases; they are the day-to-day reality of running a fleet of headless browsers at any kind of scale. When you need to retrieve thousands of screenshots a day reliably, a DIY setup often gives a frustratingly inconsistent answer. This is precisely why so many experienced engineering teams eventually decide to offload the complexity to a specialized API.
The Modern Solution: Using a Screenshot API
While headless browsers give you raw power, they come with a hefty price tag: constant infrastructure management, browser updates, and debugging those frustrating, random crashes. It's a lot of work. This reality has opened the door for a much smarter, developer-first approach that gets you the same result without the headaches.
Say hello to the dedicated screenshot API.
Instead of wrestling with complex scripts to launch a browser, navigate to a page, and snap a picture, you just make a single, clean API call. The service handles all the heavy lifting on its own optimized infrastructure, sending you back a perfect screenshot, often in milliseconds.
The whole game changes. You stop asking, "How do I build and maintain a screenshot system?" and start asking, "How do I get this screenshot with one line of code?"
Seamless Integration with a Simple API Call
The real beauty of a service like ScreenshotEngine is just how easy it is to get started. You can plug high-quality screenshot capabilities into any application with a basic HTTP request. It doesn't matter what your tech stack is—Node.js, Python, Ruby, or even a simple shell script. You get to focus on building your product, not on becoming a browser automation expert.
Let's see just how simple it is. Here are a few examples that all grab a full-page screenshot of Apple's homepage, no complex setup required.
JavaScript Example (Node.js) const https = require('https'); const fs = require('fs');
const apiKey = 'YOUR_API_KEY';
const url = encodeURIComponent('https://www.apple.com');
const apiUrl = https://api.screenshotengine.com/v1/screenshot?url=${url}&token=${apiKey};
https.get(apiUrl, (res) => {
const fileStream = fs.createWriteStream('apple-screenshot.png');
res.pipe(fileStream);
fileStream.on('finish', () => {
console.log('Screenshot saved!');
});
}).on('error', (e) => {
console.error(Got error: ${e.message});
});
Python Example import requests
api_key = 'YOUR_API_KEY' url = 'https://www.apple.com' api_url = f'https://api.screenshotengine.com/v1/screenshot?token={api_key}&url={url}'
response = requests.get(api_url)
if response.status_code == 200: with open('apple-screenshot.png', 'wb') as f: f.write(response.content) print('Screenshot saved successfully.') else: print(f'Failed to retrieve screenshot. Status code: {response.status_code}')
cURL Example (Command Line)
curl "https://api.screenshotengine.com/v1/screenshot?token=YOUR_API_KEY&url=https%3A%2F%2Fwww.apple.com"
--output apple-screenshot.png
These snippets tell the whole story: one endpoint, predictable results. If you want to dive deeper into all the options available, we've put together a comprehensive guide to using a screenshot API.
Solving Common Headless Browser Pain Points
A solid screenshot API does more than just take a picture. It’s built to handle the messy reality of the modern web, solving the most common frustrations that come with DIY headless browser setups.
The ScreenshotEngine homepage, for instance, shows off this developer-first thinking with its clean design and interactive API playground. You can test parameters and see the results instantly.
Here are a few of the headaches a good API just makes disappear:
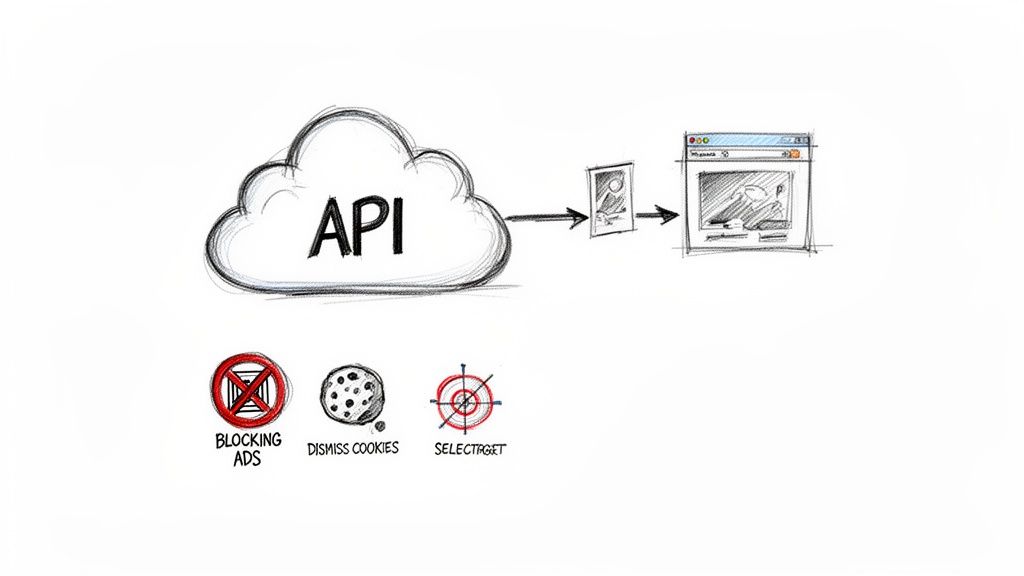
- Automatic Ad and Cookie Banner Blocking: The API is smart enough to detect and dismiss most popups, overlays, and cookie consent notices before taking the shot. The result is a clean, unobstructed view of the page's actual content.
- Targeting Specific CSS Selectors: Forget capturing a massive page and cropping it later. You can zero in on a specific element by passing a selector like
selector=#main-chartto get a perfectly cropped image of just that component. This is perfect for tracking data visualizations or user reviews. - Full-Page Capture by Default: The API reliably captures the entire length of a webpage, correctly handling tricky things like lazy-loaded images and infinite scroll content that often break simple scripts.
Building this yourself is harder than it looks. As the global Website Screenshot Software market races toward $1.2 billion by 2033, developers are learning that DIY solutions with tools like Puppeteer often fail 20-30% of the time on complex sites. A dedicated API cuts that failure rate to under 5%, making things like large-scale visual regression testing finally possible. Features like dark mode toggles and WebP for 40% smaller files are just a parameter away. You can find more market insights on datainsightsmarket.com.
Self-Hosted Headless Browser vs ScreenshotEngine API
To really understand the difference, let's break down what you're signing up for when you choose to build your own solution versus using a dedicated service.
| Feature | Self-Hosted (Puppeteer/Playwright) | ScreenshotEngine API |
|---|---|---|
| Initial Setup | Requires server provisioning, dependency installation, and custom code. | Zero setup. Start making API calls immediately with any programming language. |
| Maintenance | Constant updates for browsers, libraries, and OS. Debugging needed. | Fully managed. No maintenance, updates, or debugging required. |
| Reliability | Prone to crashes, hangs, and memory leaks. Inconsistent on complex sites. | Highly available (99.9% uptime). Optimized for stability and consistent rendering. |
| Scalability | Requires manual scaling with load balancers and more servers. | Automatically scales to handle thousands of concurrent requests without any effort. |
| Advanced Features | Requires complex custom code for popups, lazy loading, and fonts. | Built-in solutions for ad blocking, cookie banners, full-page capture, and more. |
| Geographic Capture | Limited to your server's location. Requires proxies for other regions. | Capture from multiple global locations via a simple API parameter. |
| Cost | High operational cost: server fees, developer time, maintenance. | Predictable, pay-as-you-go pricing. Often cheaper than the total cost of self-hosting. |
The table makes it clear: while self-hosting offers control, a service like ScreenshotEngine delivers speed, reliability, and lets your team focus on what they do best.
Advanced Customization Made Easy
Beyond just solving problems, a powerful API gives you incredible flexibility through simple URL parameters. You can tailor every single screenshot to your exact needs without writing a line of custom browser-launching code.
You get fine-grained control over the final image.
- Set Custom Resolutions and Viewports: Easily simulate different devices by setting width and height. Use
viewport_width=1920&viewport_height=1080for a desktop view orviewport_width=375&viewport_height=812for a mobile phone. - Toggle Dark or Light Mode: Need to see a site's dark theme? Just add
dark_mode=true. It's that easy. - Choose Your Output Format: Get the perfect image format for your use case, whether it's lossless PNG, balanced JPEG, or high-performance WebP.
- Inject Custom CSS or JavaScript: You can even apply your own styles or run a script on the page right before the screenshot is taken. This is great for hiding specific elements or modifying text on the fly.
This level of control, combined with the rock-solid reliability of a managed service, makes a screenshot API the best choice for almost any project that needs programmatic screenshots at scale.
Practical Use Cases for Automated Screenshots
Knowing the technical side of how to retrieve a screenshot is great, but the real magic happens when you apply that skill to solve actual problems. Programmatic screenshots aren't just a neat developer trick; they're a workhorse for boosting efficiency, locking down quality, and gathering critical data across the business. It’s the difference between just taking a picture and building an automated, data-driven machine.
Think of these automated captures as a definitive source of truth—an unbiased, pixel-perfect record of exactly what a user sees at a specific moment. This opens up a ton of strategic applications that would be a nightmare (or just plain impossible) to do by hand.
Enhancing Quality Assurance Workflows
If you're a QA engineer, the most direct win is visual regression testing. The concept is straightforward but vital: make sure new code doesn't unintentionally wreck the user interface. Manually clicking through every page on every device after each deployment is a recipe for missed bugs and burnout.
Instead, an automated script can run through critical user paths, retrieve a screenshot at each stage, and compare it against an approved "baseline" image. Any pixel that's out of place flags a potential regression, so you can catch it long before a customer ever does.
- Catch Unintended Style Changes: A seemingly small CSS tweak can cause chaos elsewhere. Automated comparisons instantly detect subtle shifts in layout, fonts, or colors that the human eye would easily overlook.
- Verify Responsive Designs: You can script captures across a range of viewport sizes—mobile, tablet, and desktop—to quickly confirm your site's responsiveness and squash layout issues on different devices.
- Validate Dynamic Content: For pages that feature charts, graphs, or data visualizations, you can capture just those elements to ensure they're rendering correctly with the right information.
Automating SEO and Marketing Intelligence
In the cutthroat world of digital marketing, you have to keep a constant pulse on your brand's online footprint. Automated screenshots are a fantastic way to monitor your most important channels at scale.
For example, SEO specialists can completely automate the chore of tracking search engine results pages (SERPs). A scheduled job can run a search for your target keywords and capture the results, giving you a historical timeline of ranking shifts and what your competitors are up to. You can even check how your links look on social media by capturing the link previews generated by platforms like X or Facebook.
As global daily social media screen time is set to climb to 2 hours and 41 minutes in 2025, the demand for programmatic access to visual web content is exploding. For QA engineers, manual visual regression tests on dynamic sites fail 25% of the time, whereas a reliable API can ensure 99% reliability by blocking popups that clutter 60% of top websites. SEO teams are also saving up to 70% of their time by using element-specific captures to track SERPs instead of wrestling with browser automation. You can read more about these social media screen time trends.
Additional High-Impact Applications
The usefulness of automated screenshots goes well beyond just QA and SEO. These visual records have found a home in all sorts of domains.
- Website Archiving and Compliance: Industries like finance and healthcare often have strict legal mandates to keep records of their web content. Setting up automated daily or weekly captures creates a verifiable archive that satisfies compliance officers.
- Competitor Monitoring: Keep tabs on your rivals by regularly capturing their pricing pages, new product announcements, or marketing campaigns. It’s an easy way to stay informed without manual effort.
- Generating AI Training Data: High-quality, labeled screenshots are gold for training machine learning models, especially those used for visual search or identifying specific UI components.
Common Screenshot Retrieval Questions
Once you start digging into automated screenshot workflows, the same practical questions tend to pop up. Moving from a simple script to a real-world application uncovers all sorts of quirks—from choosing the right image format to dealing with pesky pop-ups and figuring out how to scale the whole operation. Getting these details right is what separates a brittle script from a rock-solid system.
![]()
We've pulled together the most common questions we hear from developers to give you clear, no-nonsense answers that will help you build better.
How Do I Take a Screenshot of a Specific Element?
This is a big one. While your operating system’s built-in tools make you manually crop everything, programmatic tools give you surgical precision. If you're using a headless browser like Puppeteer, you can grab an element and then call the elementHandle.screenshot() function on it.
But honestly, the most straightforward way is with a dedicated API like ScreenshotEngine. You just pass a CSS selector as a parameter in your API call—something like selector=#my-chart. The service finds that specific element, crops the image perfectly, and sends back just that piece. It’s perfect for isolating graphs, user comments, or product photos without any of the surrounding page clutter.
What's the Best Image Format for Web Screenshots?
The "best" format really depends on what you're doing with the image. Making the right choice here can have a huge impact on both quality and performance.
Here’s a quick breakdown:
- PNG: Use this for visual testing or archiving where you need pixel-perfect accuracy. It's a lossless format, so every single detail is preserved without any compression artifacts getting in the way.
- WebP: This is the hero for web performance. If you're creating social media previews or site thumbnails, WebP is your best bet. It can deliver file sizes up to 40% smaller than JPEG at a comparable quality, which means faster load times.
- JPEG: A solid all-rounder for general use. It's a great choice when file size is a major concern and you can live with some minor, lossy compression.
Any good screenshot API should let you specify the output format directly in your request, giving you the flexibility to choose the right tool for the job.
A classic mistake I see is using JPEG for UI testing. The compression can create tiny pixel shifts that cause visual regression tests to fail for no good reason. Always, always use PNG for that kind of work to ensure your comparisons are accurate.
How Can I Handle Cookie Banners and Ads?
Ah, the eternal headache of web automation. A do-it-yourself script often breaks the second a cookie banner's design changes. You end up writing fragile code to find and click "accept" buttons or trying to bolt on ad-blocking extensions, which just adds more complexity and maintenance headaches.
A managed screenshot service handles this for you right out of the box. For example, ScreenshotEngine has built-in logic that automatically detects and dismisses most ads, pop-ups, and cookie consent forms by default. You get a clean, unobstructed shot of the actual content you care about without writing a single extra line of code.
Can I Automate Screenshots for 10,000 URLs?
Absolutely, but this is where the difference between building it yourself and using a service becomes crystal clear. Trying to capture 10,000 screenshots with a self-hosted headless browser solution is a massive infrastructure challenge. You’d have to manage hundreds of concurrent browser instances, build robust error handling, and constantly battle memory leaks to prevent the whole thing from crashing.
An API-based solution, on the other hand, is built for this kind of scale. You can just loop through your list of URLs and fire off an API call for each one. The service’s backend handles all the load balancing, concurrency, and infrastructure management, letting you process thousands of URLs in parallel without ever having to think about a server.
Ready to stop wrestling with headless browsers and get clean, reliable screenshots with a single API call? ScreenshotEngine handles all the complexity for you. Get started for free and see how easy it is to retrieve a perfect screenshot every time at https://www.screenshotengine.com.