Setting up automated website screenshots is one of those simple changes that completely transforms how you work. Instead of manually grabbing captures, you create a powerful, hands-off system that feeds you valuable data at regular intervals. It’s the key to everything from visual regression testing to tracking what your competitors are up to.
This isn't just about saving a few minutes here and there. It's about building a reliable visual history of any website you need to watch.
Why Schedule Website Screenshots?
Automating this process is a strategic move, not just a convenience. In a world where your website's appearance and your competitors' moves can change overnight, manual screenshots are just too slow and inconsistent to be useful. By scheduling captures, you build an automated pipeline of visual data that your development, marketing, and even compliance teams can depend on.
Think about the practical applications:
- Visual Regression Testing: Your dev team can automatically capture key pages before and after a deployment. This makes it incredibly easy to spot UI bugs or unintentional visual shifts, ensuring a polished user experience every time.
- Competitor and Market Monitoring: Imagine automatically tracking a competitor's pricing page, promotions, or homepage design over time. We have a whole guide on how to monitor a webpage for changes that dives deeper into this.
- SEO and SERP Tracking: An SEO specialist can schedule daily captures of Google search results to see how their rankings for critical keywords are trending in different cities or countries.
- Compliance and Archival: For regulated industries, this creates a verifiable visual record. You'll have proof of exactly what your website looked like on any given date, which can be invaluable.
This isn't a niche practice anymore. The demand for tools that automate web monitoring is exploding, with the global Website Screenshot Software market projected to hit $500 million in 2025 and soar to over $1.2 billion by 2033. This growth is a direct result of more businesses needing to automate this kind of data collection. You can find more details on this market trend and what's driving it.
A dedicated API like ScreenshotEngine handles all the messy background work for you—things like managing headless browsers or blocking pesky pop-up ads. This lets your team focus on using the visual data you've collected, not on building and maintaining the complex infrastructure required to get it.
Picking the Right Scheduling Architecture
Before you can schedule website screenshots, you need to decide how and where your scheduling logic will live. This isn't just a minor technical choice; it's a foundational decision that directly affects how scalable, expensive, and easy to maintain your system will be. A simple script to check a homepage once a day has vastly different needs than a system that snaps thousands of shots based on real-time events.
Let's walk through the three most common ways to tackle this: the old-school reliability of Cron jobs, the pay-as-you-go flexibility of serverless functions, and the developer-centric power of CI/CD pipelines. Each one shines in different situations, and figuring out which is right for you is the first step toward building a solid automation workflow.
The whole point of scheduling screenshots is to get visual data for a reason. Are you doing it for quality assurance, or is it for a marketing campaign? Answering that question first will point you in the right direction.
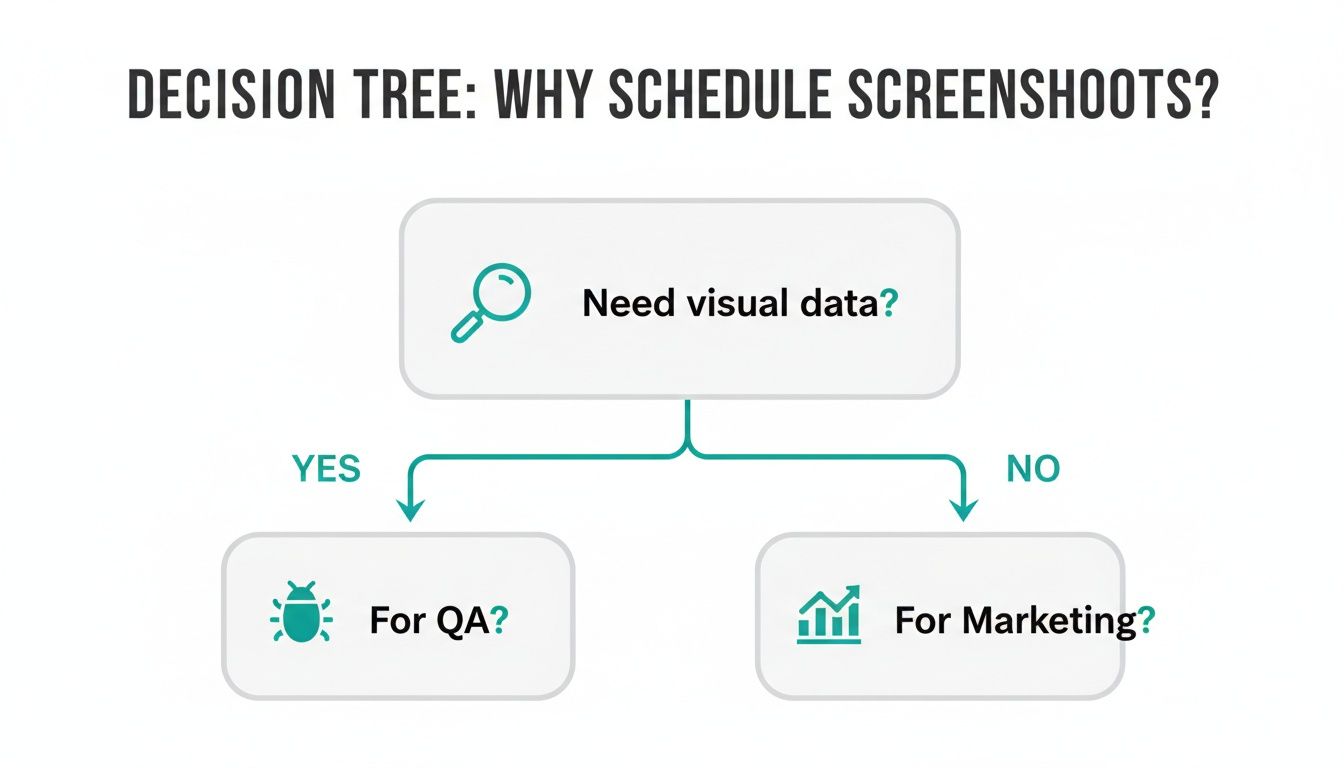
As you can see, understanding your why is crucial. It sets the stage for the entire technical implementation and helps you prioritize what matters most.
To help you decide, let's compare the core characteristics of each approach.
Comparison of Screenshot Scheduling Architectures
This table breaks down the key differences between Cron, Serverless, and CI/CD-based scheduling to help you choose the best fit for your project.
| Architecture | Best For | Cost Model | Scalability | Complexity |
|---|---|---|---|---|
| Cron Job | Simple, fixed-interval tasks on an existing server. | Fixed (server cost) | Limited to a single server | Low |
| Serverless | Event-driven, scalable, and infrequent tasks. | Pay-per-use | High (automatic) | Medium |
| CI/CD | Developer workflows; event-based (e.g., code commits). | Included in CI/CD plan | Varies by provider | High |
Ultimately, the best choice ties back to your specific goals, existing infrastructure, and technical comfort level.
The Classic Cron Job Approach
Cron jobs are the workhorse of automated scheduling on Linux-based systems. They've been around forever because they are incredibly simple and reliable for tasks that need to run on a predictable, fixed schedule. Just think of it as setting a recurring digital alarm that triggers your script.
This method is a perfect match for straightforward, repeatable tasks:
- Grabbing a daily snapshot of your competitor's homepage at midnight.
- Archiving your key landing pages every hour.
- Running a weekly visual check on a critical user flow.
The main appeal of Cron is its simplicity. If you already have a server running, adding a cron job is a five-minute task. The downside is that you're responsible for that server's uptime and maintenance. It’s also not built for dynamic, event-driven triggers or workloads that fluctuate wildly.
Our Take: Go with Cron for its rock-solid reliability on fixed schedules. If your needs are predictable and you already have server access, it's often the fastest way to get started.
The Modern Serverless Route
For a more modern, cloud-native solution, serverless functions are the way to go. Platforms like AWS Lambda or Google Cloud Functions let you run code in response to triggers—including a schedule—without ever thinking about a server.
This architecture is a game-changer for scalability and cost-efficiency. You only pay for the exact compute time your code runs, down to the millisecond. This makes it ideal for capturing thousands of URLs at once; the platform automatically scales to handle the demand, then scales back to zero.
If you need to schedule website screenshot captures for a large batch of pages but only once a week, serverless is a perfect fit. It’s the ultimate "set it and forget it" architecture for the cloud.
Using Cron Jobs for Scheduled Screenshots
When it comes to scheduling website screenshots on a regular, predictable basis, the classic cron job is often the simplest and most reliable tool in your arsenal. Think of it as a built-in alarm clock for any Linux server. It can wake up and run a script for you at any interval you choose—perfect for tasks like grabbing a daily snapshot of a competitor’s homepage or archiving your own site every hour.
The beauty of this approach is its simplicity. If you already have a server running, setting up a cron job is a quick win that uses infrastructure you already have. No need to spin up complex cloud services; you just need command-line access and a script to run.
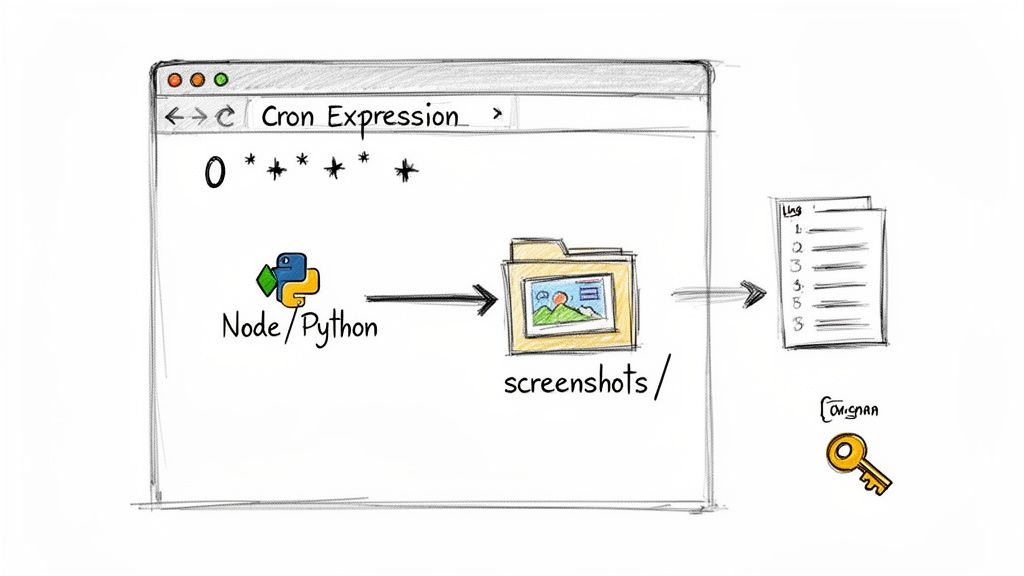
How Cron Expressions Work
The heart of any cron job is its schedule, which you define with a "cron expression." This string of five (or sometimes six) numbers and asterisks might look a bit cryptic at first, but it follows a straightforward pattern that tells the system exactly when to execute your command.
Here's a quick breakdown of what each position in the expression means.
Each asterisk acts as a wildcard, meaning "every." So, an expression like * * * * * would run your script every single minute—probably not what you want!
Let's look at a few practical examples:
0 * * * *- Runs at the top of every hour.0 9 * * 1- Runs every Monday morning at 9:00 AM.*/15 * * * *- Runs every 15 minutes.
For more complex scheduling, it's worth getting comfortable with the nuances of cron. If you're looking to go deeper, this guide on mastering task scheduling with Cron and Anacron is an excellent resource for more advanced setups.
A Practical Scripting Example
Once you have your schedule, you need a script for cron to actually run. This script will do the heavy lifting of calling the ScreenshotEngine API and saving the image file. A quick but important tip: always manage your API key as an environment variable. Never hardcode it directly into your script—it's a major security risk.
Here’s a simple Node.js example I've used before that captures a screenshot and saves it with a timestamped filename.
// screenshot-script.js const https = require('https'); const fs = require('fs'); const path = require('path');
// Pull the API key from environment variables const apiKey = process.env.SCREENSHOTENGINE_API_KEY; if (!apiKey) { console.error('API key not found. Make sure SCREENSHOTENGINE_API_KEY is set.'); process.exit(1); }
const urlToCapture = 'https://www.screenshotengine.com';
const encodedUrl = encodeURIComponent(urlToCapture);
const apiURL = https://api.screenshotengine.com/v1/screenshot?url=${encodedUrl}&token=${apiKey};
// Create a unique, sortable filename
const timestamp = new Date().toISOString().replace(/[:.]/g, '-');
const outputPath = path.join(__dirname, 'captures', screenshot-${timestamp}.png);
// Make the API call and save the image https.get(apiURL, (response) => { const fileStream = fs.createWriteStream(outputPath); response.pipe(fileStream);
fileStream.on('finish', () => {
console.log(Screenshot saved to ${outputPath});
});
}).on('error', (err) => {
console.error('Error fetching screenshot:', err.message);
});
A Lesson Learned the Hard Way: Always, always include logging in your cron scripts. Redirecting the output to a log file (
>> /var/log/screenshot.log 2>&1) is absolutely essential for debugging. Without it, you're flying blind—you'll have no idea if the script even ran, let alone why it might have failed.
This kind of automation unlocks some powerful workflows. You can capture specific page elements for visual regression testing or track SERPs from different geolocations to monitor regional rankings. When done right, automated social previews can even boost click-throughs by up to 40%.
Ultimately, using a screenshot as a service like ScreenshotEngine offloads all the browser management headaches, letting you focus on your scheduling logic and what you do with the final images.
Scaling Up with Serverless Functions
While a simple cron job on a server is a tried-and-true method for basic scheduling, it has a major limitation: it's stuck on one machine. When you need to capture screenshots for hundreds, or even thousands, of websites at once, that single server will quickly become a bottleneck. This is where a more modern, cloud-based approach like serverless functions really shines.
Think of serverless platforms like AWS Lambda or Google Cloud Functions as code that runs on-demand. You write the script to take the screenshot, and the cloud provider handles all the messy infrastructure behind the scenes—no servers to patch, no operating systems to manage. Your code just wakes up when it's needed, does its job, and goes back to sleep.
The best part? You only pay for the split seconds your code is actually running.
This pay-per-use model is a game-changer for cost efficiency. Instead of running a server 24/7 just for a task that executes a few minutes each day, you're only billed for the actual work. It’s a fundamentally different—and often much cheaper—way to build automated workflows.
How Event-Driven Triggers Work
Serverless functions don't just run on their own; they need a trigger to kick them into action. For scheduled tasks, services like Amazon EventBridge (for AWS Lambda) and Cloud Scheduler (for Google Cloud Functions) act as the alarm clock. You give them a cron expression, and they "ping" your function at the specified interval.
The entire process is remarkably straightforward:
- The schedule hits: Your scheduler fires off an event at the designated time, say, every morning at 8 AM.
- Your function wakes up: The event triggers your Lambda or Cloud Function, which runs the code to call the ScreenshotEngine API for a list of URLs.
- Screenshots get saved: The function takes the captured images and sends them directly to a cloud storage bucket like Amazon S3 or Google Cloud Storage.
This architecture is built for scale. If you suddenly need to capture 10,000 URLs instead of 100, the cloud platform just spins up more instances of your function automatically. There's no manual work required to handle the bigger load.
You manage all of this from a central dashboard, like the AWS Lambda console shown below.
This is where you'll set things like memory limits and timeouts, and, most importantly, connect your function to a scheduler like EventBridge.
The Right Tool for High-Volume Screenshots
The advantages of going serverless for screenshot automation are huge. It’s how you build a system that can handle bulk requests without breaking a sweat, which is critical for things like competitive intelligence, where tracking a rival's pricing changes can be worth millions. It’s no surprise that since 2019, investments in cloud infrastructure have soared to handle this kind of high-volume automation, especially with the 30%+ jump in automated web monitoring since the pandemic. You can explore more about this trend in automated web monitoring and its impact on the market.
Simply put, a single-server cron job would just fall over under that kind of pressure. For any serious, production-grade system, serverless offers the elasticity and hands-off operational model that makes it the clear choice. If you want to dive deeper into the code, our complete guide to using a website screenshot API walks through the practical steps.
Pro Tip: When you're setting up a serverless function, always configure a "dead-letter queue" (DLQ). If an API call fails after a few automatic retries, the failed request gets sent to this special queue. It’s a safety net that ensures you never silently lose a failed job and can go back later to figure out what went wrong.
Storing and Serving Your Screenshots
Taking the screenshot is just the first step. Where and how you store the image is what makes your automated system truly useful. Just dumping everything into a single folder on a server is a recipe for disaster—it quickly becomes an unmanageable mess.
The professional approach is to use a scalable object storage service, like Amazon S3. This gives you virtually unlimited space and, more importantly, a way to build a logical, searchable archive from day one.
Building an Organized Archive in the Cloud
A clean folder structure is the backbone of any good screenshot system. Think of it less like a folder and more like a database. Instead of saving files with generic names, build context right into the file path.
Here are a couple of organizational patterns I've found work well:
- Organize by Date:
YYYY/MM/DD/website-name.png(like2024/10/26/competitor-a.png). This is perfect when your main goal is tracking daily or weekly changes. - Organize by Website:
website-name/YYYY-MM-DD.png(likemy-landing-page/2024-10-26.png). This structure makes it super easy to pull the entire visual history for a single page.
For really important visual records, especially those needed for compliance or historical analysis, it’s worth looking into immutable backup solutions. This protects your screenshots from being accidentally deleted or tampered with, ensuring their integrity over the long haul.
When you treat your screenshot storage like a structured database, you turn a simple collection of images into a powerful dataset. This mindset is what separates a hobby project from a professional monitoring system.
Serving Images Efficiently with a CDN
So you've got your screenshots neatly organized in S3. Now, how do you get them to your users or into a dashboard without a massive delay? Linking directly to an S3 bucket can be surprisingly slow, especially if your users are on the other side of the world from your server region.
This is where a Content Delivery Network (CDN), like Amazon CloudFront, is a game-changer.
A CDN essentially creates copies of your images on servers all over the globe. When someone needs to view a screenshot, it’s served from the server closest to them. The result? Drastically faster load times and a much better user experience. It's the final piece of the puzzle for a performant capture-to-delivery pipeline.
This diagram shows exactly how a CDN acts as the middleman between your storage and the end-user, guaranteeing speed.
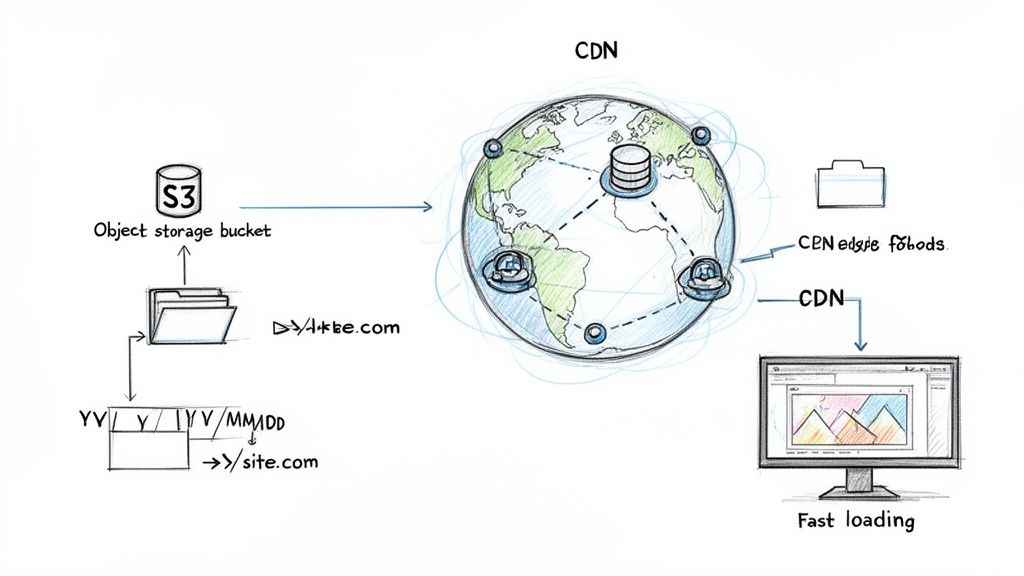
Pairing organized cloud storage with a CDN is how you build a robust, professional system that can schedule website screenshot captures at any scale. It's not just about performance, either—it also helps keep your costs down by reducing direct data transfer requests from your main storage bucket.
Fine-Tuning Your Screenshot Automation
Once you've got a basic scheduling system running, it’s time to start thinking like a pro. This is where we move beyond just taking pictures on a timer and start building a truly resilient and intelligent automation pipeline.
Professional-grade systems are all about handling the unexpected. We're talking about anticipating failures, keeping an eye on costs, and capturing exactly what you need—no more, no less. This is how you turn a simple script into a reliable tool that works for you, day in and day out.
Building a System That Doesn't Break
Let's be real: things go wrong. Network connections drop, APIs have momentary blips, and websites go down for maintenance. A solid system needs to handle these hiccups gracefully without someone having to step in. This is where retry logic is non-negotiable.
Instead of letting your script die on the first error, you can wrap your API call in a loop that tries again after a short pause. A fantastic strategy for this is exponential backoff. The idea is simple: the delay between retries increases with each failure. You might wait 2 seconds, then 4, then 8. This gives a struggling service a chance to recover without you hammering it with requests.
A system without retry logic is brittle. I learned this the hard way when a brief network outage caused an entire batch of nightly screenshots to fail. Implementing a simple exponential backoff handler immediately solved 90% of these transient errors.
You also need to be smart about your budget, especially at scale. Capturing thousands of URLs can get expensive if you're not careful. This is where rate limiting comes in. By controlling how many API calls you make per minute or hour directly in your code, you can manage costs and avoid overwhelming the API, which can sometimes get you temporarily blocked.
Mastering Precise Element Capture
Why capture an entire webpage when you only care about one small piece of it? Full-page screenshots often include a lot of noise—headers, footers, ads—and create unnecessarily large files. A much cleaner approach is to target a specific element on the page.
With a tool like ScreenshotEngine, you can pass in a CSS selector, like #daily-sales-chart or .pricing-tier, to isolate and capture just that part of the page. This is a game-changer for tasks like:
- Visual Regression Testing: Focus only on the component that was updated in a new release.
- Data Extraction: Grab clean images of charts or data visualizations for your reports.
- Competitor Monitoring: Track just the pricing section of a rival’s website, ignoring irrelevant header or footer changes.
Optimizing the Final Image for Cleaner Results
The last piece of the puzzle is controlling what the final image looks like. Modern websites are a minefield of cookie banners, newsletter popups, and live chat widgets that can easily ruin a perfect screenshot.
A good screenshot API will handle most of this for you. ScreenshotEngine, for instance, automatically blocks the most common cookie popups and ads, so you get a clean shot without any extra work. You can also fine-tune the output format to fit your needs:
- PNG: The best choice for high-fidelity images where you need crisp text and sharp lines.
- JPEG: A great option when file size is a priority, perfect for web performance.
- WebP: The modern choice, offering superior compression and quality.
By layering in smart error handling, cost controls, precise targeting, and clean outputs, you’ll have an advanced system to schedule website screenshot captures that you can truly rely on.
Ready to build a scalable, production-ready screenshot automation system? With ScreenshotEngine, you get powerful features like element capture, popup blocking, and multiple output formats right out of the box. Start building for free.