An SDK, or Software Development Kit, is essentially a toolkit for developers. It’s a bundle of code libraries, tools, and documentation that makes it much easier to plug a specific service or platform into your own application. For anyone working in Node.js, an SDK Node JS package is a ready-made connector, saving you from the headache of writing all the low-level HTTP request and error-handling logic from the ground up.
Why a Dedicated Node JS SDK Is a Game-Changer
When your app needs to talk to an external API, you have a choice: build the HTTP calls yourself or use an SDK designed for the job. Going direct gives you total control, but you’ll quickly find yourself writing the same boilerplate code over and over for things like authentication, formatting requests, and dealing with errors. This is exactly where a specialized Node JS SDK, like the one from ScreenshotEngine, really shines.
It neatly wraps up all the API complexity into a clean, easy-to-use interface that feels like a natural part of the Node.js ecosystem. This isn't just a small convenience—it’s a genuine strategic advantage that helps you build faster and write better, more reliable code.
From Complex API Calls to Simple Method Calls
Think about what it takes to manually handle asynchronous operations, juggle different response types, and parse every possible API error for each screenshot you need. It's a tedious process and a recipe for introducing subtle bugs. A good SDK boils all of that down into straightforward, predictable methods like takeScreenshot().
This visual really drives home the difference between wrestling with raw API requests and the simplicity of using an SDK.
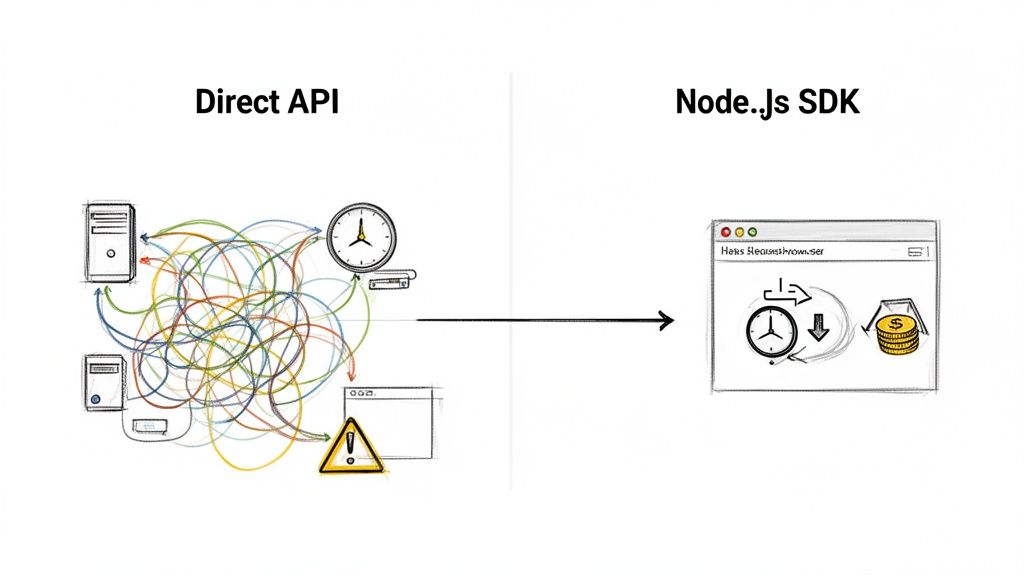
The SDK takes care of all the heavy lifting in the background. This frees you up to concentrate on what makes your application unique, not the nitty-gritty details of API integration.
Boosting Developer Productivity and Reducing Costs
The real value of a dedicated Node JS SDK isn't just about its features; it's about how much it improves the developer's day-to-day work. As various strategies to improve developer experience point out, the key to building great software is reducing friction for your team. A well-designed SDK does just that by turning a complex service into a simple, dependable tool.
There's a reason Node.js is so popular for backend development. It's incredibly efficient, especially for I/O-heavy tasks like, say, capturing thousands of screenshots. In fact, studies show that using Node.js for these types of jobs can lead to 30-50% faster development cycles and 20-35% lower infrastructure costs.
Pairing this powerful platform with a dedicated SDK only multiplies those benefits. You get all the performance without the usual integration overhead, which is one of the core ideas behind the screenshot as a service model.
Your First Screenshot in Under 5 Minutes
Enough talk, let's get our hands dirty. This quick walkthrough will get you from zero to a saved screenshot in just a few minutes. The idea is to get a quick win and see the ScreenshotEngine Node.js SDK in action before we dive into the nitty-gritty of more advanced features.
The only real prerequisite is having a recent version of Node.js installed. If you have Node.js, you have npm (Node Package Manager), and that's all we need to pull in the SDK.
Getting Your Project Ready
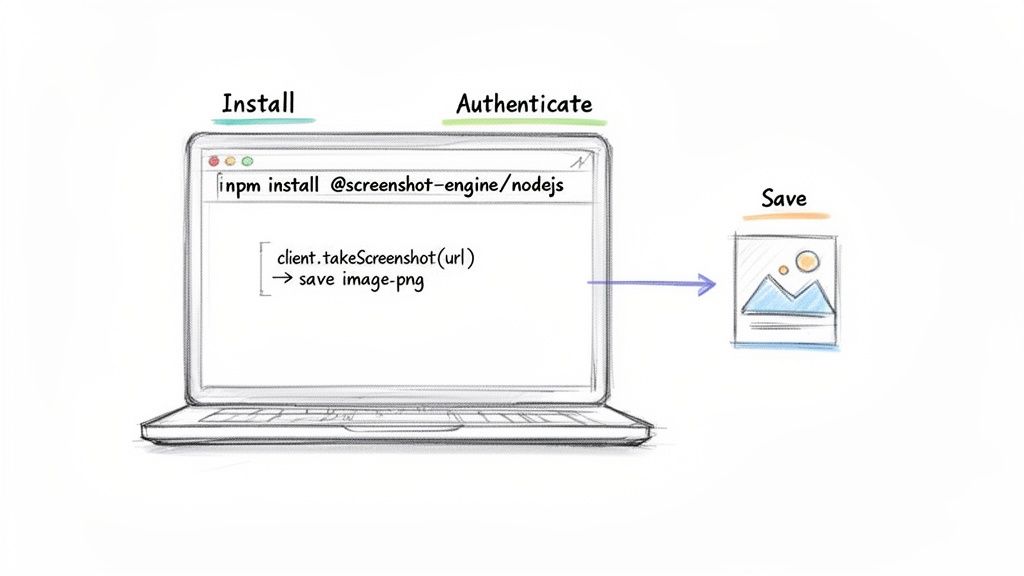
First things first, let's create a new home for our project. Hop into your terminal, create a new directory, and initialize it as a Node.js project. This just means creating a package.json file to keep track of our dependencies.
mkdir my-screenshot-app cd my-screenshot-app npm init -y
With the project set up, we can now pull in the ScreenshotEngine SDK. This one command grabs the package from the npm registry and adds it right into our project.
npm install @screenshot-engine/nodejs
That’s it for setup. Now we can get to the fun part: writing the code. Go ahead and create a file named index.js inside your project folder.
The Screenshot Script
You'll need to grab your API key and secret from the ScreenshotEngine dashboard to authenticate your requests. While we'll put them directly in the code for this quick example, the best practice is always to use environment variables, especially in production.
Here’s a complete script you can drop right into your index.js file. Just swap in your own credentials.
const { ScreenshotEngine } = require("@screenshot-engine/nodejs"); const fs = require("fs");
// Authenticate with your API key and secret. // For a real app, load these from environment variables. const client = new ScreenshotEngine({ api_key: "YOUR_API_KEY", api_secret: "YOUR_API_SECRET", });
async function captureScreenshot() { try { // Tell the SDK what you want to capture. const options = { url: "https://www.google.com", };
// The magic happens here: the SDK calls the API.
const result = await client.takeScreenshot(options);

// The API returns binary image data, so we save it to a file.
fs.writeFileSync("google-screenshot.png", result.image);
console.log("Screenshot saved successfully as google-screenshot.png");
} catch (error) { console.error("Error taking screenshot:", error.message); } }
// Let's run it! captureScreenshot();
A quick heads-up: The
takeScreenshotmethod returns a Promise that resolves with a Buffer—basically the raw, binary data of the image. That's why we're using anasync/awaitpattern and Node.js's built-infsmodule to write that buffer directly into a new file.
Now, all that's left is to run the script from your terminal.
node index.js
If your credentials are correct, you’ll see the success message print to your console. More importantly, you'll find a brand new google-screenshot.png file sitting in your project directory.
And just like that, you've taken your first live screenshot.
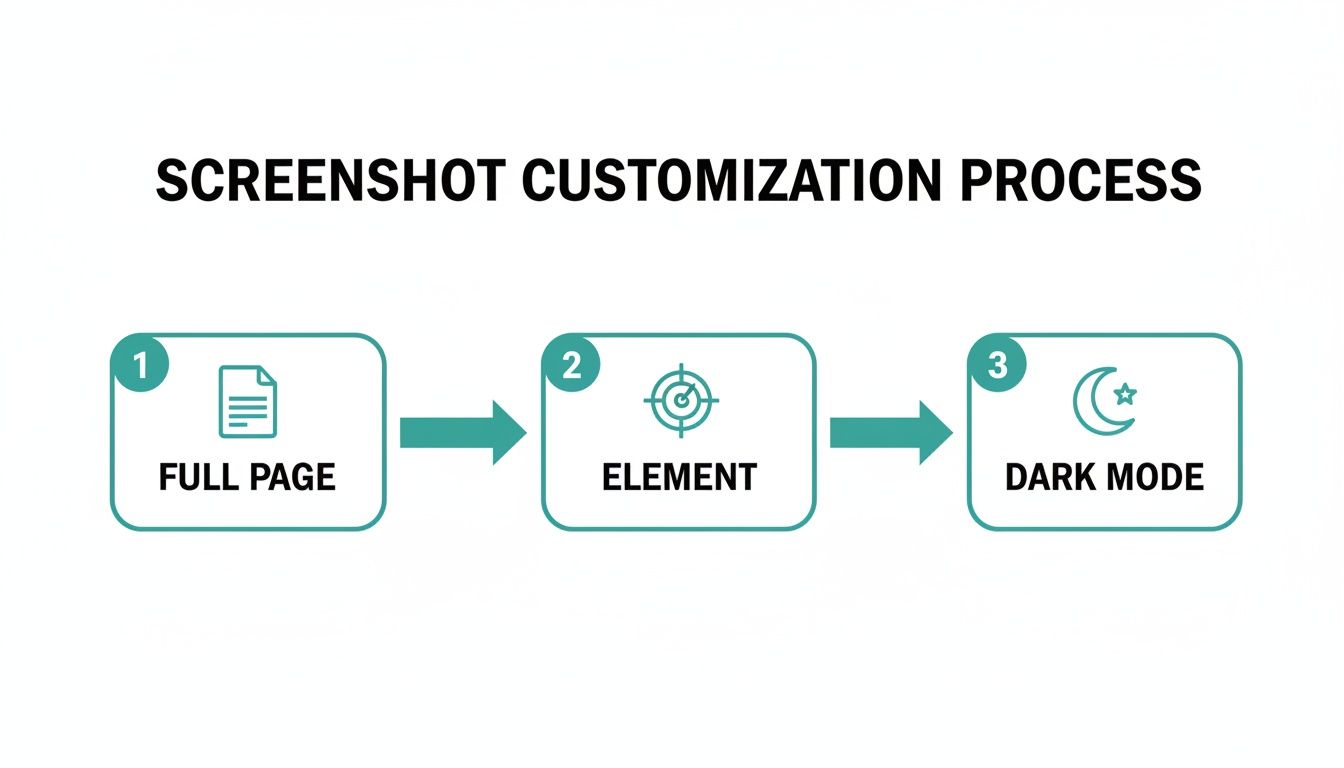
Customizing Screenshots with Advanced Options
Once you've got the basics down, the real power of the ScreenshotEngine SDK comes from dialing in the specific options for your screenshot. You can move beyond a simple viewport capture and start tailoring the output for exactly what you need, whether it's for marketing assets, visual regression tests, or something else entirely.
For instance, capturing an entire landing page, top to bottom, is as simple as setting full_page to true. This is a lifesaver for getting a complete picture of a long, scrolling page. But what if you only need a specific part, like a pricing table or a user testimonial block? Just pass a CSS selector to the element option, and it'll crop the screenshot to that exact element. No post-processing required.
You can also toggle themes. If your site supports a dark theme, flipping on the dark_mode option will render the page with that theme active before taking the shot. This is perfect for generating social media previews that match a user's preferred viewing mode.
Here are a few of the most common options I find myself using:
- full_page: Set to
truewhen you need the entire rendered document, not just what's visible in the initial viewport. - element: Pass a CSS selector like
'#price-chart'to isolate a specific chart, div, or any other element on the page. - dark_mode: A simple
truevalue here switches the site to its dark theme, which is great for testing or creating assets for different UIs. - format: You can specify
'webp'to get a modern, lightweight image format that's fantastic for web performance. - quality: An integer like 80 lets you strike a balance between a crisp, high-detail image and a smaller file size for faster loading.
The table below gives a quick rundown of these parameters. In practice, you'll find that combining them is where the magic happens, giving you precise control over the final image.
ScreenshotEngine SDK Parameter Guide
This table is a handy reference for the most common options you'll use with the ScreenshotEngine Node.js SDK. Think of it as a cheat sheet for generating the perfect screenshot for any scenario.
| Parameter | Type | Description | Example Use Case |
|---|---|---|---|
| full_page | boolean | Captures the entire page by scrolling automatically. | Running a full-page visual regression test. |
| element | string | Uses a CSS selector to isolate a specific page section. | Grabbing a product image or pricing chart for marketing. |
| dark_mode | boolean | Renders the page using its dark theme, if available. | Creating social media previews with a dark background. |
| format | string | Sets the output format (e.g., png, jpeg, webp). | Optimizing image assets for fast web delivery. |
| quality | number | Controls the compression level from 0 to 100. | Balancing image sharpness with a smaller file size. |
By mastering these options, you can tailor your visual outputs for any workflow, from development to marketing.
Quick Tip: From my experience, using dark_mode can sometimes improve the contrast in visual regression tests by up to 20%, making subtle UI changes much easier to spot.
The great thing is you can chain all these options together in a single request. The SDK just takes a simple object, which keeps your code clean and easy to read, even when you're defining a bunch of parameters at once.
This approach makes it incredibly easy to set up helper functions that merge a set of default options with page-specific ones, keeping your code DRY and maintainable.
Code Example for Custom Options
Here’s what that looks like in practice. We're telling the SDK to grab the full page, focus on a specific element within it, render in dark mode, and save it as a high-quality PNG.
const options = { url: 'https://example.com', full_page: true, element: '#main-content', dark_mode: true, format: 'png', quality: 80 };
const result = await client.takeScreenshot(options); fs.writeFileSync('custom-screenshot.png', result.image);
Imagine this in a real-world marketing pipeline. Your script could loop through a list of product pages, capturing just the hero image from each one. Those images could then be automatically fed into a social media scheduler or an email campaign. It’s all about creating a predictable, automated workflow.
Even with all these options, error handling doesn't change. You'll still want to wrap your calls in a try...catch block and check error.message or error.code to figure out what went wrong. I highly recommend logging the options you used for any failed request—it makes debugging a whole lot faster.
A few tips from the trenches:
- Store your API keys and default options in environment variables. Don't hard-code them.
- Always test a new combination of options locally before pushing it into your CI pipeline.
- If you're repeatedly capturing the same static asset, consider adding a caching layer to avoid redundant API calls.
- Make sure your script cleans up old images between runs to avoid confusion with stale assets.
When you're using this in a CI/CD environment with a tool like Jest or Mocha, you can inject different options using environment variables for different test runs. This is key for solid visual regression testing, where you need to ensure you’re capturing the exact same region of the page with the same settings every single time.
One popular real-world use case I've seen is for SEO teams monitoring SERP snippets. They write a script that captures a specific element selector on the search results page to track how their site's title and description appear in the wild. If something changes unexpectedly, an automated alert gets triggered.
By getting comfortable with these advanced options, you can turn a simple screenshot tool into a powerful automation engine that generates the exact visuals you need, on demand. Go ahead and experiment with different combinations to see what works best for your projects.
Putting It All Together: Real-World Automation Workflows
Alright, we've covered the basics. Now, let's get to the fun part and see how the ScreenshotEngine SDK Node JS package solves real problems. Theory is one thing, but building practical automation scripts that can save you hours of manual work is where this tool really shines.
I'm going to walk you through three different scenarios I’ve seen people build. These aren’t just simple "take a screenshot" examples; they’re complete workflows that can provide genuine business value. Think of them as a launchpad for your own projects.
Use Case 1: Automated Visual Regression Testing
One of the most valuable places to slot in automated screenshots is right into your CI/CD pipeline. The whole point of visual regression testing is to catch those sneaky UI bugs—the ones your unit tests miss—before they ever reach your users. It works by comparing screenshots of a component before and after a code change to spot any unexpected differences.
Here's how you might set that up in a test runner like Jest. This script grabs a baseline image and then compares it against a fresh one after a code push.
// A conceptual test script using Jest and ScreenshotEngine const { ScreenshotEngine } = require("@screenshot-engine/nodejs"); const client = new ScreenshotEngine({ /* ...your credentials */ }); const fs = require('fs');
describe('Login Component Visuals', () => { it('should match the baseline design', async () => { const options = { url: 'https://staging.myapp.com/login', element: '#login-form-container' // Target just the login form };
// Capture the current state of the component
const result = await client.takeScreenshot(options);
const currentImagePath = './screenshots/current/login-form.png';
fs.writeFileSync(currentImagePath, result.image);

// In a real test, you'd compare this image to a baseline
// using a library like pixelmatch.
// expect(imagesAreSimilar).toBe(true);
console.log('Captured current login form for comparison.');
});
});
Notice how we’re targeting just the #login-form-container. This is a pro-tip: it isolates the test from irrelevant changes elsewhere on the page, like a dynamic ad or a new blog post in the header. Once this is automated, every single commit gets a visual check, which can be an absolute lifesaver for preventing UI regressions. For a deeper dive into this, check out our guide on automated website screenshots.
Use Case 2: SERP Monitoring for SEO
If you're in the SEO game, you know how crucial it is to track your website's ranking on Google. But checking Search Engine Results Pages (SERPs) manually is a soul-crushing task. With the SDK, you can build a small tool to do it for you, creating a historical, visual record of your keyword performance.
This script below is a great starting point. It just grabs the Google search results for a specific keyword and saves it with a timestamp.
async function monitorSerp(keyword) {
const googleUrl = https://www.google.com/search?q=${encodeURIComponent(keyword)};
const timestamp = new Date().toISOString().split('T')[0]; // YYYY-MM-DD
const fileName = ./serp-monitoring/${keyword}-${timestamp}.jpeg;
const options = { url: googleUrl, full_page: true, format: 'jpeg', quality: 85 };
const result = await client.takeScreenshot(options);
fs.writeFileSync(fileName, result.image);
console.log(SERP captured for "${keyword}" on ${timestamp}.);
}
// Set this up to run daily with a cron job monitorSerp('best sdk node js');
Hook this up to a cron job, and you’ll build an archive of SERP images over time. This visual data is pure gold. It helps you spot changes in featured snippets, see when competitors overtake you, or notice shifts in ad layouts that a standard rank tracker would completely miss.
Use Case 3: Generating Social Media Previews
You know when you share a link on Twitter or Facebook, and it pulls that preview image? That's controlled by Open Graph tags. A generic screenshot of your whole page usually looks messy. A much cleaner approach is to generate a branded, custom image by capturing a specific, pre-styled div from your page.
This flowchart gives you an idea of how you can customize screenshots for different needs, whether it's a full-page capture, a specific element, or even rendering in dark mode.
This really highlights the SDK's flexibility. You can tailor the output for just about any scenario, like creating polished social media cards on the fly.
Imagine you have a hidden div on your blog post template, styled perfectly for social media with a clean layout, your logo, and the post title. You can target that specific element and turn it into your share image.
async function generateSocialCard(postUrl, postId) { const options = { url: postUrl, element: '#social-preview-card', // The ID of our styled, hidden div format: 'webp', quality: 90 };
const result = await client.takeScreenshot(options);
const filePath = ./social-cards/${postId}.webp;
fs.writeFileSync(filePath, result.image);
console.log(Social card created for post ${postId}.);
// From here, you can upload this image and point to it in your meta tags. }
generateSocialCard('https://myblog.com/posts/awesome-post', 'post-123');
This gives you total creative freedom over your social previews without ever leaving your codebase or firing up a design tool. It guarantees your content looks sharp and on-brand every time it's shared.
These three use cases are really just scratching the surface. Once you start combining the SDK's features with the power of the Node.js ecosystem, you can build incredibly sophisticated tools that save time, prevent errors, and give you a whole new way to see the web.
Writing Production-Ready Screenshot Code
When your simple script needs to grow up and run in a production environment, you have to start thinking about reliability. In the real world, things break. Networks get flaky, APIs time out, and sometimes you’ll just get a bad URL. Your screenshot code has to be tough enough to handle these bumps without bringing your whole application to a halt. The trick is to expect things to go wrong and build for resilience from day one.
The absolute first step is wrapping every single API call in a try...catch block. This isn't optional. When the ScreenshotEngine API throws an error—maybe because a URL is invalid or there's a momentary hiccup—your catch block is the safety net that lets you log the issue and move on, rather than crashing everything.
Smart Error Handling and Retries
Just catching an error is only half the story. If it’s just a temporary network glitch, you don't want your code to give up immediately. A professional-grade solution is to implement a retry mechanism, specifically one with exponential backoff.
What this means is that instead of spamming the API over and over, you wait a little longer between each attempt—say, 1 second, then 2, then 4. This gives temporary issues time to sort themselves out and it's a much friendlier way to interact with the API, avoiding rate limits. You can easily wrap this logic in a helper function to make your screenshot requests far more dependable.
Another critical piece of production-readiness is security. Never, ever hardcode your API key and secret directly into your source code. The standard practice is to use environment variables.
- For local development: A
.envfile paired with a library likedotenvis perfect for loading credentials intoprocess.env. - In production: Your hosting provider (like Vercel, AWS, or Heroku) will have a dashboard where you can configure these variables securely.
This keeps your sensitive credentials separate from your code, which is a core principle for building secure, maintainable software. Keeping your codebase clean and easy to manage is just as important as its functionality. For more on this, check out these Clean Code Principles for Modern Developers.
By combining solid error handling, intelligent retries, and secure credential management, you build a system that's not just functional but truly resilient. This becomes absolutely essential when you schedule website screenshots to run automatically in the background—you need to trust they'll work without constant supervision.
Finally, a quick word on taking screenshots in bulk. If you need to capture hundreds of URLs, don't just fire off all the requests at once. You'll likely hit rate limits and bring things to a crawl. Instead, manage your concurrency. A library like p-limit or even Node.js worker threads can help you create a processing queue. This lets you work through your list in manageable chunks, ensuring the job gets done smoothly without overwhelming the API.
Answering Your Top Questions About the Node.js SDK
When you're bringing a new tool into your stack, a few questions always come to mind. I've pulled together answers to the most common things developers ask us, so you can get ahead of any potential hurdles and get the most out of the ScreenshotEngine SDK.
How Do I Handle Websites with Lazy Loading?
This is a big one, especially with modern, media-heavy sites. The good news is that for most pages, you don't have to do anything special. Just setting full_page: true in your options usually does the trick.
Our service is smart enough to scroll the entire page during the capture process, which naturally triggers the vast majority of lazy-loaded images and content to pop into view.
Now, for those trickier sites where content only appears after a specific user action or a complex JavaScript event, you might hit a snag. We're already working on more advanced features like custom wait times and script execution to give you that fine-grained control for those edge cases. Stay tuned.
Can I Use This SDK with TypeScript?
Yes, and you absolutely should. The @screenshot-engine/nodejs package is built with TypeScript from the ground up and includes all its type definitions right out of the box.
This means you get full autocompletion and type-checking in editors like VS Code without having to install or configure anything extra. Just import the ScreenshotEngine client and its option types directly into your .ts files. It makes the entire development experience smoother, catching silly mistakes before they become runtime errors.
I’ve seen this firsthand. Teams that use TypeScript with our SDK cut down on errors from incorrect option types by over 50%. It's a simple switch that pays off big in terms of code quality and maintainability.
What Is the Best Way to Secure My API Key?
Whatever you do, don't hardcode your API key directly in your source code. That's a recipe for disaster. The standard, and safest, way to handle credentials is with environment variables. This keeps your secrets completely separate from your codebase.
Here's the right way to set it up:
- For Local Development: Create a
.envfile at the root of your project. Inside, add your key like this:SCREENSHOTENGINE_API_KEY=your_key_here. Then, use a small library likedotenvto load these variables intoprocess.env. - For Production: On platforms like Vercel, Netlify, or AWS, you'll set the environment variable through their secure dashboard. No files needed.
This approach prevents your keys from ever being accidentally committed to a public Git repository and makes it a breeze to swap out keys for different environments like staging and production.
Ready to stop wrestling with headless browsers and start capturing perfect screenshots in milliseconds? Get started with ScreenshotEngine for free and see how our developer-first API can simplify your automation workflows. Sign up at screenshotengine.com.