Ever had that sinking feeling when tests pass flawlessly on your machine, only to fail spectacularly in the CI pipeline? It's a maddeningly common problem, and it almost always boils down to one culprit: environment inconsistency. This is precisely where a Playwright Docker image becomes your best friend, creating a portable, self-contained environment that ensures your tests run the exact same way, every single time.
Why a Consistent Environment Is Non-Negotiable
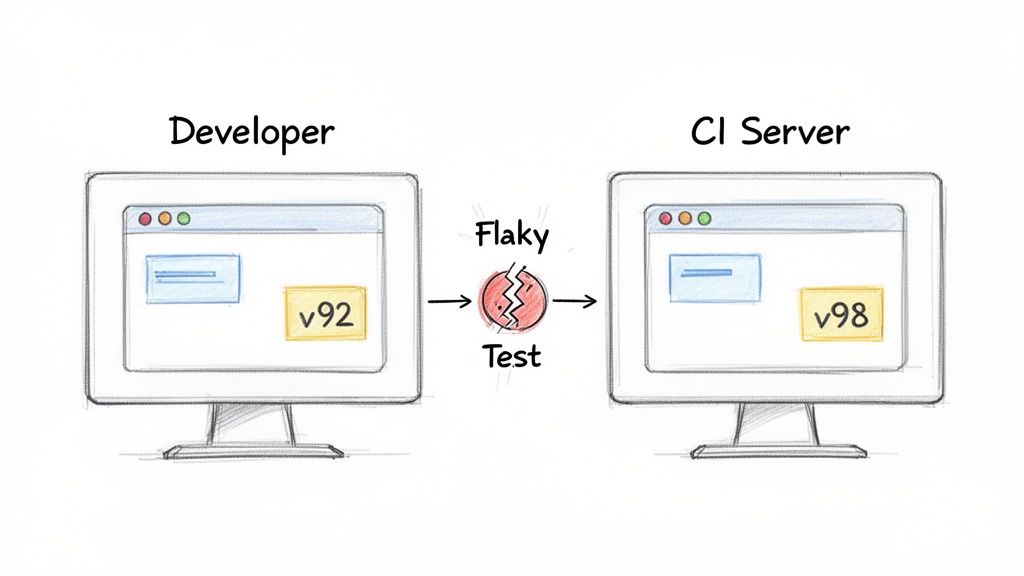
It's a story I've seen play out countless times. A developer writes a solid suite of Playwright tests, everything checks out locally, so they push their code. Moments later, the CI/CD pipeline is a sea of red, with failures on tests that were green just minutes before. This isn't just an annoyance—it's a major time sink and slowly erodes trust in your entire test suite.
The root cause is usually a subtle, almost invisible difference between your local setup and the CI server. These tiny variations can have a massive impact.
- Browser Version Mismatches: Maybe your machine has Chromium v120, but the CI runner just updated to v121. Seemingly minor rendering changes between versions can easily break a visual regression test.
- Missing OS Dependencies: That specific font or graphics library that’s standard on your macOS machine? It's probably missing on the bare-bones Linux container in your CI environment.
- Node.js Version Drift: Even slight differences in Node.js versions can lead to variations in dependency resolution and execution behavior.
The Real Cost of Flaky Tests
These "it works on my machine" bugs lead to so much wasted energy. Debugging turns into a wild goose chase as you try to replicate the CI environment locally, which is often a near-impossible task. Flaky tests just create noise, making it incredibly difficult to tell a real regression from a simple environment hiccup.
This is the problem Docker was built to solve. By bundling your test code, all its dependencies, and the exact browser binaries into a single Playwright Docker image, you create a standardized, predictable environment from the get-go. That image becomes a universal blueprint for your tests.
A consistent test environment is the bedrock of reliable automation. Docker takes environmental guesswork out of the equation. If a test passes in a container on your laptop, you can be confident it will pass in that same container in the pipeline.
This isn't a niche trick; it's rapidly becoming the industry standard. According to the 2023 Stack Overflow Developer Survey, Docker is used by over 53% of professional developers for building dependable development and testing workflows.
Ultimately, achieving environment parity is fundamental, whether you're just starting out or comparing tools as we did in our Playwright vs Puppeteer guide. It's how you transform testing from a source of frustration into the reliable safety net it's meant to be.
Kicking the Tires: Running Your First Test with the Official Image
Theory is great, but let's see this in action. The fastest way to understand the benefit of a consistent environment is to run a test inside the official Playwright Docker image. This image, which is maintained by the Microsoft team, is a game-changer because it comes with all the browsers and OS dependencies you need, completely eliminating setup headaches.
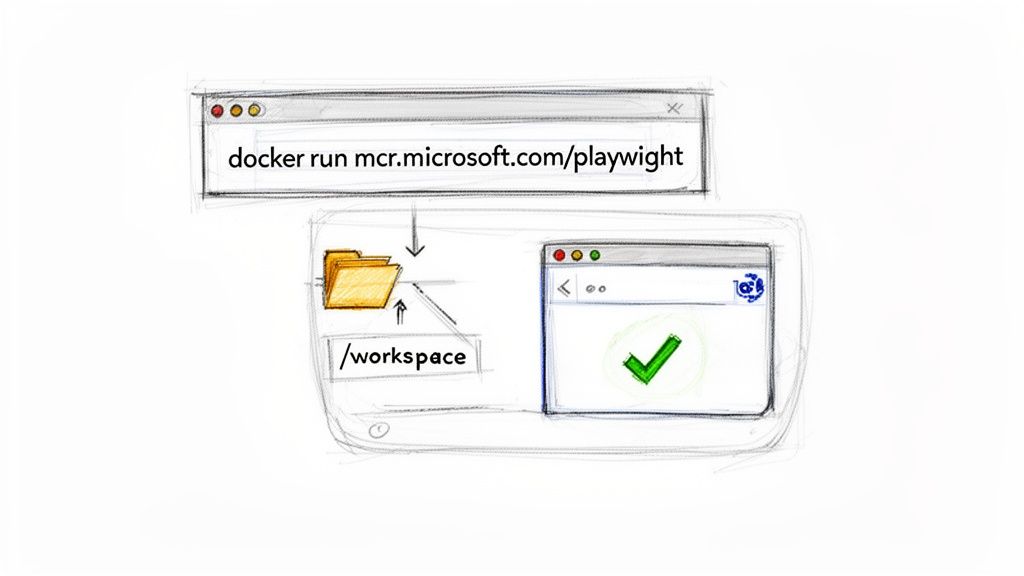
First things first, you'll need to pull the image from the Microsoft Container Registry. Just pop open your terminal and run this command:
docker pull mcr.microsoft.com/playwright:v1.44.0-jammy
That one line downloads a complete, self-contained testing environment. What you have on your local machine now is the exact same setup your CI pipeline will use. This is huge—it means a test that passes for you locally will behave the same way in an automated build.
Running a Local Test Script
Okay, image downloaded. Now for the fun part. We need to tell the Docker container where to find our test files. We do this by "mounting" your local project directory into the container, which lets the containerized Playwright see and run your tests.
The docker run command is our tool for this, and we'll use a few specific flags to get it right:
--rm: This is just good housekeeping. It tells Docker to automatically delete the container after the test run finishes.-v $(pwd):/work/: This is the core of the operation. It maps your current directory (your project folder) to a directory named/work/inside the container.-w /work/: This sets the working directory inside the container to/work/, so when the command runs, it's starting from your project's root.mcr.microsoft.com/playwright:v1.44.0-jammy: This tells Docker which image to spin up.npx playwright test: And finally, this is the actual command we want to execute inside the container to kick off the tests.
Putting it all together, the command looks like this:
docker run --rm -v $(pwd):/work/ -w /work/ mcr.microsoft.com/playwright:v1.44.0-jammy npx playwright test
When you run it, you should see something that looks exactly like the image below, confirming a successful run.
The terminal output shows that Playwright ran three tests across three browsers (Chromium, Firefox, and WebKit), all from within the container. Just like that, you've got a hassle-free, perfectly reproducible testing foundation. That’s the immediate payoff of using the official image.
Building Your Own Custom Playwright Docker Image
The official Playwright image is a great all-in-one solution. It’s quick, easy, and gets you up and running in minutes. But once your project scales, you might start feeling its one-size-fits-all approach isn't a perfect fit. That's when it's time to consider building your own custom Playwright Docker image.
So, why bother? It really comes down to efficiency. Let's say your entire test suite only targets Chromium. The official image ships with Firefox and WebKit too, which means you're hauling around hundreds of megabytes of browsers you'll never use. That extra bloat slows down image pulls in your CI pipeline and takes up unnecessary space.
Building a custom image lets you shed that dead weight. You can create a lean, mean testing machine with just the browser you need. Another huge win is pre-installing all your project dependencies. This simple move can slash your CI/CD run times by cutting out the repetitive npm install step on every single job.
Crafting Your Dockerfile
Everything starts with a Dockerfile. Think of it as a blueprint that tells Docker exactly how to assemble your image. We'll begin with a slim base image from Microsoft, copy over our project files, and then install only the essentials.
Here’s a real-world Dockerfile that builds an image with just Chromium, which is a common scenario:
Start from the official Playwright base image
FROM mcr.microsoft.com/playwright:v1.44.0-jammy
Set the working directory inside the container
WORKDIR /app
Copy package files and install dependencies first for better caching
COPY package.json package-lock.json ./ RUN npm ci
Now, install ONLY the Chromium browser to keep the image lean
RUN npx playwright install chromium
Copy the rest of your project files
COPY . .
Set the default command to run when the container starts
CMD ["npx", "playwright", "test"]
This simple file produces a much smaller and more focused image. As you build out your Dockerfile, you'll often find yourself needing to install other tools. This guide on how to install software in Linux is a great resource for figuring out those commands.
Key Benefits of a Custom Build
The payoff for this initial effort becomes obvious pretty quickly, especially in a busy CI pipeline or a large team.
- Smaller Image Size: Ditching unused browsers can easily shrink your image by hundreds of megabytes. That means faster pulls from your container registry and less disk space consumed.
- Faster CI Jobs: By "baking" your dependencies into the image, your pipeline gets to skip a slow, network-intensive step every time it runs.
- Version Pinning: You get absolute control over your Node.js, Playwright, and browser versions, which helps eliminate those frustrating "works on my machine" version mismatch bugs.
- Added Tooling: Need a specific test reporter, a data-seeding script, or other utilities? Just install them right into the image.
Official Image vs Custom Build: A Quick Comparison
Deciding between the official image and a custom build often comes down to your project's needs. The official image prioritizes convenience, while a custom build is all about optimization. This table breaks down the key differences to help you choose the right path.
| Factor | Official Playwright Image | Custom Docker Image |
|---|---|---|
| Setup Time | Minimal; pull and run | Requires Dockerfile creation and maintenance |
| Image Size | Large (includes all browsers) | Smaller; tailored to your specific needs |
| CI/CD Speed | Slower due to on-the-fly dependency installs | Faster; dependencies are pre-installed |
| Control | Limited; uses prescribed versions | Full control over all software versions |
| Best For | Small projects, quick starts, local development | Large projects, CI/CD pipelines, specific needs |
Ultimately, a custom image gives you a testing environment that's perfectly sculpted for your project.
The decision to build a custom image is a classic trade-off: a little more work upfront for significant long-term gains in speed and efficiency. For a small project, the official image is perfect. For a large, performance-critical application, a custom image is a smart investment.
This level of environmental control is absolutely essential for more advanced testing strategies. Take visual regression testing, for example, where a stable, consistent environment is non-negotiable. If you're heading in that direction, our guide on the top visual regression testing tools is a great place to start. Given Docker's massive industry adoption, with a market share of 87.67%, learning to build a custom image is a core skill for any modern developer. A custom build empowers you to create the exact testing environment your project deserves.
Weaving Playwright Into Your CI Pipeline
Once you have a solid Playwright Docker image built, the real magic happens when you plug it into your automation workflow. This is where Continuous Integration (CI) takes your containerized tests from a neat local trick to a powerful, automated safety net for your entire project. By running your tests in a CI pipeline, you guarantee that every single code change gets validated automatically, catching bugs and regressions long before they have a chance to sneak into production.
Platforms like GitHub Actions make this surprisingly easy. The basic idea is to set up a workflow that grabs your latest code, fires up your Playwright Docker image, and runs your test suite inside it. This gives you a clean, isolated, and perfectly repeatable environment for every test run.
A Real-World GitHub Actions Workflow
Let's walk through a complete, battle-tested workflow file. This YAML configuration sets up a job that uses our Playwright image to run the tests and—just as importantly—deals with the results afterward.
name: Playwright Tests
on: push: branches: [ main ] pull_request: branches: [ main ]
jobs: test: timeout-minutes: 60 runs-on: ubuntu-latest container: image: mcr.microsoft.com/playwright:v1.44.0-jammy steps: - uses: actions/checkout@v4 - name: Install dependencies run: npm ci - name: Run Playwright tests run: npx playwright test - name: Upload test report if: always() uses: actions/upload-artifact@v4 with: name: playwright-report path: playwright-report/ retention-days: 30
Notice the if: always() condition on that final step? That's a crucial little detail. It ensures that even if a test fails and the script exits with an error, the workflow still uploads the test report artifact. This is a lifesaver for debugging because you always get access to the logs, screenshots, and videos, especially when things go sideways.
The process of creating that custom image, which is the cornerstone of this CI setup, follows a simple, layered approach.

As the diagram shows, a Dockerfile systematically builds upon a base image, adding your application files and installing dependencies to create a self-contained testing environment.
Handling Test Artifacts for Better Debugging
A test run is only useful if you can understand its results. A simple pass/fail check isn't enough; you need the full story. The actions/upload-artifact step is your best tool for this, letting you save and later inspect key evidence from the test run:
- HTML Reports: Get a bird's-eye view of all test runs, successes, and failures.
- Screenshots: See exactly what the UI looked like at the moment a test failed.
- Videos: Watch a full recording of the test from start to finish for deep-dive analysis.
This kind of visibility is absolutely critical. In fact, the global market for Docker monitoring is expected to hit US$3.5 billion by 2033, a huge number driven by the need to understand what's happening inside complex container pipelines.
For more background on the principles that make CI/CD so effective, this practical guide to automation in DevOps is a great resource. It also helps to understand the broader ecosystem of automated website testing tools and see where Playwright fits in. By setting up your pipeline to not only run tests but also manage the artifacts intelligently, you build a truly robust quality gate for your application.
Even with the best-laid plans, things can go wrong when running Playwright tests in a container. It happens to everyone. The key is knowing what to look for so you can fix it quickly instead of losing hours to frustrating debugging sessions.
Let's dive into some of the most common hiccups you'll likely run into with your playwright docker image and, more importantly, how to get past them.
Browser Crashes and Memory Problems
One of the first and most frequent errors you might see is the browser just giving up and crashing mid-test. The logs might be cryptic, but more often than not, this points directly to a memory issue.
Modern browsers, especially Chromium, are memory hungry. They heavily use a shared memory space (/dev/shm) to render pages, and by default, Docker keeps this space pretty small. When the browser hits that limit, it doesn’t gracefully fail—it just crashes.
Thankfully, the fix is usually a one-liner. Just tell Docker to allocate more shared memory using the --shm-size flag when you run your container.
docker run --rm --shm-size=1g ... your-playwright-image
My go-to starting point is always
1g. This simple addition solves the vast majority of memory-related browser crashes I've seen. If you're running a particularly heavy test suite with tons of parallel workers, you might even bump it up to2g. This single flag can be the difference between a flaky setup and a rock-solid one.
The "Browser Failed to Launch" Error
Ah, the classic "browser failed to launch" error. This one almost always means there's a disconnect between the Playwright library version in your project and the browser binaries living inside your Docker container. It’s super common in CI environments where your package-lock.json might be updated, but the cached Docker image hasn't been.
The most robust way to handle this is to force a synchronization right before you run your tests. Simply run the install command as part of your process.
- In a CI/CD pipeline: Add a step like
npx playwright installto your workflow file right before you execute the tests. - In a custom Dockerfile: If you're building your own image, you can bake this right in. Just add
RUN npx playwright installafter you've runnpm ciornpm install.
Think of this command as a safety net. It ensures that the browsers inside the container are the exact versions your code expects, wiping out any potential for version conflicts.
Dealing with "Zombie" Processes
Here’s a more subtle problem. Sometimes, browser processes don't shut down cleanly and turn into "zombie" processes. They hang around, eating up resources, and can eventually destabilize your container or CI runner. It's a silent killer for long-running test suites.
Docker has a built-in and incredibly simple fix for this: the --init flag.
Adding docker run --rm --init ... to your command tells Docker to use a tiny, specialized process as the main entry point (PID 1) in your container. This init process is smart enough to properly manage and clean up any orphaned or zombie child processes left behind by your tests. It's a tiny change that brings a huge amount of stability to your entire setup.
Frequently Asked Questions
Once you start combining Playwright and Docker, a few common questions always seem to pop up. These are the practical, real-world hurdles you hit when you move from a simple tutorial to your own projects. Let's walk through some of the most frequent ones.
How Do I Test a Local App from Inside a Docker Container?
This is a classic problem. Your web app is humming along nicely on localhost, but from the perspective of your Playwright container, localhost is itself, not your host machine. So, how do you bridge that gap?
The most straightforward way is to tell your Docker container to use your host machine's network directly. You can do this with a simple flag when you run your container: --network="host".
docker run --rm --network="host" ... your-playwright-image
By adding this, you're essentially tearing down the network wall between the container and your machine. Now, when your Playwright script tries to access localhost or 127.0.0.1, it will correctly point to the app running on your actual computer. This is an absolute must for debugging tests locally before you ever think about pushing them to a CI pipeline.
Can I Use Docker Compose with Playwright?
Not only can you, but you absolutely should, especially once your setup involves more than just the test runner. Docker Compose is perfect for orchestrating a test environment where you need to spin up your web app and your Playwright container at the same time.
You can define both as separate services in a single docker-compose.yml file. The real magic here is using the depends_on directive. This tells Docker Compose to wait until your web application's container is fully up and running before it even tries to start the Playwright container.
This approach gives you a fully self-contained and reproducible testing environment. A single
docker-compose upcommand spins up your entire application stack and test suite, making it dead simple for anyone on your team to run the exact same tests every single time.
This completely eliminates those annoying race conditions where tests fail just because they started a few seconds too early. It's the go-to method for building a reliable, end-to-end testing rig.
What Is the Difference Between This and a Service Like ScreenshotEngine?
This question comes down to "build vs. buy" and what problem you're actually trying to solve.
A Playwright Docker image is a powerful tool for your toolbox. It gives you a self-managed environment to run your own custom test suites and browser automation scripts. You control the infrastructure, you write the code, and you manage the whole execution. It's a core building block for any serious CI/CD testing pipeline.
On the other hand, a service like ScreenshotEngine is a fully managed API that takes all of that infrastructure management off your plate. Instead of wrestling with Docker, servers, and browser versions, you just send an API request with a URL. In return, you get a perfectly rendered screenshot. It's built for one job—high-volume, reliable screenshot generation—and does it exceptionally well.
You'd use a Playwright Docker image to run tests, but you’d use an API like ScreenshotEngine when all you really need is the final image artifact without the overhead.
For developers who need to generate high-quality screenshots without managing infrastructure, ScreenshotEngine offers a powerful and simple API. Skip the Docker setup and get pixel-perfect screenshots in milliseconds. Learn more and try it for free at https://www.screenshotengine.com.