
In a world where speed and quality are paramount, the pressure on development teams has never been greater. While traditional advice often circles around better meetings or faster hardware, the most significant gains are found by optimizing the systems and workflows developers rely on every day. True productivity isn't about working harder; it's about eliminating friction, automating repetitive tasks, and creating feedback loops that catch issues before they derail progress.
This article moves past the generic tips and dives into ten high-impact, actionable strategies that directly address the bottlenecks in modern software development. To truly achieve the 'real secrets to unlocking engineering velocity,' understanding practical tips for improving developer productivity through actionable strategies and tools is paramount. We will build upon that foundation by focusing on specific, high-leverage automations.
From revolutionizing your testing cycles with visual automation to simplifying your CI/CD infrastructure, these methods are designed to help your team reclaim valuable time, reduce manual overhead, and ultimately, ship better products faster. Each point provides concrete tools, practical implementation steps, and real-world examples to help you increase developer productivity in measurable ways. We will cover how to automate everything from visual regression testing and social media previews to compliance archival and AI training data collection, providing a comprehensive blueprint for engineering efficiency.
1. Visual Regression Testing Automation
Visual regression testing (VRT) is a powerful practice that automatically detects unintended visual changes in a web application's user interface. It works by capturing a "baseline" screenshot of a web page or component and then comparing it against new screenshots taken after code changes. By using pixel-by-pixel or perceptual difference algorithms, VRT tools can highlight even the most subtle rendering bugs, CSS regressions, or layout shifts that manual testing might miss. This systematic approach is a game-changer for developer productivity, as it catches visual defects early in the development cycle, long before they reach production.
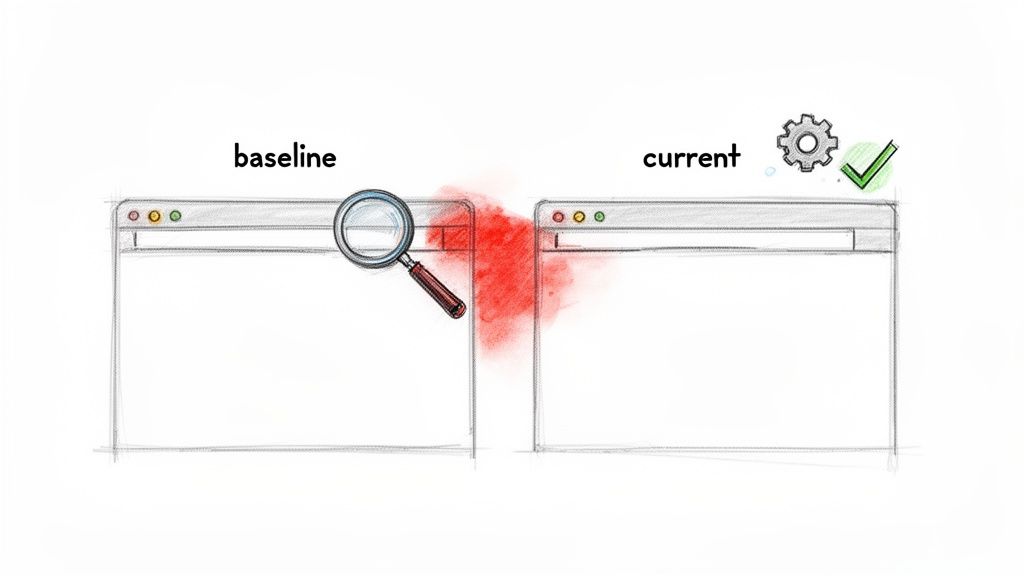
This method significantly reduces the time developers spend manually checking UI consistency across different browsers, devices, and screen resolutions. Companies like GitHub and Shopify integrate VRT directly into their CI/CD pipelines, flagging visual discrepancies in pull requests automatically. This frees up developers and QA engineers from tedious, repetitive checks, allowing them to focus on building new features and solving more complex problems. Integrating a tool like ScreenshotEngine allows teams to automate the screenshot capture process within their existing workflows, ensuring visual consistency is maintained with every release.
How to Implement Visual Regression Testing
To effectively increase developer productivity with VRT, start small and expand gradually.
- Target Critical Journeys: Begin by implementing VRT on your most critical user flows, such as checkout processes, login pages, or key landing pages, rather than the entire application at once.
- Handle Dynamic Content: Use "ignore regions" to mask areas with dynamic content like timestamps, ad banners, or live counters. This prevents false positives and keeps your test suite reliable.
- Isolate Components: Leverage element-level screenshot capabilities to test individual UI components in isolation. This is especially useful for teams maintaining a design system.
- Integrate into CI/CD: The biggest productivity gain comes from automating VRT within your continuous integration pipeline. Run tests on every commit or pull request to provide developers with immediate feedback.
For teams looking to adopt this practice, there are many powerful options available. You can find an in-depth comparison of VRT solutions by checking out this guide on the best visual regression testing tools.
2. API-First Screenshot Integration in CI/CD Pipelines
An API-first approach to screenshot generation involves integrating a dedicated screenshot service directly into your Continuous Integration and Continuous Deployment (CI/CD) pipeline. Instead of managing complex, resource-intensive headless browser infrastructure, developers make a simple API call to capture screenshots of web pages or components during the build or test stages. This method abstracts away the complexities of browser installation, versioning, and configuration, allowing teams to focus on code rather than infrastructure. This streamlined process is a major driver to increase developer productivity by eliminating a significant source of manual work and potential pipeline failures.
This integration provides immediate visual feedback on code changes directly within the development workflow. For instance, companies like Netflix and Twilio leverage robust automation in their CI/CD processes to maintain quality at scale. By embedding screenshot API calls, teams can automate visual testing, generate documentation, or create deployment previews with minimal effort. Using a service like ScreenshotEngine, which offers a powerful single-endpoint API, simplifies this integration. Developers can trigger screenshot generation for every merge request in a GitLab CI pipeline or as a step in a GitHub Actions workflow, ensuring visual consistency is automatically verified.
How to Implement API-First Screenshots in CI/CD
To effectively boost productivity with this approach, focus on seamless integration and efficient use of the API.
- Secure API Keys: Store your screenshot service API key in your CI/CD platform's secret management system, such as GitHub Secrets or GitLab CI/CD variables, to avoid exposing it in your code.
- Use SDKs for Simplicity: If available, use the service's official SDKs (Software Development Kits) for your team's primary programming language. This simplifies API calls and handles retries or error management.
- Run Requests in Parallel: To speed up your pipeline, trigger multiple screenshot requests concurrently for different pages or UI variations. This is especially effective for testing responsive designs across various viewports.
- Test Parameters Before Deployment: Use an API playground or local testing tools to fine-tune screenshot parameters like resolution, block requests, or wait times before embedding the calls into your live pipeline. This prevents unnecessary pipeline runs and debugging.
This method is ideal for teams seeking to automate visual checks without the overhead of maintaining their own browser automation infrastructure. You can learn more about how a simple, powerful API can streamline this process by exploring ScreenshotEngine's API documentation.
3. SEO Monitoring and SERP Tracking Automation
Automating the capture and analysis of search engine results pages (SERPs) is a highly effective way to monitor keyword rankings, track competitor visibility, and analyze search result layouts. This practice eliminates the need for manual, time-consuming checks, freeing up SEO specialists and developers from repetitive tasks. By programmatically capturing screenshots of SERPs, teams can systematically track performance metrics, identify algorithm changes, and discover new optimization opportunities with far greater efficiency. This automation allows developers to build robust monitoring systems instead of performing endless manual searches.
This process significantly reduces the labor-intensive work of daily rank checking across multiple keywords, devices, and geographic locations. Companies like SEMrush and Ahrefs built their platforms around this core concept of automated SERP data collection. E-commerce businesses, for instance, use this method to track seasonal keyword rankings, while SaaS companies monitor search visibility for new product launches. Automating this data gathering with a screenshot API allows teams to focus on strategy and analysis, which in turn helps to increase developer productivity by letting them work on higher-value data processing and feature development tasks.
How to Implement SERP Tracking Automation
To effectively implement automated SERP monitoring, focus on consistency and scale.
- Use Proxies for Geographic Accuracy: Employ rotating proxies to capture SERPs from different geographic locations. This is crucial for tracking international SEO performance and avoids rate-limiting or captchas.
- Schedule Consistent Captures: Automate screenshot captures at the same time each day or week to minimize variations caused by time-of-day fluctuations in search results.
- Capture Full-Page Layouts: Use full-page screenshot capabilities to capture the entire SERP, including "People Also Ask" boxes, featured snippets, and map packs. This provides a complete picture of the search landscape.
- Add Timestamp Metadata: Store each screenshot with detailed metadata, including the timestamp, keyword, and location. This data is essential for building a historical archive to analyze ranking trends over time.
For teams looking to scale their operations, it's essential to have the right tools. To drastically improve efficiency and scale your online presence, explore the 12 best SEO automation tools available, which directly contributes to higher developer productivity. You can also learn more by exploring this guide to building a SERP results checker.
4. Social Media Preview and Link Metadata Automation
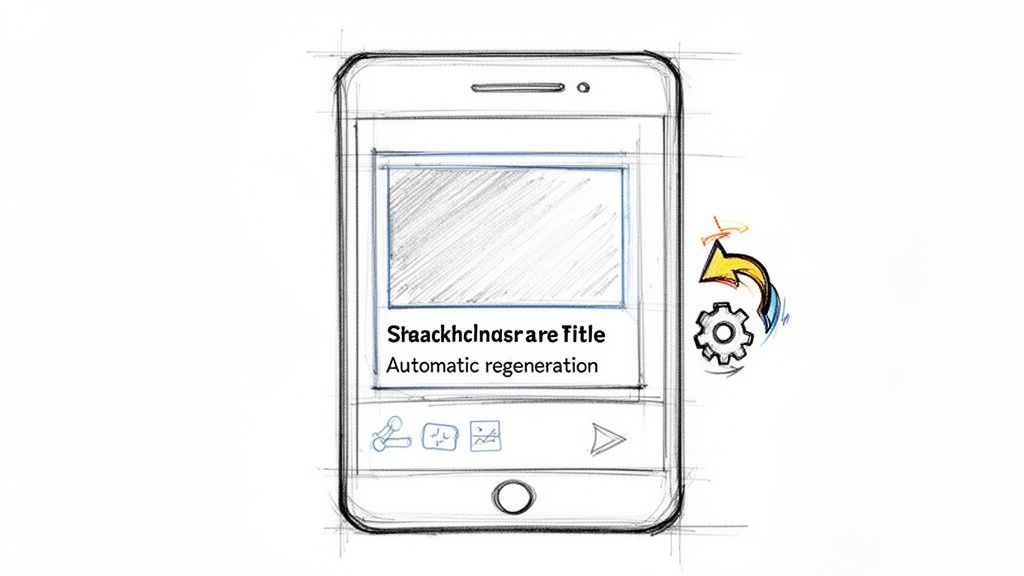
Manually creating and updating social media preview images (like Open Graph cards) for every new blog post, product page, or content update is a tedious, error-prone task that drains developer time. Social media preview automation solves this by dynamically generating these images from your web content. This practice ensures that whenever a link is shared on platforms like Twitter, Facebook, or LinkedIn, it displays a professional, branded, and up-to-date preview, which significantly improves click-through rates and brand consistency. Automating this process frees developers from the repetitive cycle of image design and asset management.
This method directly contributes to an increase in developer productivity by eliminating a significant manual bottleneck in the content publishing workflow. Companies like Vercel have popularized dynamic OG image generation, allowing developers to define templates that are automatically populated with titles, author names, or product details. Instead of waiting for a designer or manually updating images, developers can set up a system that programmatically captures the necessary content. Using a screenshot API like ScreenshotEngine, teams can automate the capture of perfectly sized and styled preview images directly from a URL, triggered every time content is updated.
How to Implement Social Media Preview Automation
To get started, focus on automating the generation process and integrating it into your content management system (CMS) or CI/CD pipeline.
- Define Standardized Templates: Create HTML and CSS templates for your social media cards. These act as the blueprint for all generated images, ensuring brand consistency.
- Trigger Regeneration on Update: Use webhooks from your CMS to trigger the image generation process whenever content is published or modified. This ensures previews are never stale.
- Capture Platform-Specific Sizes: Use a screenshot service to capture images at the optimal dimensions for social platforms, such as 1200x630 pixels for Open Graph. This avoids awkward cropping.
- Cache for Performance: Store the generated images on a CDN and set a reasonable time-to-live (TTL). This reduces generation costs and ensures fast load times when the link is shared.
For teams looking to streamline their content workflows, automating social previews is a high-impact productivity win. You can explore how to build these dynamic images with our guide on creating an Open Graph template.
5. Compliance and Website Archival Automation
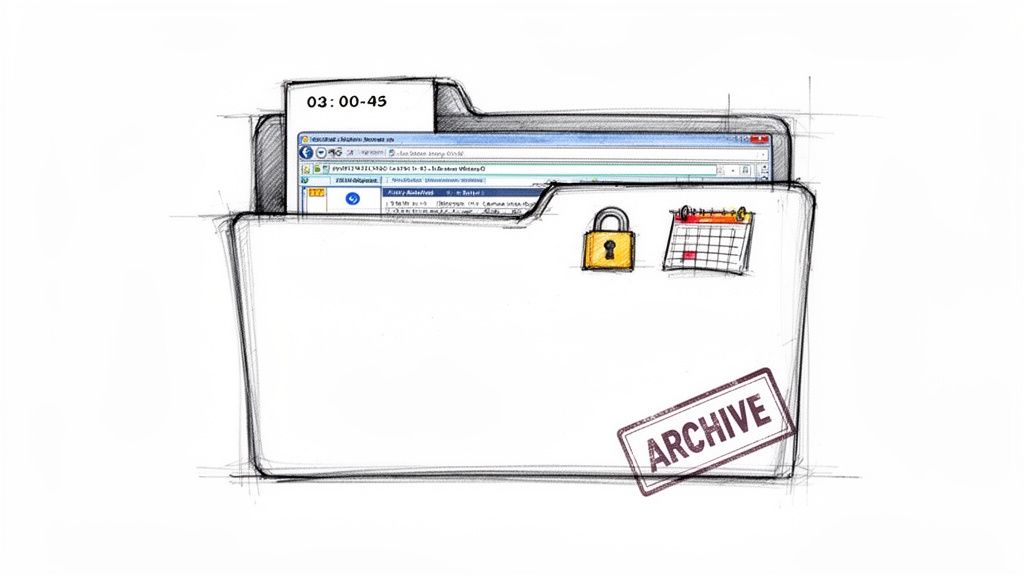
Compliance and website archival automation involves systematically capturing and storing screenshots of web pages for regulatory compliance, legal discovery, and historical record-keeping. This practice creates timestamped visual evidence of a website's state, protecting an organization during disputes and maintaining clear audit trails. For developers, automating this process removes the manual burden of documenting web properties, which is especially critical in regulated industries or for organizations subject to strict data retention policies. It’s a proactive measure that saves countless hours of reactive, high-stress work later on.
Automating archival tasks directly boosts productivity by eliminating a tedious, error-prone manual process. Organizations like DocuSign and Everlaw build their platforms around verifiable audit trails, a concept that extends to a company’s own web presence. Financial institutions must archive trading platform UIs, healthcare providers need records of patient portal interfaces, and e-commerce sites must document pricing changes. Automating this with a tool like ScreenshotEngine ensures captures are consistent, scheduled, and securely stored, freeing developers to focus on feature development rather than manual compliance tasks. This shift significantly helps increase developer productivity by offloading a critical but repetitive responsibility.
How to Implement Website Archival Automation
To effectively implement an automated archival system, focus on creating a robust, verifiable, and manageable process.
- Schedule Automated Captures: Use a screenshot API to implement automated daily or weekly capture schedules for critical pages, such as terms of service, pricing pages, or user dashboards.
- Store with Rich Metadata: Ensure every screenshot is stored with complete metadata, including the precise timestamp, full URL, viewport dimensions, and user agent string. This context is vital for legal and compliance audits.
- Use High-Quality Formats: Save archives in a lossless format like PNG to ensure the best possible quality and compatibility for long-term storage and legal review.
- Implement Immutable Storage: Store the captured assets in an immutable storage solution, such as AWS S3 with Object Lock or Google Cloud Storage with Bucket Lock, to prevent tampering or accidental deletion.
- Align with Retention Policies: Work with legal and compliance teams to define and implement automated retention policies that align with regulatory requirements, ensuring data is kept for the required duration and then securely disposed of.
6. AI Training Data Collection and Dataset Generation
Automating the collection of large-scale screenshot datasets is a critical practice for training sophisticated machine learning models. This approach involves programmatically capturing vast numbers of visual samples from websites and applications to create comprehensive datasets for tasks like UI understanding, computer vision, and accessibility analysis. By automating this process, data scientists and ML engineers can build robust training sets without the monumental effort of manual collection, drastically accelerating model development and improving data quality. This automation is a significant factor to increase developer productivity in the AI and ML space.
This method moves teams beyond small, manually curated datasets, enabling the creation of diverse and large-scale visual inventories necessary for high-performance models. Organizations like OpenAI and platforms like Hugging Face rely on massive, programmatically gathered web datasets to train their foundational models. Automating screenshot capture with a tool like ScreenshotEngine allows AI teams to systematically gather visual data across millions of URLs, capturing variations in layout, content, and design. This frees developers from tedious data sourcing tasks, letting them concentrate on model architecture, training, and evaluation.
How to Implement Automated Dataset Generation
To effectively collect visual data for AI training, a structured and efficient approach is key.
- Generate Viewport Variations: For each target URL, capture screenshots across multiple viewports (mobile, tablet, desktop) and modes (light and dark) to ensure your model learns from diverse visual contexts.
- Use Efficient Formats: Store images in a modern format like WebP, which is 30-40% smaller than PNG. This reduces storage costs and speeds up data transfer and loading times during model training.
- Capture at Scale: Implement parallel batch requests to maximize collection throughput. This allows you to generate hundreds or thousands of screenshots per minute from a large list of URLs.
- Create Labeled Samples: Use element-level screenshot capabilities to automatically crop specific UI components like buttons, forms, or navigation bars. This creates pre-labeled training samples for object detection models.
For teams building the next generation of visual AI, automating data collection is not just a convenience; it's a competitive necessity. You can learn more about programmatic screenshot generation by exploring the ScreenshotEngine API documentation.
7. Automated Performance Monitoring and Visual Degradation Detection
Automated performance monitoring combined with visual degradation detection provides a powerful, proactive approach to maintaining application quality. This practice involves systematically capturing screenshots of a web application at regular intervals to monitor its visual performance over time. By correlating these visual snapshots with performance metrics, teams can automatically identify subtle degradations like slow-rendering components, Cumulative Layout Shift (CLS), or visual glitches that appear under specific network conditions. This is a crucial strategy to increase developer productivity by catching performance regressions that directly impact user experience before they escalate.
This method moves beyond traditional performance metrics by providing visual proof of how slowdowns manifest to the end-user. For instance, a news website can monitor how quickly its hero images load, while an e-commerce platform can track the rendering speed of its checkout flow. Companies like New Relic and Datadog have popularized Real User Monitoring (RUM) by connecting performance data to user sessions. Integrating automated screenshots with a tool like ScreenshotEngine elevates this by adding a visual dimension, allowing developers to see the exact moment a UI component fails to render correctly due to a backend slowdown, thus eliminating guesswork and reducing time spent on debugging.
How to Implement Automated Visual Performance Monitoring
To effectively use this technique and increase developer productivity, focus on correlating visual evidence with performance data.
- Monitor During Peak Traffic: Schedule screenshot captures during high-traffic periods to identify performance bottlenecks and visual degradation under real-world load conditions.
- Combine with Core Web Vitals: Pair screenshots with key performance metrics like Largest Contentful Paint (LCP) and First Contentful Paint (FCP). Store performance metadata alongside each screenshot to analyze how metrics impact the visual outcome.
- Isolate Critical Components: Use element-specific screenshots to monitor the rendering performance of vital UI components, such as a SaaS dashboard's main chart or a payment form's "Submit" button.
- Set Alert Thresholds: Implement automated alerts that trigger when a visual discrepancy is detected or when a performance metric crosses a predefined threshold, providing immediate feedback without manual checks.
8. Headless Browser Elimination and Infrastructure Simplification
Managing headless browsers like Puppeteer, Playwright, or Selenium introduces significant infrastructure complexity and maintenance overhead. This includes dealing with browser versioning, memory leaks, dependency management, and scaling issues, all of which divert developer attention from core application logic. By transitioning to a managed screenshot API, teams can eliminate this entire layer of infrastructure, offloading the burden of running and maintaining browser instances to a specialized service. This direct approach is a powerful way to increase developer productivity by simplifying CI/CD pipelines and reducing operational costs.
This shift allows developers to replace complex, resource-intensive browser automation code with a simple, reliable API call. Companies moving from self-hosted Puppeteer to an API like ScreenshotEngine often see their CI/CD Docker image sizes shrink by up to 40% by removing the need to bundle a full browser. This simplification also accelerates deployment times and reduces the attack surface of their applications, freeing developers from troubleshooting browser-related failures and letting them focus on building features.
How to Simplify Your Infrastructure
To effectively transition away from self-managed headless browsers, follow a structured migration plan.
- Audit Current Usage: Identify all instances where Puppeteer or Playwright are used in your codebase. Categorize them by criticality, such as critical-path visual tests versus non-essential social media card generation.
- Start with Non-Critical Tasks: Begin migrating lower-risk functionalities, like generating marketing previews, to a managed API. This allows you to validate the new service's reliability and performance without impacting core user journeys.
- Measure the Impact: Track key metrics before and after the migration. Monitor CI/CD pipeline duration, Docker image size, infrastructure costs, and the frequency of browser-related test failures to quantify the productivity gains.
- Leverage API-Specific Features: Utilize built-in API features like ad, cookie, and chatbot blocking to remove complex custom code from your application. For example, ScreenshotEngine handles these common website interruptions with simple API parameters, further simplifying your test setup.
For teams ready to reduce their maintenance load, exploring a managed service is the next logical step. You can start testing the API-based approach immediately with a free ScreenshotEngine plan to see the benefits firsthand.
9. Collaborative Visual Testing and Design System Sync
Collaborative visual testing bridges the communication gap between design and development by using automated screenshots as a shared source of truth. This practice ensures that UI implementations precisely match design system specifications. By generating visual snapshots of components and pages, it creates a "visual contract" that both designers and developers can reference, streamlining reviews and eliminating the back-and-forth often associated with UI verification. This approach significantly boosts efficiency by catching design deviations early and fostering tighter alignment between teams.
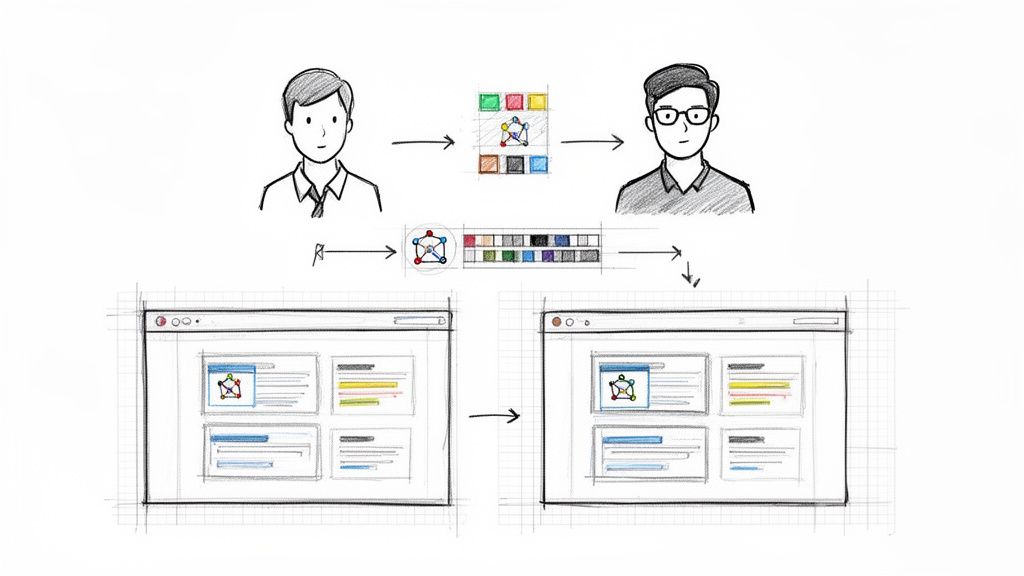
This method empowers designers to review UI changes without needing to set up a local development environment. Companies like Stripe and tools like Chromatic for Storybook champion this workflow by showing design specifications and visual diffs alongside the implementation in pull requests. This allows for asynchronous feedback and verification, freeing developers from manual design handoff checks and letting them focus on coding. Using a service like ScreenshotEngine to capture these visuals and embed them in tools like GitHub or Jira automates this crucial collaboration step, making design compliance a seamless part of the development lifecycle.
How to Implement Collaborative Visual Testing
To effectively increase developer productivity using this collaborative model, integrate visual checks directly into your team's workflow.
- Integrate into Pull Requests: Automatically generate and post baseline vs. current screenshots as comments in every UI-related pull request. This provides immediate visual context for reviewers.
- Isolate Design System Components: Use element-specific screenshots to capture individual components. This allows for focused review and ensures that changes to one component do not unintentionally affect others.
- Establish Visual Approval Workflows: Make visual verification a required step for merging pull requests. This formalizes the process and guarantees that no UI change goes live without design approval.
- Create a Reference Gallery: Maintain a central, auto-updated screenshot gallery of all design system components and key pages. This serves as a living style guide and a quick reference for the entire product team.
10. Intelligent Caching and Cost Optimization through Content Hashing
Intelligent caching is a powerful strategy that dramatically reduces unnecessary work and API costs by preventing redundant operations. In the context of visual automation, this means avoiding new screenshot captures when a web page's content has not changed. This is achieved through content hashing, a method where the HTML of a page is converted into a unique checksum (or hash). If the hash remains the same between checks, the system knows the page is visually identical and can reuse a previously captured, cached screenshot. This technique is a major lever to increase developer productivity by eliminating wasted resources and speeding up processes that rely on visual data.
This practice directly translates to significant cost savings and efficiency gains. For example, SEO monitoring platforms have cut their screenshot API calls by over 50% by hashing page URLs and their content, only generating new screenshots when a change is detected. This frees up developers from managing ballooning API budgets and complex rate-limiting logic, allowing them to focus on feature development. By integrating this strategy with a service like ScreenshotEngine, teams can ensure they only pay for captures that reflect actual changes, optimizing both performance and expenditure.
How to Implement Content Hashing for Caching
To effectively optimize your screenshot generation workflows, you can implement a content hashing system with a few targeted steps.
- Generate Content Hashes: Before requesting a screenshot, fetch the page's HTML content and generate a consistent hash using an algorithm like SHA-256. This hash serves as a unique fingerprint for the page's current state.
- Implement a Cache-Aside Strategy: Use a key-value store like Redis or a local database. Check if the content hash exists as a key in your cache. If it does (a "cache hit"), retrieve the associated cached screenshot URL. If not (a "cache miss"), proceed with the API call to ScreenshotEngine, then store the new screenshot URL in the cache with the content hash as the key.
- Optimize Storage: When caching screenshot images, use modern, efficient formats like WebP. This can significantly reduce your storage footprint and costs, especially when archiving a large volume of visual data.
- Monitor Cache Performance: Track your cache hit and miss rates. This data provides clear insight into the effectiveness of your strategy and quantifies the API calls you've avoided and the associated cost savings, directly demonstrating the productivity boost.
10-Point Developer Productivity Comparison
| Item | 🔄 Implementation Complexity | ⚡ Resource Requirements | 📊 Expected Outcomes | ⭐ Ideal Use Cases | 💡 Key Advantages |
|---|---|---|---|---|---|
| Visual Regression Testing Automation | High — baseline maintenance, threshold tuning, CI integration | Moderate–High storage and compute; multi-browser support | Detect visual regressions early; reduced manual QA | UI-heavy web apps, design systems, release gating | Catches rendering bugs; diff highlighting; visual docs |
| API-First Screenshot Integration in CI/CD Pipelines | Low–Medium — simple HTTP integration, API key management | Low infra overhead; network/API quota considerations | Fast build-time screenshots; no headless browser maintenance | CI/CD pipelines, build-time checks, lightweight teams | Quick integration; auto-scaling SDKs; minimal infra |
| SEO Monitoring and SERP Tracking Automation | Medium — scheduling, geo/device variants, proxy handling | Proxies/IP rotation, storage for historical captures | Historical SERP records; competitor and layout monitoring | SEO agencies, enterprise rank tracking, marketers | Bulk SERP captures; trend detection; multi-region support |
| Social Media Preview and Link Metadata Automation | Low — generate/regenerate OG images, webhook triggers | Minimal compute; storage and caching for previews | Consistent social previews; improved CTR and branding | News sites, blogs, e‑commerce product pages | Automated OG generation; platform-sized outputs |
| Compliance and Website Archival Automation | Medium — scheduled jobs, legal metadata and retention | High long-term storage; immutable/archive storage options | Legally defensible, timestamped website archives | Regulated industries, legal discovery, audits | Immutable records, audit trails, full‑page captures |
| AI Training Data Collection and Dataset Generation | Medium–High — large-scale batching, metadata tagging | Very high throughput & storage; cost at scale | Scalable, consistent datasets for ML training | Computer vision, accessibility research, ML teams | Bulk generation, multiple formats/variants, element crops |
| Automated Performance Monitoring & Visual Degradation Detection | Medium — scheduled captures, metric correlation, alerting | Continuous API calls, storage for time-series images | Early detection of visual/perf regressions; trend analysis | SaaS dashboards, high-traffic sites, e‑commerce | Correlates perf metrics with visuals; alerting and timelines |
| Headless Browser Elimination & Infrastructure Simplification | Low — swap local browsers for managed API | Lower infra and image sizes; network reliance | Reduced infra complexity; faster CI builds | Serverless functions, teams avoiding Chromium deps | No browser management; smaller images; simpler deployments |
| Collaborative Visual Testing & Design System Sync | Medium — baseline specs, design tool integration, PR workflows | Storage for baselines; review tooling integration | Faster design reviews; consistent implementation with specs | Design/dev collaboration, component libraries, DS teams | Side-by-side diffs; living design documentation |
| Intelligent Caching & Cost Optimization through Content Hashing | High — cache key strategy, invalidation, deduplication | Cache store (Redis), compute for hashing; some storage | Fewer API calls; significant cost and rate-limit reduction | Large-scale monitoring, frequent captures, cost-sensitive ops | Dramatic API cost savings; faster repeat requests; TTL strategies |
Putting It All Together: Your Blueprint for Higher Productivity
We've explored a comprehensive landscape of strategies designed to reclaim valuable engineering time and significantly increase developer productivity. The journey from manual toil to automated efficiency isn't about finding a single silver bullet. Instead, it’s about strategically weaving together smarter workflows, modern tooling, and a cultural commitment to reducing friction. The common thread connecting every point, from automating visual regression tests to streamlining SEO monitoring, is the principle of systematic offloading. By delegating repetitive, error-prone tasks to specialized services, you free your team to concentrate on complex problem-solving and innovation.
The shift is from reactive maintenance to proactive value creation. Rather than spending hours debugging a flaky headless browser setup or manually capturing screenshots for compliance, developers can trust an automated system to handle it. This creates a virtuous cycle: faster feedback loops lead to quicker iterations, which in turn boosts code quality and developer morale. The real win isn't just saving a few hours; it's about fundamentally changing the development experience from one of frustrating overhead to one of focused, creative work.
Your Actionable Roadmap to Higher Productivity
Translating these ideas into reality requires a deliberate, step-by-step approach. Overhauling everything at once is a recipe for disruption. The key is to identify the most significant bottlenecks in your current workflow and target them with high-impact automations.
Here’s a practical blueprint to get started:
- Identify Your Biggest Time Sink: Conduct a small audit with your team. Is it manual QA testing before a release? Is it the tedious process of updating social media preview images? Perhaps it's the infrastructure management tied to your current screenshot generation tools. Pinpoint the one process that causes the most collective groans.
- Implement a Pilot Project: Choose one specific area to automate first. For example, if visual regression is a pain point, integrate an API-based screenshot service like ScreenshotEngine into a single project’s CI/CD pipeline. The goal is to achieve a measurable win quickly, demonstrating the value of automation to the entire team and building momentum.
- Measure the Impact: Track the before-and-after. How many developer hours were saved? Did the feedback loop for designers and product managers shorten? Was there a noticeable reduction in visual bugs reaching production? Quantifying these results is crucial for making the business case to expand these practices.
- Expand and Standardize: Once you’ve proven the value in one area, use that success as a template to tackle the next bottleneck. Standardize the tools and processes across teams to ensure consistency and maximize the return on investment. Whether it's for SERP tracking, compliance archival, or AI data collection, a unified approach simplifies maintenance and training.
The Compounding Value of Smart Automation
Ultimately, the quest to increase developer productivity is about creating an environment where developers can thrive. It's about removing obstacles that drain energy and replacing them with systems that provide leverage. Each manual task you automate, from generating social media previews with correct metadata to ensuring design system consistency through visual snapshots, adds up. These individual improvements compound over time, leading to a more resilient, efficient, and innovative engineering organization.
By embracing the strategies we’ve discussed, you’re not just optimizing a workflow; you’re investing in your team’s most valuable asset: their time and cognitive energy. The result is a faster, more reliable development lifecycle, and more importantly, a happier and more engaged team empowered to build exceptional products.
Ready to eliminate screenshot-related bottlenecks and supercharge your team's efficiency? ScreenshotEngine provides a robust, scalable API to automate every visual task discussed in this article, from CI/CD integration to SEO monitoring. Try ScreenshotEngine today and discover how you can increase developer productivity by offloading complex visual generation and testing to a dedicated, reliable service.