Taking a screenshot of a webpage sounds simple, but the right way to do it really depends on what you need. A quick grab for a bug report is a world away from generating thousands of high-fidelity images for a production service.
The method you choose matters. It’s the difference between a five-second task and a five-hour coding session. We'll walk through the four main approaches developers use, from the simplest keyboard shortcut to a full-blown API integration.
Your Quick Guide to Capturing Webpages Instantly
Knowing how to effectively screenshot a webpage can save you a ton of time, whether you're a developer documenting a UI bug, a QA engineer running visual tests, or a marketer keeping an eye on competitor sites. The choice isn't just about speed; it's about getting the precision, scale, and automation you actually need.
Think of this as your roadmap. We’ll start with the basics and work our way up to the kind of solutions you'd build into a real-world application.
The Four Core Methods
The tools at your disposal range from straightforward manual actions to complex, automated scripts. Each has its strengths, but it's crucial to understand their trade-offs.
- Built-in OS and Browser Tools: This is your first line of defense. We're talking
PrtScnon Windows orCmd+Shift+4on macOS. They are perfect for one-off captures of what's currently on your screen but offer zero options for capturing a full scrolling page or automating the process. - Browser Developer Tools: A huge leap forward. The DevTools built into browsers like Chrome and Firefox let you capture exactly what you need—full pages, specific elements, even what a page looks like on a mobile device—all without installing a thing.
- Headless Automation: When you need to take screenshots repeatedly, libraries like Puppeteer and Playwright are your best friends. You can write scripts to navigate websites and snap pictures programmatically. This gives you incredible control, but it also means you're responsible for all the setup and ongoing maintenance.
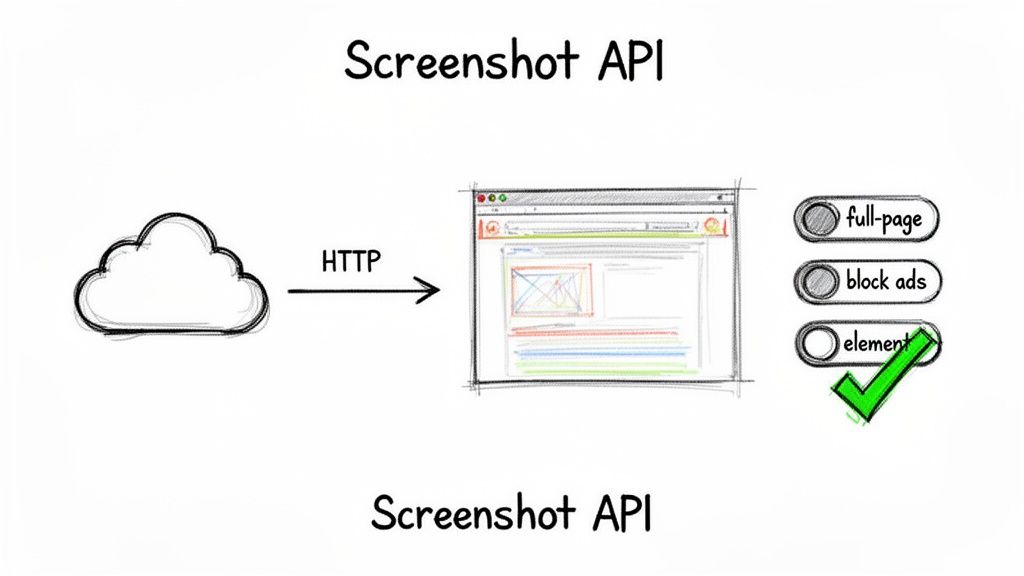
- Screenshot APIs: This is the professional-grade solution for production systems. A service like ScreenshotEngine offloads all the heavy lifting—browser management, infrastructure, and proxy rotation. You just make a simple API call to capture any webpage, anywhere.
This flowchart can help you decide which path makes the most sense for your project, from a single manual screenshot to a large-scale, automated workflow.
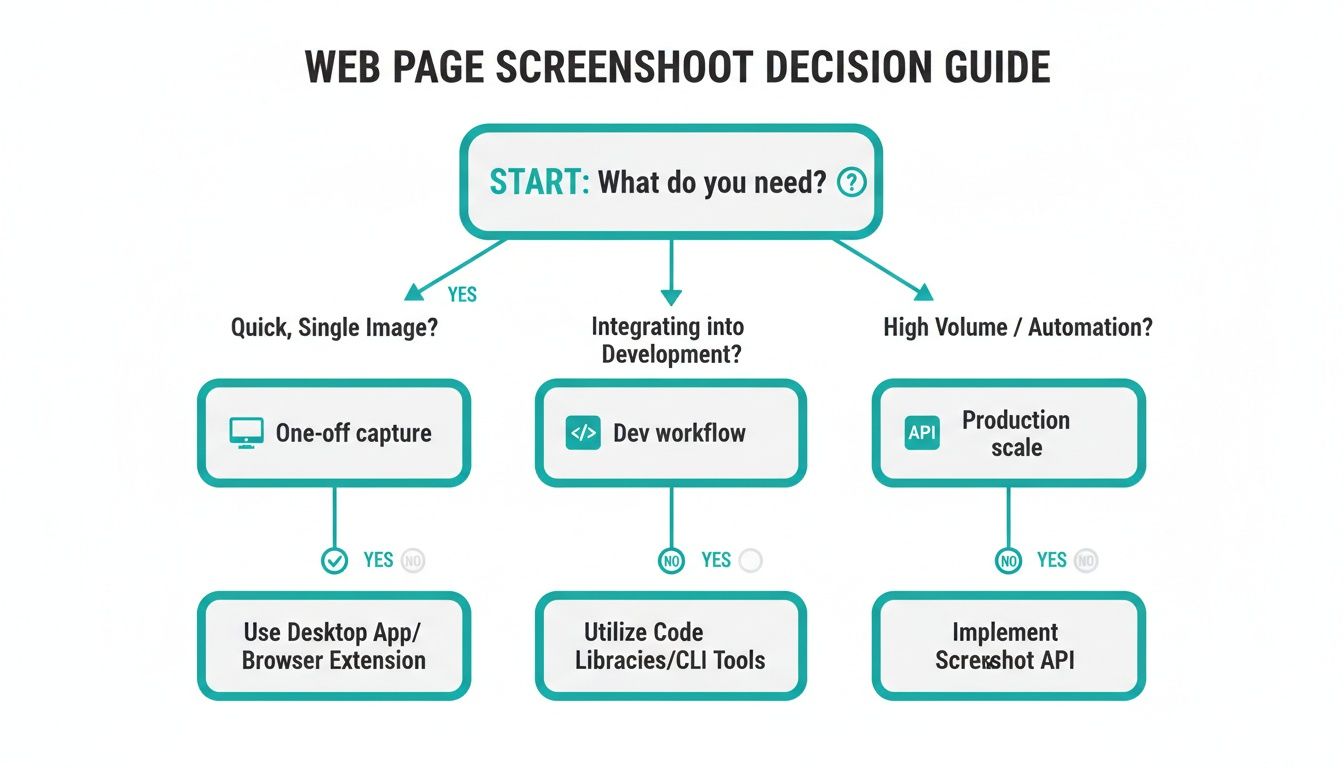
As you can see, the tooling naturally evolves as your needs shift from personal use to professional development and, finally, to scalable production systems.
To help you choose, here’s a quick breakdown of how these methods stack up against each other.
Comparison of Webpage Screenshot Methods
| Method | Best For | Complexity | Scalability |
|---|---|---|---|
| OS/Browser Tools | Quick, one-off captures of the visible screen area. | Low | Very Low |
| Developer Tools | Full-page captures, element-specific shots, and device emulation. | Low | Low |
| Headless Automation | Automated, repeatable tasks and bulk screenshot generation. | High | Medium |
| Screenshot API | Production-level, reliable, and highly scalable captures. | Low | Very High |
Each method has its place. The key is picking the right tool for the job to avoid unnecessary complexity or hitting a wall when you need to scale. For a deeper dive, we've also put together a guide on the best screenshot capture software available.
The most important factor is aligning the tool with the task's complexity and scale. Using a simple OS command for a thousand daily captures is inefficient, just as setting up a headless browser for one quick image is overkill.
Consider this your quick-start guide. In the sections that follow, we'll get into the nitty-gritty of each approach, complete with code examples and practical advice to help you master every method.
2. Using Browser Developer Tools for High-Fidelity Screenshots
When you need more precision than a quick keyboard shortcut can provide, the best tool is probably already on your machine. Every major browser—Chrome, Firefox, Edge, and Safari—is packed with a powerful suite of Developer Tools that gives you surgical control over your screenshots. Best of all? You don't need to install a thing.
Moving beyond basic screen grabs is a game-changer for your workflow. Forget stitching multiple images together or dealing with awkward crops. With dev tools, you can capture exactly what you need in one clean shot. This is how developers, designers, and QA testers work efficiently.
Finding the Screenshot Commands
First things first, you need to open the Developer Tools. The quickest way is to right-click anywhere on the page and hit "Inspect." You can also use a keyboard shortcut: Ctrl+Shift+I on Windows/Linux or Cmd+Option+I on a Mac.
With the DevTools panel open, the real magic happens in the Command Menu. It’s a powerful, searchable interface that puts hundreds of browser functions at your fingertips. Pop it open with Ctrl+Shift+P (Windows/Linux) or Cmd+Shift+P (macOS).
Once you're in the Command Menu, just start typing "screenshot." A few different options will pop up, each tailored for a specific job.
The image below gives you a glimpse of the Command Menu in Chrome DevTools, showing the capture options we're about to dive into.
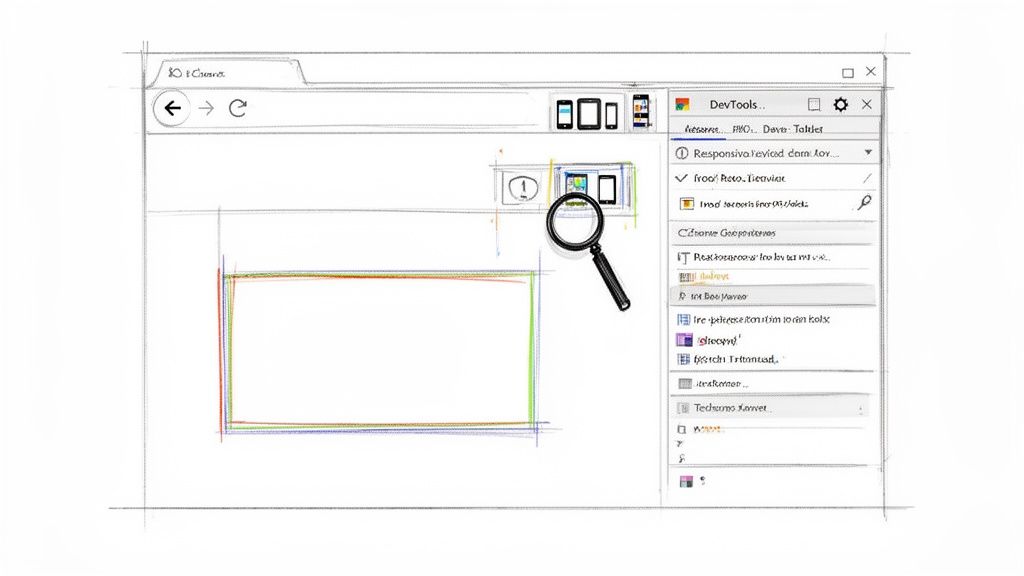
This little menu is your ticket to capturing everything from a massive, scrolling page down to a single button with pixel-perfect accuracy.
Snapping a Full-Page Screenshot
Capturing a long webpage that scrolls forever is a classic headache. Trying to piece together multiple screenshots is a frustrating puzzle that almost never looks right. Developer Tools make this a non-issue.
After opening the Command Menu (Ctrl+Shift+P or Cmd+Shift+P), type "screenshot" and find the Capture full size screenshot option. The browser will handle the rest, automatically scrolling and rendering the entire page into a single, high-resolution PNG file. It's the perfect way to archive long-form articles or document an entire landing page design.
Zeroing In on a Specific Element
Sometimes, you don't care about the whole page—you just need one piece of it. Maybe you need to flag a bug in a complex navigation bar or share a new chart from a dashboard with your team. Taking a full screenshot and then opening an editor to crop it is just extra work.
There's a much faster way:
- Right-click the exact element you want to capture and select "Inspect." This automatically highlights its HTML code in the Elements panel.
- With that code highlighted, open the Command Menu (
Ctrl+Shift+PorCmd+Shift+P). - Type "screenshot" and select Capture node screenshot.
Boom. The browser saves a tightly cropped image of only that element, ignoring everything else. It's an incredibly efficient way to grab clean assets for bug reports, presentations, or design docs.
Pro Tip: Capturing a node screenshot is my go-to trick for grabbing UI elements with a transparent background (as long as they don't have a background color set in the CSS). This is amazing for creating mockups or building out a design system.
Emulating and Capturing Mobile Views
Making sure a website looks right on a phone is non-negotiable. While nothing beats testing on a real device, you can get a very accurate preview right from your desktop using the Device Mode in Developer Tools.
To turn it on, just click the little phone-and-tablet icon in the top-left of the DevTools panel. You can also press Ctrl+Shift+M (Windows/Linux) or Cmd+Shift+M (macOS) to toggle it.
This switches the page into a responsive simulator where you can pick from presets like an iPhone or Pixel, or even punch in a custom screen size. Once you've got the view you want, just open the Command Menu (Ctrl+Shift+P or Cmd+Shift+P).
- Capture screenshot grabs the visible part of the emulated screen.
- Capture full size screenshot saves the entire scrolling page as it would appear on that device.
Automating Screenshots with Headless Browsers
Taking screenshots with DevTools is great for one-off jobs, but what happens when you need to capture a webpage every hour? Or monitor the look and feel of hundreds of product pages on your e-commerce site? This is where manual methods just can't keep up, and automation becomes a necessity.
For these kinds of advanced situations, developers reach for powerful headless browser libraries. A headless browser is basically a web browser without a graphical user interface. You control it entirely through code. Imagine a robot running Chrome or Firefox that you can command with a script to browse, click, and, of course, take screenshots.
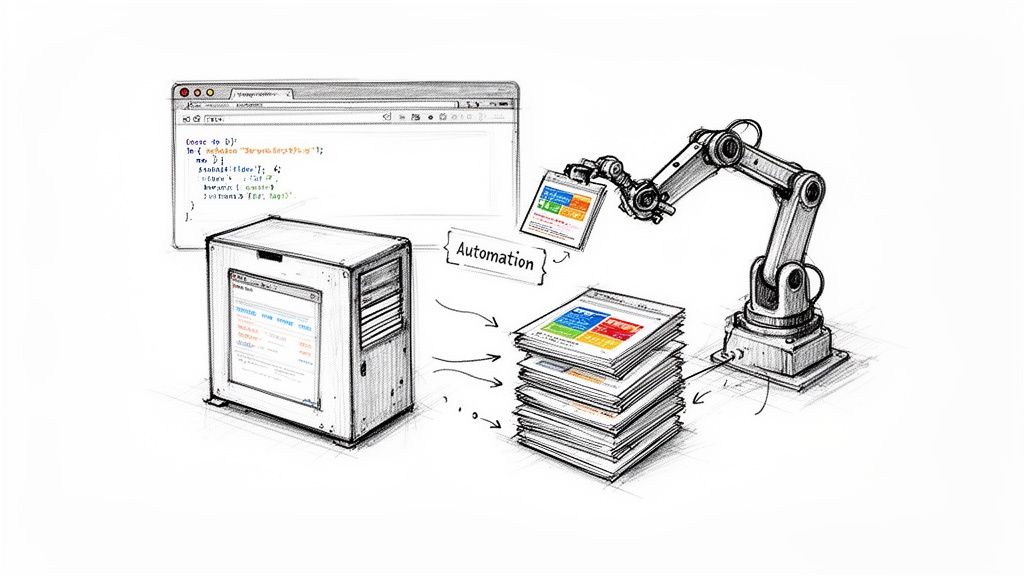
This approach unlocks the ability to screenshot webpages at an incredible scale, making it a key part of modern QA testing, data gathering, and site monitoring workflows.
Introducing Puppeteer and Playwright
Two names really stand out in the headless automation world: Puppeteer and Playwright. Both are open-source Node.js libraries that give you a high-level API to control a browser.
- Puppeteer: Developed by Google, this library is all about controlling Chrome and Chromium. It's known for its massive community and fantastic documentation, which makes it a go-to starting point for a lot of developers.
- Playwright: This one comes from Microsoft—in fact, it was built by the same team that originally created Puppeteer. Its big advantage is cross-browser support right out of the box, covering Chromium, Firefox, and WebKit (the engine behind Safari). This makes it an amazing choice for comprehensive cross-browser testing.
For advanced scenarios and programmatic control over web pages, developers often turn to powerful headless browser libraries such as Playwright for headless browser automation. Both tools let you write scripts that can perform complex actions just like a real person would.
A Practical Puppeteer Example
Let’s take a look at how simple it is to get started. Here’s a basic JavaScript snippet using Puppeteer to visit a website and save a full-page screenshot.
const puppeteer = require('puppeteer');
(async () => { // Launch the browser in headless mode const browser = await puppeteer.launch(); const page = await browser.newPage();
// Set a specific viewport size await page.setViewport({ width: 1280, height: 800 });
// Navigate to the target URL await page.goto('https://www.example.com', { waitUntil: 'networkidle0' });
// Take a full-page screenshot and save it await page.screenshot({ path: 'example-screenshot.png', fullPage: true });
// Close the browser
await browser.close();
})();
In this script, we're launching a browser, setting the window size, heading to a URL, and taking the shot. That waitUntil: 'networkidle0' option is a really important detail—it tells Puppeteer to hold off until the network traffic has calmed down, giving dynamic content a chance to fully load before the capture.
And this is just scratching the surface. With a few more lines, you could tell it to wait for a specific chart to render before capturing just that element, or you could loop through a list of 50 competitor websites and archive each one. The power is immense, but it comes with a lot of responsibility. Learning how to properly capture a website with these tools is a skill in itself.
The Hidden Complexities of DIY Automation
While headless browsers offer total control, running them reliably in a production environment is a major engineering lift. It’s not just about writing a script; it's about building and maintaining an entire infrastructure.
The real challenge of headless automation isn't taking one screenshot—it's taking the 10,000th screenshot reliably at 3 AM without human intervention. The operational overhead is often far greater than teams initially expect.
Here are some of the common hurdles you'll run into:
- Infrastructure Management: You’ll need to run servers or serverless functions to execute your scripts. This involves setup, scaling, and managing costs.
- Dependency Hell: Keeping browser versions, drivers, and libraries perfectly in sync across your development and production environments can be a fragile and time-consuming nightmare.
- Handling Anti-Bot Measures: Many sites use tools like Cloudflare or Akamai to block automated traffic. Your scripts will need to manage user agents, proxies, and even CAPTCHA-solving services to appear human.
- Asynchronous Nightmares: Modern websites are incredibly dynamic. Your code must expertly handle race conditions—waiting for animations to finish, elements to appear, and network requests to complete—before taking a screenshot.
When people search for "how to screenshot a webpage," they're increasingly looking for automated solutions. Browser-level shortcuts have been around since the 1980s, but they simply don't scale when a team needs thousands of consistent captures. Modern screenshot APIs have emerged to solve this problem, aligning with the broader API economy, which is projected to grow to USD 87.55 billion by 2035. This growth is fueled by teams who want to skip the operational pain of managing headless browser clusters just to take a picture. You can discover more insights about the rise of the API economy on datainsightsmarket.com.
When You Need Production-Grade Screenshots, Use an API
While rolling your own headless browser solution gives you fine-grained control, that power comes with a hefty price tag. You're suddenly responsible for managing the infrastructure, wrestling with dependencies, and constantly fighting anti-bot measures. Honestly, it's a full-time job. This is exactly where a dedicated screenshot API like ScreenshotEngine flips the script for production workflows.
Instead of getting bogged down writing and maintaining complex automation scripts, you can get the same—or often better—results with a single, clean API call. The entire operational headache of running browsers at scale is handled for you, letting you focus on what actually matters: your product.
This approach shifts your team's focus from tedious infrastructure management to simple integration. The result? You develop faster and build a much more reliable system.
The Beauty of a Simple API Call
Let's make this concrete. Think back to the Puppeteer script from the last section. It required setup, async/await logic, and multiple lines of code just to capture one page. With a screenshot API, that entire process shrinks to just one request.
Here’s all it takes to grab a full-page screenshot using a simple cURL command. Just swap in your own API key.
curl "https://api.screenshotengine.com/v1/screenshot?url=https://www.example.com&full_page=true"
-H "Authorization: Bearer YOUR_API_KEY"
--output example-fullpage.png
That’s it. That one line does the work of the entire Node.js script. It's declarative—you just tell the API what you want (url, full_page=true), and the service handles all the heavy lifting. This model works beautifully in any programming language you can imagine.
For example, doing the same thing in Python is just as straightforward:
import requests
api_key = 'YOUR_API_KEY' url = 'https://www.example.com'
api_url = f"https://api.screenshotengine.com/v1/screenshot?url={url}&full_page=true" headers = {'Authorization': f'Bearer {api_key}'}
response = requests.get(api_url, headers=headers)
if response.status_code == 200: with open('example-fullpage.png', 'wb') as f: f.write(response.content) else: print(f"Error: {response.status_code}")
The developer experience is just fundamentally better. You're no longer a browser admin; you're just using a reliable web service. This is the core idea behind the modern screenshot as a service model. If you're curious, you can dive deeper into what a screenshot as a service can do for your projects.
Powerful Parameters for Pinpoint Accuracy
A great screenshot API does more than just snap a picture. It gives you a whole toolkit of parameters to get the exact capture you need, all within that single API call.
You can fine-tune nearly every aspect of the screenshot:
- Full Page vs. Viewport: Need the whole scrolling page? Use
full_page=true. Just need what's visible? Specify awidthandheightfor a fixed viewport. - Element Capture: This one is incredibly useful. You can target a specific part of a page using a CSS selector, like
element=#main-chart. It's perfect for grabbing just a graph, a user profile card, or a product image. - Output Format: Get your image in the best format for the job, whether that's
png,jpeg, or the super-efficientwebp. - Automatic Blocking: Good APIs clean up the mess for you. ScreenshotEngine can automatically block common annoyances with parameters like
block_ads=trueandblock_cookie_banners=true, giving you a pristine image every time.
By letting the API handle tasks like ad blocking and element targeting, you keep your own code much cleaner. You're not writing brittle CSS selectors or complex browser logic just to get a decent image.
A well-documented API makes all the difference. To understand what separates a good developer experience from a great one, it's worth checking out some general API Documentation Best Practices.
Why APIs Are the Clear Winner for Production
When it comes down to it, choosing an API over a DIY headless setup is a business decision. It's about reliability, scalability, and the total cost of ownership. The goal is to get a perfect screenshot, every single time, without any drama.
| Feature | DIY Headless Automation | Screenshot API (ScreenshotEngine) |
|---|---|---|
| Infrastructure | You manage everything (servers, proxies) | Fully managed by the service |
| Maintenance | Constant updates, patches, and fixes | Zero maintenance for your team |
| Anti-Bot | A huge, ongoing headache to solve | Handled automatically behind the scenes |
| Scalability | Requires significant engineering effort | Built to scale on demand |
| Development Time | High initial setup and ongoing work | Minimal—just a single API call |
Ultimately, the modern answer to "how to screenshot a webpage" at scale is tied to the growth of the API economy. The global API management market is projected to explode from USD 6.51 billion in 2025 to USD 30.81 billion by 2033. Most screenshot API plans are very accessible, typically starting in the USD 7–30 per month range, and many offer a free tier to get you started. ScreenshotEngine follows this model, providing powerful features like full-page capture, element-only screenshots, and automatic ad blocking. This trend shows a clear industry shift: businesses prefer to rely on specialized, managed services rather than building and maintaining complex systems in-house.
Practical Use Cases for Automated Screenshots
Automated screenshots aren't just a neat developer trick; they're a cornerstone of countless business workflows. Once you move past taking one-off captures manually, you unlock solutions to some surprisingly complex problems. A static image, when captured programmatically and reliably, becomes a powerful data point.
The real value comes from consistency and scale. A single, manual screenshot is just a quick observation. But thousands of automated captures? That's a dataset. It reveals trends, catches errors before they snowball, and preserves critical information over time. Each of the use cases we'll cover here solves a real-world business challenge, turning the simple act of taking a picture into a genuine strategic advantage.
Bolster Quality with Visual Regression Testing
One of the most immediate wins for automated screenshots is in visual regression testing. In any fast-moving development environment, developers constantly ask: did my last code change accidentally break the UI? A functional test might pass just fine, but what if a button is now misaligned, an image is stretched, or the entire layout has shifted on a specific phone screen?
This is where automated captures are invaluable. As part of a CI/CD pipeline, a screenshot API can automatically grab images of key pages and components both before and after a code merge. The magic happens when these images are compared pixel by pixel.
If the difference between the "before" and "after" shots crosses a certain threshold, the build fails, and the team gets an immediate notification. This catches those subtle but critical UI bugs that purely functional tests would miss entirely, acting as a visual safety net. It's how you prevent embarrassing and costly design flaws from ever reaching your users.
Monitor SEO and Competitor Strategy
The world of Search Engine Optimization (SEO) is brutally competitive and completely data-driven. Agencies and marketing teams need to know exactly how their clients—and their rivals—are ranking on Google for key search terms. Manually checking search engine results pages (SERPs) isn't just tedious; it's impossible to do effectively at scale.
This is a perfect job for a screenshot API. SEO specialists can set up automated jobs to:
- Capture SERPs daily for a list of target keywords, creating a visual timeline of ranking changes.
- Monitor competitor landing pages for design tweaks, new product launches, or price adjustments.
- Archive paid ad placements to see how a competitor’s messaging and campaign strategy evolves.
This kind of constant visual monitoring gives you concrete evidence of market shifts, offering insights that rows of data alone could never provide.
The practical meaning of “how to screenshot a webpage” has evolved from a one-off user action to a high-volume workflow measured in tens of thousands of images per month. For teams doing visual regression testing or compliance archiving, a 30–70% failure rate from a DIY setup is unacceptable. You can learn more about how screenshot volume impacts modern workflows and explore detailed API guides.
Generate Rich Social Media Link Previews
When you share a link on platforms like X, Slack, or LinkedIn, the platform crawls that URL to generate a preview card—a title, a description, and an image. A missing or ugly preview image can tank engagement. Oftentimes, the default image specified in the meta tags (og:image) just isn't great, or it might not even be there.
A screenshot API offers a really elegant solution here. When a user shares a link from your application, you can make a quick, real-time API call to capture a clean, high-quality screenshot of the destination page. This image then becomes the preview, ensuring every link shared from your site looks professional and accurately represents the content. It’s a dynamic approach that makes for a much better user experience and can seriously boost click-through rates.
Ensure Compliance and Archival Integrity
For industries like finance, healthcare, and legal services, keeping an accurate historical record of digital communications isn't just good practice—it's a strict legal requirement. This means archiving the exact appearance of a website on a specific date, from terms of service pages to financial disclosures.
Automated screenshots provide a reliable, almost tamper-proof method for compliance. You can schedule daily or weekly captures of your most important pages, storing the images with timestamps as a verifiable archive. This creates an indisputable visual record for audits or legal discovery, proving precisely what information was displayed to the public at any given point. It’s a straightforward yet powerful way to manage regulatory risk in a digital-first world.
Frequently Asked Questions
When you first dive into taking programmatic screenshots, you quickly realize it's more than just a simple capture command. Modern websites are complex beasts, with things like dynamic content, login walls, and tricky rendering getting in the way. Let's walk through some of the most common headaches developers run into and how to solve them.
How Do I Screenshot a Page with Infinite Scroll?
Ah, infinite scroll. It's a classic problem for any automated capture tool. Standard "full-page" screenshot methods only grab what's currently in the DOM, completely missing all the content that would load as you scroll.
You could try to wrestle with it yourself using a headless browser script. The general idea is to loop through a sequence of "scroll down, wait for content to load, scroll again" until you hit the bottom of the feed. Once the page stops growing, you take the screenshot. This can work, but it's often flaky and can easily break if the site's loading behavior changes.
A much saner approach is to use a screenshot API. A service like ScreenshotEngine, for instance, has already done the heavy lifting to figure this out. It can intelligently scroll the page for you or use other rendering tricks behind the scenes to make sure the entire feed is captured, all without you having to write a single line of scrolling logic.
Can I Screenshot a Webpage Behind a Login?
Absolutely. Capturing a page behind a login is a common requirement, but you need to handle the session carefully.
One way is to script the entire login process with a headless browser like Puppeteer or Playwright. Your script would navigate to the login page, programmatically type the username and password into the right fields, and click the login button. From there, you have to manage the session cookies to keep your script logged in for subsequent captures. It works, but it means storing credentials in your code or secrets manager, which isn't always ideal.
A cleaner and more secure method is to use a screenshot API that lets you pass authentication tokens directly. Instead of scripting the login, you just include a valid session cookie or token in the API request headers. This tells the service to load the page as an already-authenticated user, bypassing the login form entirely. It's far more stable and secure.
The key takeaway is to leverage existing sessions whenever possible. Passing authentication tokens via API headers is not only more secure than scripting logins with raw credentials but also far less likely to break when the login page's UI changes.
What Is the Best Image Format for Webpage Screenshots?
The "best" format really comes down to your specific use case. It's a trade-off between image quality, file size, and features. Picking the right one can make a real difference in your app's performance and storage costs.
Here’s a quick breakdown of the main contenders:
- PNG (Portable Network Graphics): This is a lossless format, which means you get a pixel-perfect copy with zero quality degradation. It's the go-to choice for things like visual regression testing, where every single pixel matters.
- JPEG (Joint Photographic Experts Group): A lossy format that does a fantastic job of balancing visual quality with file size. It's perfect for generating social media link previews or for general website archiving where a tiny bit of compression is perfectly acceptable.
- WebP: A more modern format from Google that offers much better compression than both JPEGs and PNGs. If your main goal is web performance and smaller file sizes, WebP is an excellent choice.
Any decent screenshot API should give you the flexibility to choose between these formats, so you can pick the right tool for the job every time.
Ready to stop wrestling with headless browsers and start capturing perfect screenshots with a single API call? Get started with ScreenshotEngine for free and see how simple production-grade screen captures can be. Try ScreenshotEngine for free.