
At its core, a website screenshot is just a snapshot of a webpage at a single point in time. But when you capture it programmatically—without someone manually pressing PrtSc—it becomes a powerful tool. Developers use screenshot APIs to automate visual testing, generate fresh marketing assets on the fly, and archive web content for legal or compliance reasons.
It's about transforming a mundane manual task into a scalable, automated workflow that just runs in the background.
The Strategic Value of Automating Website Screenshots
Moving past the occasional one-off screen grab unlocks a huge strategic advantage for any development team. The whole idea is to replace a tedious, inconsistent manual process with a reliable, API-driven one. This shift isn't a small thing; it frees up countless hours of engineering time that would otherwise be sunk into wrangling headless browsers or manually checking UI updates.
This move is driven by real business needs for speed and accuracy. The global market for this tech tells the story: valued at around USD 500 million in 2024, it's on track to hit USD 1.2 billion by 2033. Why the boom? Teams are baking these tools right into their CI/CD pipelines to catch visual bugs before they go live. Automated screenshots can achieve 99% accuracy in spotting pixel-level regressions and have been shown to cut down QA time by up to 80%. You can dig into more of the data in this analysis from Verified Market Reports.
Key Drivers for Automation
So, why are so many engineering teams making this switch? It boils down to a few practical, bottom-line benefits:
- Pixel-Perfect Consistency: Automated APIs capture screenshots under the exact same conditions every single time. This eliminates all the variables that throw off manual testing, like different screen resolutions, browser versions, or even pesky user plugins.
- Dynamic Asset Generation: Imagine your marketing team getting social media previews or email header images for new blog posts instantly, without having to wait on a designer. An API makes that possible.
- Compliance and Archival: For industries like finance or law, having a verifiable, timestamped record of your website is non-negotiable. Scheduling automated captures is the perfect solution.
The real win with a screenshot API is offloading the immense complexity of maintaining a headless browser fleet. Instead of managing infrastructure, you can focus entirely on your application's logic, letting a dedicated service handle scaling, ad blocking, and rendering quirks.
The difference between a manual approach and an automated one becomes stark when you look at it side-by-side.
Manual vs Automated Screenshot Workflows
| Metric | Manual Screenshots | Automated API (e.g., ScreenshotEngine) |
|---|---|---|
| Time per Screenshot | 1-5 minutes (open browser, navigate, capture, save) | < 2 seconds |
| Consistency | Low (depends on OS, screen resolution, human error) | High (standardized environment, resolution, timing) |
| Scalability | Extremely poor; linear effort per screenshot | High; can process thousands of captures concurrently |
| Maintenance | N/A (human-driven) | Zero; managed and updated by the service provider |
| Integration | Manual upload/paste into other systems | Seamlessly integrates into CI/CD, CMS, or apps |
| Cost | High (employee time and opportunity cost) | Low (predictable, usage-based pricing) |
This table really highlights how an API-based service fundamentally changes the economics and reliability of the process.
Tools like ScreenshotEngine are purpose-built to handle all this messy backend work. They manage the headless browsers, deal with annoying cookie popups, and provide the infrastructure to scale on demand. All you have to do is make a simple API call. The goal is to make capturing a website as simple and reliable as any other microservice in your stack, saving you from building and troubleshooting a brittle, in-house script.
Taking Your First Website Screenshot with an API
Jumping into a new API can feel a bit abstract. The best way I've found to get a real feel for how a screenshot API works is to hit it directly from the command line. This cuts through any language-specific boilerplate and shows you exactly what's happening under the hood—just a clean request and response.
You can see a quick walkthrough of this process here:
Your First API Call with cURL
Let's fire up the terminal and use cURL. It's a classic command-line tool, available on pretty much any system, and it's perfect for this kind of quick, raw API testing. With a single command, we can ask the API to capture a website and save the image right to our machine.
Here’s a simple request to grab a shot of example.com:
curl -u YOUR_API_KEY:
-d "url=https://example.com"
-o "example-screenshot.png"
"https://api.screenshotengine.com/v1/screenshot"
So, what's this command actually doing?
-u YOUR_API_KEY:: This is how you authenticate. You pass your unique API key here, telling the service you have permission to make the request.-d "url=https://example.com": This is the data payload. We're simply telling the API whichurlwe want a picture of.-o "example-screenshot.png": This flag sets the output file name. The API sends back raw image data, and this tellscURLto save it as a PNG file in whatever directory you're currently in."https://api.screenshotengine.com/...": This is the actual API endpoint we're sending our request to.
Run that, and you should see a new file named example-screenshot.png pop up. It's a simple but powerful confirmation: your API key works, and the core functionality is solid. You send a URL, you get an image back. Simple as that.
If you're curious about all the other parameters you can tweak, we've covered them in detail in our complete guide to using a website screenshot API.
Production-Ready Code Examples
While cURL is fantastic for a quick test, you'll eventually want to bake this functionality right into your application. Let's look at how to do this in Node.js and Python, two of the most popular languages for building web services and automation scripts.
Good API documentation makes this part easy. You should be able to find clear, copy-paste-ready examples for your language of choice.
As you can see, well-structured docs often provide snippets organized by language, which really speeds up integration.
Node.js Screenshot with Axios
For Node.js projects, Axios is my go-to HTTP client. It’s promise-based and handles things like binary responses (which is what an image is) really elegantly. To save the file, we’ll also need the native fs (File System) module that comes with Node.
First, make sure you have Axios installed: npm install axios.
Here’s a small async function that will call the API and save the screenshot.
const axios = require('axios'); const fs = require('fs');
const apiKey = 'YOUR_API_KEY'; const apiUrl = 'https://api.screenshotengine.com/v1/screenshot'; const targetUrl = 'https://developer.mozilla.org';
async function takeScreenshot() { try { const response = await axios.post( apiUrl, { url: targetUrl }, { auth: { username: apiKey }, responseType: 'stream' // Super important for binary data! } );
const writer = fs.createWriteStream('mozilla-dev.png');
response.data.pipe(writer);

return new Promise((resolve, reject) => {
  writer.on('finish', resolve);
  writer.on('error', reject);
});
} catch (error) { console.error('Error taking screenshot:', error.message); } }
takeScreenshot().then(() => { console.log('Screenshot saved successfully!'); });
A key thing to remember: That
responseType: 'stream'option is critical. Without it, Axios will try to parse the image data as JSON and you'll end up with a corrupted file. By treating it as a stream, we can pipe the data directly to a file, which is much more efficient.
Python Screenshot with Requests
In the Python world, the Requests library is the undisputed king of HTTP. Its API is incredibly straightforward and makes interacting with web services a breeze.
If you don't have it installed, just run: pip install requests.
And here's the Python equivalent for capturing a URL and saving the image to your local disk.
import requests
api_key = 'YOUR_API_KEY' api_url = 'https://api.screenshotengine.com/v1/screenshot' target_url = 'https://github.com'
try: response = requests.post( api_url, auth=(api_key, ''), json={'url': target_url}, stream=True # Prevents loading the whole image into memory at once )
if response.status_code == 200:
    with open('github-home.png', 'wb') as f:
        for chunk in response.iter_content(chunk_size=8192):
            f.write(chunk)
    print('Screenshot saved successfully!')
else:
    print(f"Error: {response.status_code} - {response.text}")
except requests.exceptions.RequestException as e: print(f"An error occurred: {e}")
Notice the pattern? Whether you're using Node.js or Python, the fundamental logic is the same: authenticate your request, send the target URL in the body, and make sure you handle the binary image data from the response correctly. Once you nail this pattern, you can integrate automated screenshots into just about any application.
Advanced Techniques for Customizing Your Screenshots
Anyone can grab a basic screenshot. But the real magic happens when you move beyond the defaults and start tailoring the capture to solve a specific problem.
Think about it: are you testing a responsive design? Validating a single UI component? Or maybe generating assets for a light and dark theme? Each of these jobs requires a different kind of screenshot. This is where you need precise control over the final image, ensuring it shows exactly what you need and nothing you don't.
This level of customization is precisely where a good screenshot API earns its keep. It gives you a whole toolbox of parameters to dictate everything from the dimensions and format to the exact pixel area you want to capture.
Capturing Specific Page Areas
One of the first challenges you'll run into is capturing content that isn't immediately visible. Sometimes you need the entire, scrolling length of a landing page for archival. Other times, all you want is a tiny snapshot of an interactive chart for a report.
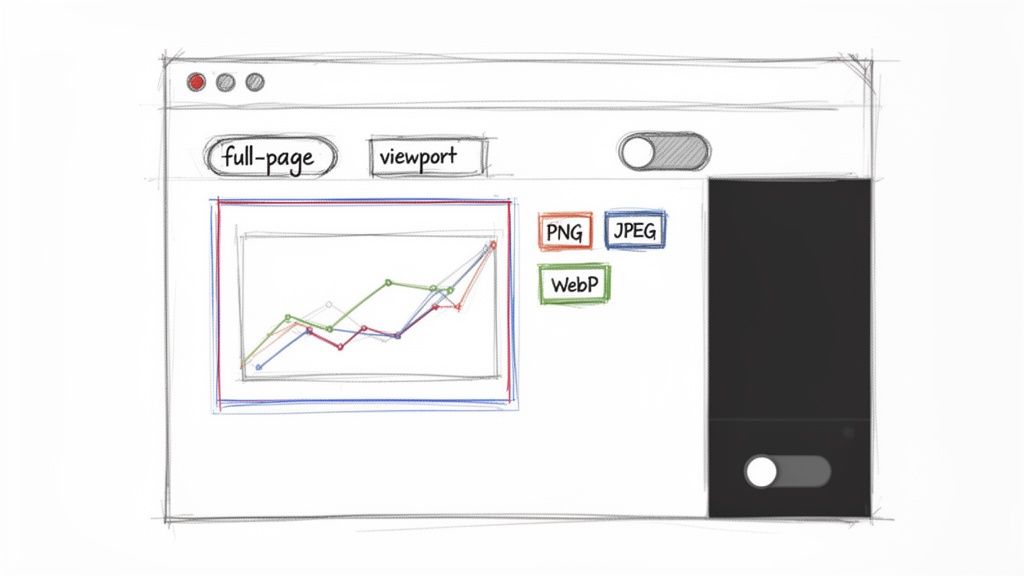
Full Page vs. Viewport Screenshots
Most screenshot tools default to capturing the viewport—the part of the website a user sees before they start scrolling. This is perfect for quick "above the fold" checks or simulating a user's initial impression.
But for things like design reviews or compliance documentation, you need the whole story. That's where a full-page screenshot comes in. A simple API parameter, often something like full_page=true, handles the tricky business of scrolling down the entire page and stitching it all together into one seamless image.
The ability to switch between viewport and full-page captures is fundamental. I use viewport shots for quick UI spot-checks in CI/CD pipelines, but I rely on full-page captures for creating a complete visual record of our terms of service page every month for compliance purposes.
Isolating a Single Element
Sometimes, even a full-page shot is overkill. What if you only care about one specific UI component, like a pricing table, a user profile card, or a data visualization?
This is where element-specific captures are a lifesaver. You can use a CSS selector to tell the API, "Hey, just find #chart-container or .user-review-card and give me a picture of that." It's incredibly powerful for:
- Visual Regression Testing: Check if a specific component's styling has accidentally changed.
- Dynamic Content Generation: Create images of user-generated content for social media previews.
- Automated Documentation: Populate your knowledge base with fresh images of UI elements.
This targeted approach not only gives you cleaner, more focused images but also results in smaller files, which is always a plus.
Controlling Image Format and Quality
The image format you choose is a constant trade-off between visual fidelity and file size, which in turn impacts load times and storage costs. There's no single "best" format; the right choice is always about the job at hand.
Most APIs let you fine-tune these captures with a handful of key parameters. Here’s a quick-reference table to help you decide what to use and when.
Key API Parameters for Custom Screenshots
| Parameter | Description | Example Value | Use Case |
|---|---|---|---|
full_page |
Captures the entire scrollable length of the page, not just the visible viewport. | true |
Archiving a full terms of service page or capturing a long landing page for design review. |
selector |
Takes a screenshot of only the element matching the specified CSS selector. | "#pricing-table" |
Isolating a single component like a chart or user card for visual regression testing. |
format |
Defines the output image format. The choice impacts quality and file size. | webp |
Generating high-quality but small-footprint images for social media previews or web use. |
quality |
Sets the compression level for lossy formats like JPEG and WebP (1-100). | 80 |
Balancing file size and image clarity for general-purpose thumbnails or web assets. |
width / height |
Specifies the dimensions of the browser viewport in pixels. | width=390, height=844 |
Simulating an iPhone 14 screen to test the mobile responsive layout of a website. |
dark_mode |
Renders the page as if the user has prefers-color-scheme: dark enabled. |
true |
Automating the capture of a website's dark theme for design validation in a CI pipeline. |
As you can see, a few simple parameters can dramatically change the screenshot you get back.
When you're doing pixel-perfect visual regression testing, PNG is non-negotiable because it's lossless. But if you're generating thousands of link previews, the smaller file sizes of JPEG or WebP will save you a ton on bandwidth and storage.
Simulating Different User Environments
Your website doesn't exist in a vacuum. It looks different depending on a user's device, screen size, and even their system settings. Advanced screenshot APIs let you simulate these different environments so you can catch issues before your users do.
Setting Custom Viewport Dimensions
Never hardcode your screenshot dimensions. You'll miss a flood of responsive design bugs. A solid API lets you specify the browser width and height for every single request, which is a game-changer for responsive testing.
You can easily script a job to capture your key pages at all the standard breakpoints:
- Mobile:
width: 390,height: 844(iPhone 14) - Tablet:
width: 820,height: 1180(iPad Air) - Desktop:
width: 1920,height: 1080
Automating this gives you a complete visual library of how your site renders on different devices, making it easy to spot layout breaks before they go live.
Toggling UI Themes like Dark Mode
With dark mode being more popular than ever, you can't afford to ignore it. Manually switching your OS theme just to take a screenshot is slow and painful.
A much smarter workflow is to use an API parameter that simulates the user's preference. For instance, you can pass a parameter like dark_mode=true to emulate the prefers-color-scheme: dark media query. This tells the headless browser to render the page in its dark theme, making it trivial to validate both your light and dark styles in an automated test suite.
For those looking to brush up on their manual capture skills, check out these Snipping Tool hacks to supercharge screen captures. But by mastering these advanced, API-driven customizations, you can transform a simple screenshot from a static image into a powerful tool for diagnostics and asset generation.
How to Get Clean and Consistent Screenshots Every Time
Let's be honest, one of the biggest headaches when you start grabbing website screenshots automatically is all the visual junk. The web is a chaotic mess of cookie consent banners, promotional popups, live chat widgets, and third-party ads. These things create inconsistent and unpredictable screenshots, making them pretty much useless for any serious work.
Trying to script your way around this chaos manually is a losing battle. Sure, you can write a Selenium script that works today, but it’s guaranteed to break the moment a marketer changes the CSS selector on that cookie banner. This kind of brittleness turns any in-house solution into a constant maintenance nightmare.
A much better approach is to use a service built to handle this stuff from the ground up. Tools like ScreenshotEngine are designed to automatically block common annoyances, giving you a clean render of the core content you actually care about. They do the heavy lifting of maintaining and updating blocklists for ads, trackers, and cookie notices, saving you from that endless cycle of scripting and fixing.
Here’s a typical website capture. It has the usual navigation, a cookie banner at the bottom, and other interactive bits and pieces.
Without telling the capture service to hide these elements, they become part of your final image. For most automated workflows, that's definitely not what you want.
Injecting Custom Code for Surgical Control
Even with great automatic blocking, you'll still run into unique elements you need to hide. Maybe it's a persistent "live chat" button floating in the corner or a feedback survey that slides into view. For these cases, you need more precise control.
The best way to handle this is by injecting your own custom CSS or JavaScript right before the screenshot is taken. This gives you the power to modify the page on the fly.
For instance, you can hide a specific element with a simple CSS injection:
- CSS Injection: A parameter like
csscan take a string of styles. To hide a chat widget with the ID#live-chat-widget, you'd pass"#live-chat-widget { display: none !important; }". That!importantflag is your friend here—it helps override any existing styles that might be fighting you.
This is a much more stable solution than trying to script a "click" on a close button that could change at any time.
Waiting for the Page to Settle
Modern websites are dynamic. Content—especially things like complex data visualizations or elements fed by third-party APIs—often loads asynchronously. If you snap a screenshot the second the page starts to load, you’ll probably just get an empty div with a loading spinner instead of the fully rendered chart you were after.
It's a classic timing problem. You have to give the page a moment to finish its work.
A rookie mistake is using a fixed, arbitrary delay like
sleep(2). This is incredibly fragile. It might be too short on a slow network or just wasted time on a fast one. A much smarter method is to wait for the network activity to die down.
More advanced screenshot APIs have intelligent waiting mechanisms built-in. You can tell the service to wait until all network requests have been idle for a specific period, like 500 milliseconds. This is the best way to ensure all dynamic content has loaded and rendered before the capture happens. It's especially critical for:
- Dashboards with charts: Capturing data from libraries like D3.js or Chart.js.
- Single-Page Applications (SPAs): Making sure content rendered client-side by frameworks like React or Vue is actually there.
- Third-party widgets: Waiting for social media feeds or comment sections to fully load in.
We dig into more of these common pitfalls and their solutions in our guide to website screenshot challenges. By combining automated blocking, custom code injection, and intelligent delays, you can build a truly resilient workflow that produces clean, perfect screenshots every single time.
Real-World Website Screenshot Workflows
Knowing the technical ins and outs of an API is one thing, but the real magic happens when you connect those features to actual business problems. Taking programmatic screenshots isn't just about grabbing pixels; it's about building smart, automated systems that solve real-world challenges. These workflows often get baked directly into the tools we use every day, turning a simple image capture into a genuinely powerful data point.
For instance, many of these workflows are built around a comprehensive website audit checklist, creating a visual record to help document and track site changes over time.
Let's dig into a few common scenarios where automated captures become absolutely essential.
The diagram below gives a high-level look at the process for getting clean, consistent results, which is foundational to any automated workflow you build.
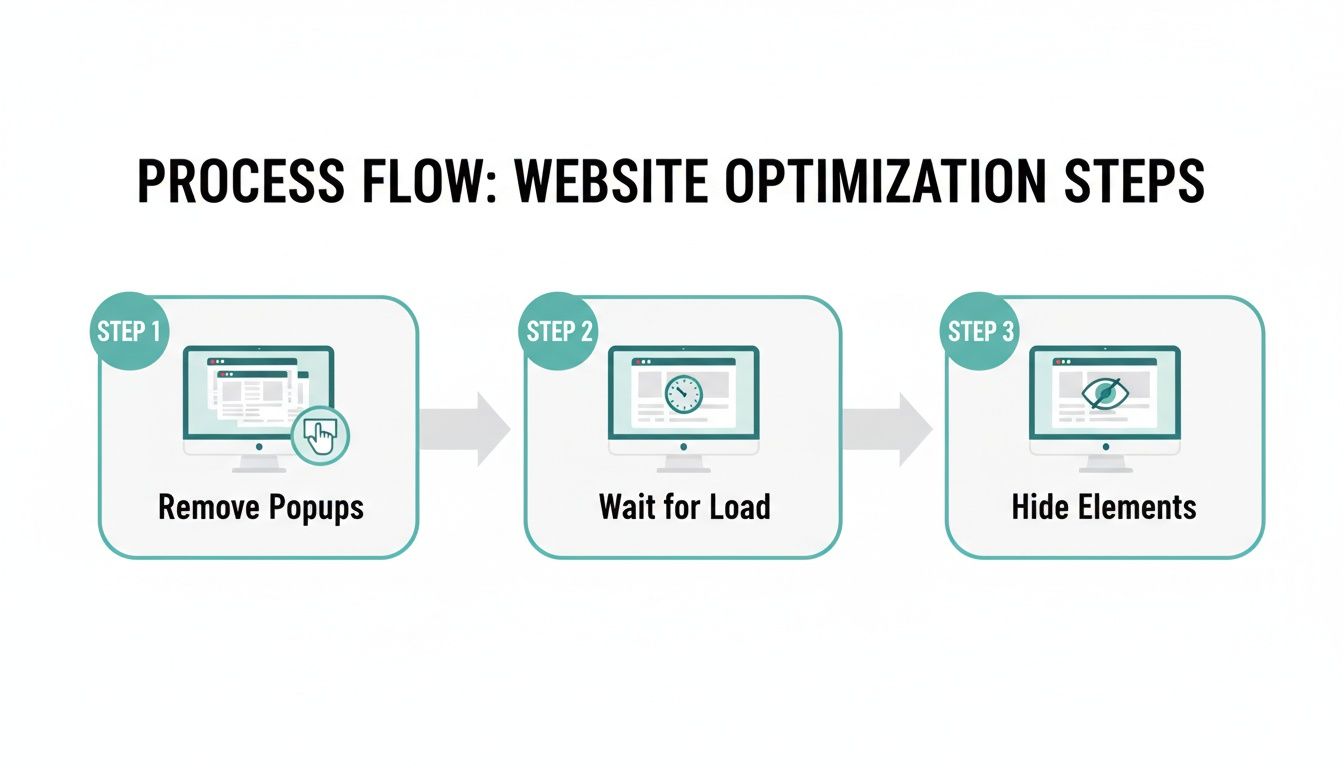
This simple flow—kill the distractions, wait for everything to load, and hide anything you don't need—is the bedrock for reliable captures in all the advanced use cases we're about to cover.
Visual Regression Testing in Your CI/CD Pipeline
One of the most powerful applications for a screenshot API is visual regression testing. The whole point is to automatically spot unintended UI changes before they ever make it to production. We've all been there: a tiny CSS tweak to a button on one page breaks something completely unrelated on another. These visual bugs are notoriously tricky to catch with traditional unit or integration tests.
A typical workflow looks something like this:
- Set Your Baseline: First, you capture screenshots of key pages and components on your stable production environment. These images become your "golden record."
- Trigger on Pull Request: When a developer opens a pull request, your CI/CD pipeline (think GitHub Actions or Jenkins) kicks off a job automatically.
- Capture the New Version: The job then uses the screenshot API to grab images of the exact same pages and components, but this time from the staging environment that includes the new code.
- Compare and Flag: The new screenshots are compared programmatically against the production baselines using a pixel-diffing tool. If the difference is more than a tiny tolerance (say, >0.1%), the test fails. The PR gets flagged for a manual review, showing the developer exactly what changed visually.
This workflow shifts UI quality control from a slow, manual checklist after deployment to an automated gate before merging. It gives developers immediate feedback on the visual impact of their code, shrinking the feedback loop from days down to minutes.
Dynamic Marketing and Social Media Assets
Marketing teams are always hungry for fresh visual content, especially for social media. Manually creating a unique open graph image for every single blog post or new product is a huge time-sink. An automated workflow can generate these on the fly. If you're looking to build this out, our guide on automated website screenshot techniques offers a deeper dive.
The trick is to create a dedicated, unlisted HTML template on your site. This simple page is designed specifically to be the perfect source for your social sharing card.
When a new article goes live, an event triggers a script that:
- Grabs the new blog post's title and author name.
- Builds a URL for your HTML template, passing the new data as query parameters (e.g.,
.../og-template?title=My%20New%20Post). - Fires this URL off to the screenshot API.
- Saves the generated image and sets it as the
og:imagemeta tag for the new blog post.
Just like that, every piece of content shared on platforms like X or LinkedIn has a beautiful, on-brand preview image—no manual design work required.
Website Archiving for Compliance and Auditing
For companies in regulated industries like finance, healthcare, or law, keeping a historical record of their website isn't just a good idea; it's often a legal requirement. An automated screenshot workflow offers a straightforward and solid solution for compliance.
This is usually set up as a scheduled job—like a cron job or a serverless function—that runs on a regular cadence, maybe daily or weekly.
- The job works from a list of critical URLs, like your terms of service, pricing pages, and privacy policies.
- On its schedule, it loops through this list, calling the screenshot API to capture a full-page image of each URL.
- It then saves these images to a secure, timestamped archive, like a folder in an Amazon S3 bucket.
This process creates an immutable, auditable trail of how your site looked on any specific date. This archive is invaluable for resolving customer disputes, answering regulatory questions, or even just tracking the evolution of your own digital footprint.
Answering Your Top Website Screenshot Questions
When you start automating website screenshots, you’ll inevitably run into a few tricky situations. It’s just the nature of the beast. Let's walk through some of the most common questions I hear from developers and get you some practical answers.
How Do I Handle Websites That Require a Login?
This one comes up all the time. Capturing pages hidden behind a login wall is a classic challenge, but you've got a few good ways to tackle it.
For the most complex scenarios, you could dive into headless browser automation with tools like Puppeteer or Playwright. This lets you write a script that mimics a user typing in a username and password before snapping the picture. It’s powerful, but can be brittle if the login form changes.
A much more stable approach is to use session cookies. Many screenshot APIs let you pass your authentication cookies along with the request. This tells the service’s browser, "Hey, I'm already logged in," and it can jump straight to the page you need. For internal tools, the simplest fix is often to run your captures against a staging environment where you can bypass auth with an IP allowlist or a special query parameter.
What Is the Best Image Format for Website Screenshots?
There's no single "best" format—it really boils down to what you're trying to accomplish. You're always trading off image quality against file size.
Here’s my take:
- PNG: Go with PNG when you need absolute pixel-perfect quality. Its lossless compression is non-negotiable for things like visual regression testing, where every single pixel matters.
- JPEG: This is your workhorse for when file size is the top priority and you can live with a little quality loss. Think generating thousands of thumbnails or social media link previews.
- WebP: This is the modern sweet spot. WebP gives you fantastic image quality with much better compression than JPEG, making it a great all-rounder for web assets where you need to keep things fast.
I personally default to PNG for anything related to testing. It completely removes the risk of compression artifacts causing a test to fail. For just about everything else, like archiving content or generating OG images, WebP gives you the best bang for your buck.
Can I Screenshot Content That Requires Scrolling?
Absolutely. This is a must-have feature for any serious screenshot tool, usually called a "full-page" screenshot. It’s designed specifically to capture the entire length of a webpage, not just what's visible in the browser window when it first loads.
You’ll typically just add a parameter to your API call, something like full_page=true. This tells the headless browser to scroll down the page and stitch everything together into one tall, seamless image. It’s a lifesaver for archiving long-form articles, saving a copy of terms and conditions, or getting a complete view of a new landing page design.
How Can I Avoid Getting Blocked or Seeing CAPTCHAs?
Ah, the bot-detection problem. It's a constant battle. Many websites are quick to flag automated traffic, especially when it comes from a typical data center IP address, and they’ll throw up a CAPTCHA or block you entirely.
Honestly, the most reliable way to sidestep this is to use a dedicated screenshot API. These services are built to solve this exact problem. They intelligently route requests through residential or other high-quality proxy networks, making the traffic look like it’s coming from a real person. They also handle all the other little details, like randomizing browser fingerprints and user-agent strings, to keep your captures flowing without a hitch.
Ready to stop wrestling with headless browsers and start getting clean, reliable screenshots? ScreenshotEngine provides a powerful API that handles all the complexity for you. Start for free and make your first API call in minutes.