If you're a developer, you have a couple of solid options for taking website screenshots programmatically. You could go with a dedicated screenshot API, which boils the whole process down to a single API call, or you can get your hands dirty with a headless browser library like Puppeteer or Playwright for more fine-grained control. Either way, automating this is far more reliable and scalable than doing it by hand.
Why Automate Website Screenshots
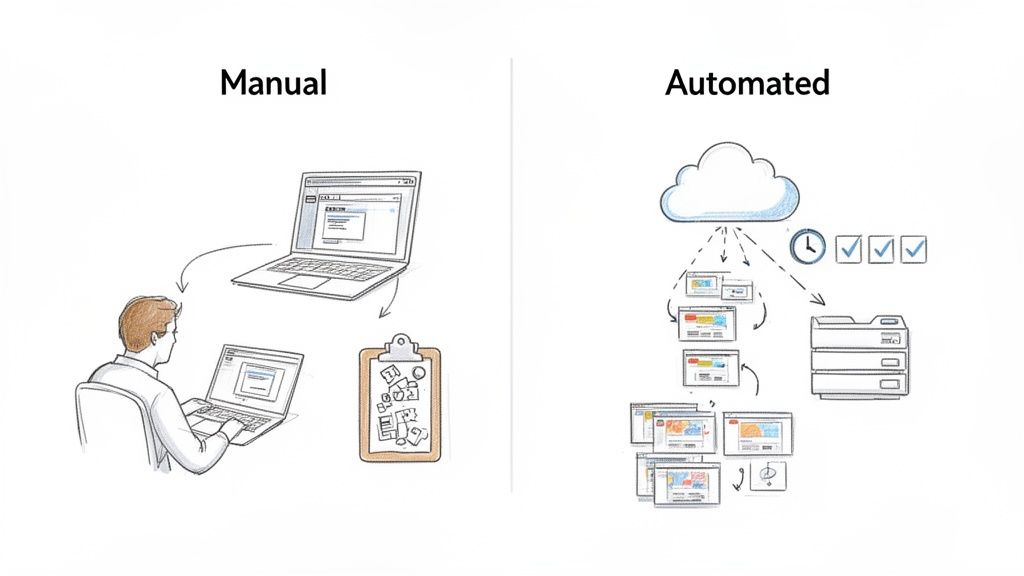
Let's be honest, moving beyond manual screen captures isn't just a "nice-to-have." For modern development, marketing, and data analysis, it’s a necessity. Hitting PrtScn is slow, wildly inconsistent, and simply doesn't scale for any task that matters.
Automated solutions are designed to fix these exact problems. They give you a dependable, programmatic way to capture visual data from the web, unlocking powerful applications that would be impossible to pull off manually.
The Limits of Manual Methods
Just think about it. Imagine you have to manually check your website's layout on ten different screen sizes every single time someone pushes new code. It's a nightmare. The time you'd waste and the potential for human error make it a non-starter.
Manual captures are plagued by a few critical flaws:
- Inconsistency: The screenshots will always differ slightly in size, quality, and even content, depending on who takes them and when.
- Lack of Scalability: You can't possibly capture hundreds or thousands of pages daily for things like price monitoring or SEO tracking.
- Time Consumption: It's a huge drain on developer or QA time that could be spent on much more important work.
Automated screenshot systems are built to eliminate these variables. They ensure every capture is pixel-perfect, consistent, and delivered on a schedule, forming the backbone of reliable visual monitoring.
The Strategic Value of Automation
The market data backs this up. The website screenshot software market hit a $0.6 billion valuation in 2023 and is on track to reach $1.5 billion by 2031. This isn't surprising when you see the clear ROI, especially in marketing (which accounts for 35% of use cases) and development (28%).
When you're automating at a large scale, you also need to think about how you manage your requests. Using things like rotating proxies for web scraping becomes crucial for reliability.
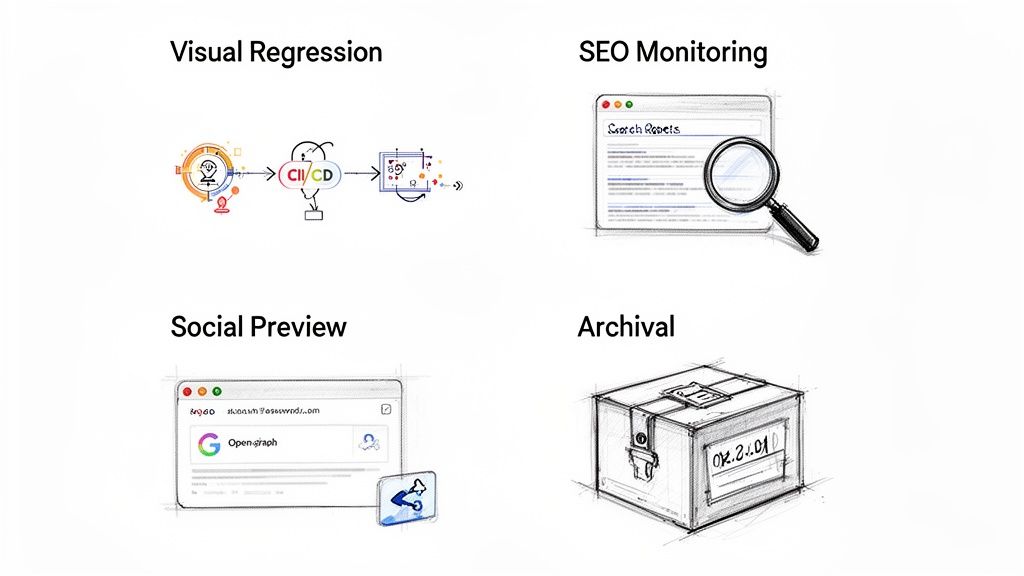
Here are just a few of the essential business functions that programmatic screenshots enable:
- Visual Regression Testing: Automatically spot unintended UI changes right in your CI/CD pipeline.
- SEO Rank Tracking: Capture search engine results pages (SERPs) to see how your keyword positions change over time.
- Social Media Previews: Dynamically generate those slick Open Graph images for links shared on social platforms.
- Compliance Archival: Keep a visual history of your site for legal and regulatory requirements.
Using a Screenshot API for Effortless Captures
If you need to programmatically capture website screenshots without the headache of managing your own infrastructure, a dedicated API is the way to go. Forget wrestling with headless browsers, finicky dependencies, and proxy management. Offloading the whole process to a specialized service is a game-changer.
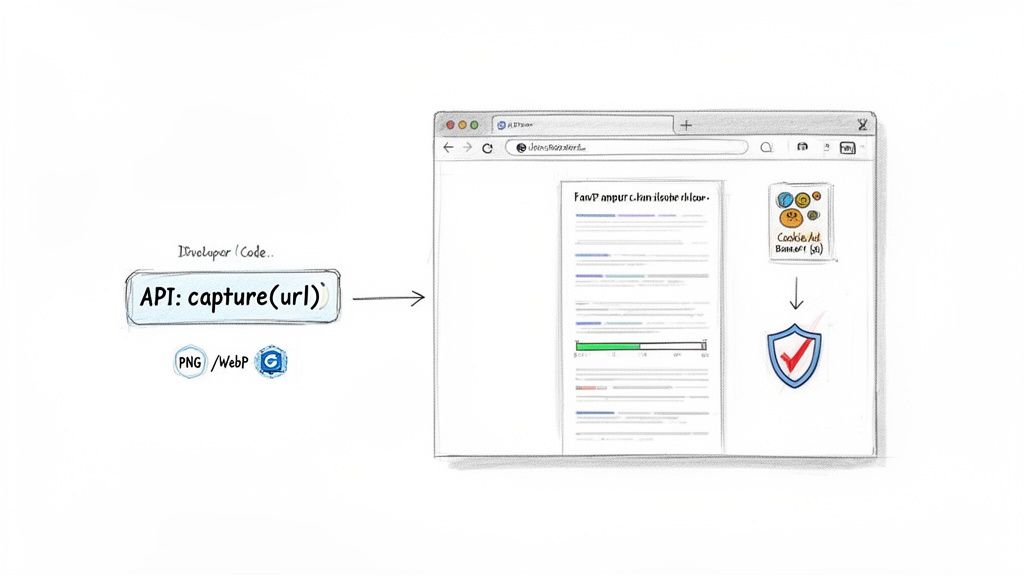
The entire task gets simplified to a single, clean API call. You just send a URL with a few parameters, and the service handles the heavy lifting—rendering, capturing, and delivering a pixel-perfect image. It's a production-ready solution you can get running in minutes, not days.
One of the biggest wins of using a service like ScreenshotEngine is how it delivers clean, professional-grade images right out of the box. It automatically handles the junk that typically clutters a capture.
- Ad Banners: Say goodbye to distracting third-party ads.
- Cookie Consents: The API deals with cookie banners so they don't block the content.
- Popups: Annoying promotional popups are blocked before the screenshot is ever taken.
This built-in filtering means the images you get back are ready for your reports, social media posts, or testing environments without any tedious manual cleanup.
Making Your First API Call
At its heart, using a screenshot API is incredibly straightforward. You just build a URL with your API key, the target website, and any options you need to customize the final image.
For instance, let's say you want to grab a standard-sized PNG of a homepage. Your request is just a simple call to the API endpoint. The service handles the browser launch, navigation, and rendering entirely behind the scenes.
The real value here is abstraction. You're not worrying about servers, browser versions, or memory leaks. You just ask for an image and get one back. This frees up your team to focus on building your product, not on screenshot infrastructure.
Common Screenshot API Parameters
To get the most out of the API, you'll want to use parameters to control the output. Here’s a quick-reference table of the most common options you’ll use.
| Parameter | Description | Example Value |
|---|---|---|
token |
Your unique API key for authentication. | YOUR_API_KEY |
url |
The full URL of the website you want to capture. | https://example.com |
full_page |
Captures the entire scrollable height of the page. | true |
width |
Sets the viewport width in pixels. | 1920 |
height |
Sets the viewport height in pixels. | 1080 |
format |
The output image format. | png, jpeg, webp |
These are just the basics, but they give you a ton of flexibility for most common use cases, from generating social media previews to creating visual reports.
Practical Code Examples for Common Languages
Plugging a screenshot API into your application is easy. Here are a couple of practical examples showing how to get this done in popular languages. For a deeper dive into all the available options, check out this detailed guide on using a website screenshot API.
JavaScript (Node.js) In this Node.js snippet, we're using a simple HTTPS request to capture a full-page screenshot of a blog and save it as a PNG.
import { createWriteStream } from 'fs'; import { get } from 'https';
const token = 'YOUR_API_KEY'; const url = 'https://example.com/blog';
const apiUrl = https://api.screenshotengine.com/v1/screenshot?token=${token}&url=${url}&full_page=true;
get(apiUrl, (response) => { const fileStream = createWriteStream('blog-screenshot.png'); response.pipe(fileStream); });
Python
Here's the same idea using Python's fantastic requests library. This code grabs a 1920x1080 screenshot of a pricing page and saves it locally.
import requests
token = 'YOUR_API_KEY' url = 'https://example.com/pricing' api_url = f"https://api.screenshotengine.com/v1/screenshot?token={token}&url={url}&width=1920&height=1080"
response = requests.get(api_url, stream=True)
if response.status_code == 200: with open("pricing-screenshot.png", "wb") as f: for chunk in response.iter_content(1024): f.write(chunk)
As you can see, integrating programmatic screenshots into your workflow is surprisingly simple. A complex task is reduced to just a few lines of code.
Advanced Screenshot Customization Techniques
Basic full-page captures are a good start, but real-world development often needs more precision. When you move past the standard settings, you unlock the power to isolate specific components, test features like dark mode, and optimize image assets for better performance. This is where you can really elevate your website screenshot automation for more complex jobs.
Imagine you need to grab a specific data visualization from a dashboard for a daily report. Instead of capturing the whole page and cropping it later, you can target the exact HTML element you need. This is a perfect way to extract charts, user profile cards, or product images with pinpoint accuracy.
Capturing a Specific HTML Element
Targeting an element is a game-changer for component-based testing and data extraction. Most advanced screenshot services let you pass in a CSS selector, like #main-chart or .user-profile, to isolate the exact part of the page you want.
For instance, to capture a div with the ID quarterly-revenue-chart, your API call would include a parameter like element=#quarterly-revenue-chart. The service still renders the entire page in the background but returns an image containing only that specific div. This approach is incredibly efficient for:
- Component Libraries: Visually checking that individual UI components are rendering correctly in isolation.
- Data Scraping: Pulling out visual information like graphs or tables for analysis.
- Content Previews: Generating thumbnails for specific articles or products from a larger page.
This method gives you clean, focused captures that are ready to use right away, with no post-processing needed. It cuts through the noise of surrounding page elements to give you a perfect snapshot of the component that actually matters.
Enabling Dark Mode and Other Preferences
Dark mode is pretty much a standard feature now, so testing its implementation is a must. A simple toggle in your API call can tell the browser to render the page with the prefers-color-scheme: dark media query. This lets you programmatically grab a screenshot of your site's dark theme to make sure the contrast and readability are on point.
This is especially valuable for visual regression testing inside a CI/CD pipeline. You can automatically compare light and dark mode screenshots to catch UI bugs before they ever reach your users.
Controlling Image Quality and Format
Not every screenshot needs to be a massive, high-resolution PNG. For use on the web, file size is king. High-quality screenshot APIs give you granular control over both the image format and its quality level.
- Format: You can choose PNG for pixel-perfect accuracy (great for testing), JPEG for good compression where some quality loss is acceptable (like for previews), or WebP for a modern balance of great quality and small file sizes.
- Quality: For JPEG or WebP, you can usually set a quality level (e.g.,
quality=80). From my experience, a setting of 80 often looks fantastic while cutting the file size by 50% or more compared to a max-quality setting.
Balancing these options is key. You can dive deeper into this and learn how to capture high-resolution screenshots without bloating your file sizes. This level of control means you can tailor every single screenshot for its specific purpose, whether that’s for pixel-perfect archival or fast web delivery.
A Look at Alternative Screenshot Methods
Using a dedicated API is a fast, reliable way to get website screenshots, but it’s certainly not the only game in town. Your best bet really depends on what you're building, your budget, and how much time you want to spend on maintenance. Let's break down the other options so you can see where they shine and where they fall short.
The most straightforward method is already built into your browser: Developer Tools. For a quick, one-off screenshot during a design review or a debugging session, it's perfect. You can snap a full-page capture or even just a specific HTML node. The big catch? It's completely manual. If you need to do this more than once, it becomes a tedious chore.
Do-It-Yourself with Headless Browsers
For developers who need automation and want total control over the process, self-hosting a headless browser is a really common path. Tools like Google's Puppeteer or Microsoft's Playwright are incredibly powerful, giving you a direct line to control a real browser with code. You can script complex scenarios like logging into a user account, filling out a form, or waiting for an animation to finish before taking a screenshot.
But all that power comes with a price—and that price is your time. Suddenly, you're not just taking screenshots; you're managing infrastructure.
You’re now on the hook for:
- Setup: Installing the right browser versions, drivers, and all their dependencies.
- Maintenance: Constantly dealing with updates, security patches, and the inevitable breaking changes in a new library version.
- Evasion: Figuring out how to handle proxies, CAPTCHAs, and bot detectors that will try to block you.
- Scaling: Building and managing a server fleet that can handle multiple screenshot requests at once without grinding to a halt.
Self-hosting gives you ultimate flexibility, but it turns a simple task into a full-blown infrastructure project. The time you sink into maintenance can easily eclipse the cost of an API, especially when your team should be focused on your actual product.
This choice often boils down to a classic debate: control versus convenience. If you're heading down this road, checking out a comparison of Puppeteer vs Playwright is a great place to start. We also have our own take on Playwright vs Puppeteer that dives into the specifics for screenshotting.
The Middle Ground: Command-Line Tools
Sitting between the all-manual and all-code approaches are command-line interface (CLI) tools. Think of these as simple wrappers around headless browsers. They let you take screenshots with a basic terminal command, making them great for simple automation.
For instance, you could easily whip up a shell script to take a screenshot of your homepage every morning. While this is a big step up from DevTools, CLIs tend to lack the advanced options and rock-solid reliability you get from a dedicated API, especially when you're up against complex, JavaScript-heavy websites.
The whole field has changed a lot in recent years. Since around 2019, and especially with a big push in 2021, tools have gotten much better at handling modern JavaScript-driven sites. This was a critical improvement, as older methods would fail on as many as 65% of basic captures on these sites. It’s part of a much bigger trend, too. The API management market is expected to jump from $5.24 billion in 2025 to $6.92 billion in 2026, with screenshot endpoints being a surprisingly common use case.
This flowchart maps out some of the more advanced options you'll want to consider, whether you're using an API or building your own solution.
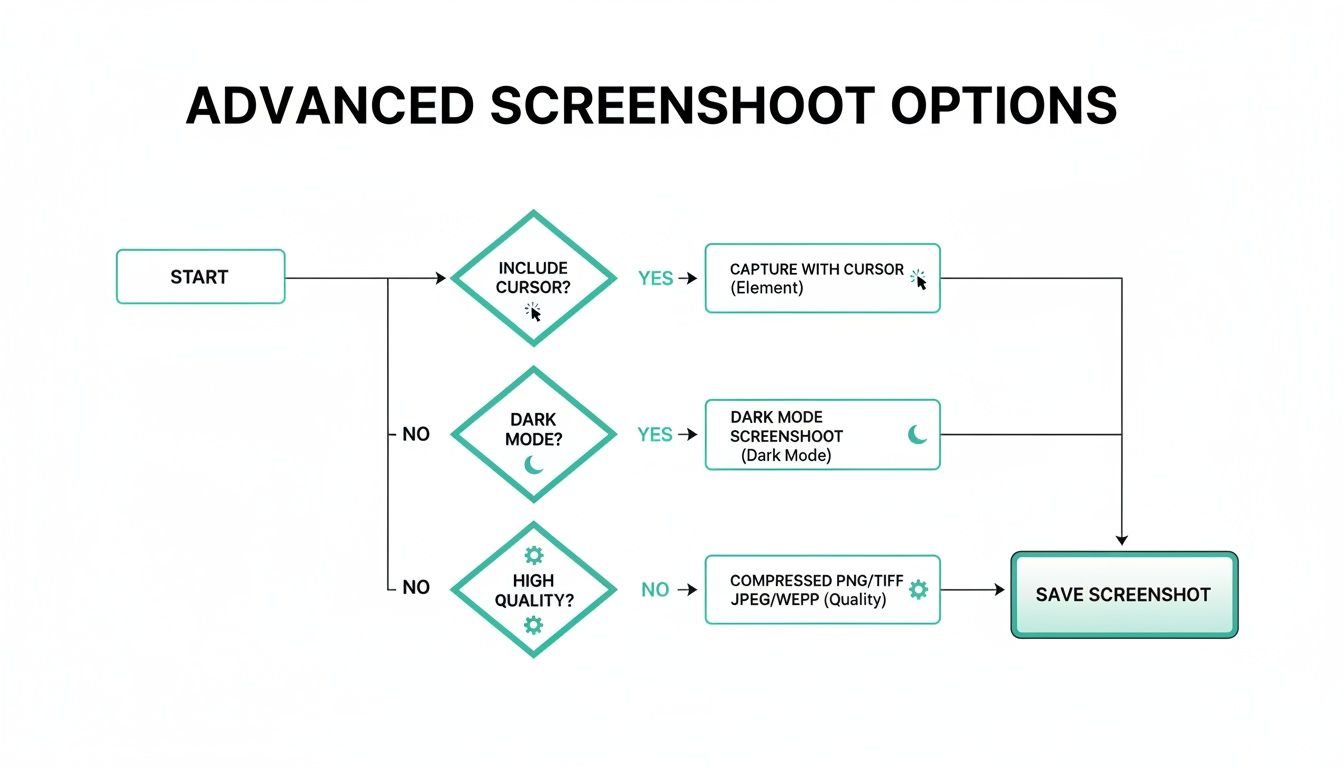
As you can see, you can really dial in your captures—from targeting specific elements and faking a cursor to testing dark mode or tweaking image quality for better performance.
Screenshot Methods Compared: API vs. Self-Hosted vs. Manual
To help you decide, here’s a quick summary of how these methods stack up. Each one has its place, but the "best" one truly depends on your specific needs.
| Method | Best For | Pros | Cons |
|---|---|---|---|
| Screenshot API | Production apps, automated workflows, and teams wanting to focus on their core product. | Highly reliable, scalable, maintenance-free, rich feature set, easy to implement. | Paid service, less control over the underlying environment. |
| Self-Hosted | Complex, custom tasks requiring deep browser control and teams with dedicated DevOps resources. | Maximum flexibility and control, potentially lower cost at a very small scale. | High maintenance overhead, requires infrastructure management, difficult to scale, prone to blocking. |
| Manual (DevTools) | Quick, one-off captures for debugging, design checks, or personal use. | Free, built into every browser, no setup required. | No automation, time-consuming, not suitable for repetitive tasks. |
Ultimately, a dedicated API handles the messy parts for you, while self-hosting puts all the power—and all the responsibility—in your hands. Manual methods are great in a pinch but aren't a serious option for any automated process.
Real-World Applications and Use Cases
It’s one thing to know how to capture a website screenshot programmatically, but it’s another to see where it genuinely solves problems. This isn't just a neat developer trick; it’s a powerful tool that addresses some surprisingly common business challenges, from development workflows to marketing intel.
These are the moments where reliable, scalable screenshot automation really proves its worth. You're turning visual data into something actionable, saving countless hours and catching issues that manual checks would almost certainly miss.
Visual Regression Testing in CI/CD
This is arguably one of the biggest wins for any development team. By plugging automated screenshots into your CI/CD pipeline, you can create a powerful visual regression testing workflow. Every time new code is pushed, a script automatically captures snapshots of key pages or components.
Those new images are then compared against a set of approved "golden" baseline images. If there are any visual differences—a broken layout, a wonky button, a clashing color—the build fails. This simple check catches UI bugs before they ever slip into production, letting you deploy with far more confidence.
The scale of modern testing makes this a no-brainer. With visual regression testing becoming standard in an estimated 90% of CI/CD pipelines, the need for solid automation is obvious. If you're curious about the sheer scale of API usage in workflows like this, API League has a detailed report that's worth a read.
SEO and Competitive Monitoring
For anyone in SEO, manually tracking Search Engine Results Pages (SERPs) is a lost cause. They're dynamic, personalized, and constantly changing. But an automated script can grab screenshots of Google results for your target keywords every single day, creating a visual timeline of how your rankings evolve.
It’s also a fantastic way to keep an eye on the competition. Set up a job to capture their key landing pages, pricing tiers, or promotional banners on a regular schedule. Over time, you build a visual archive of their entire marketing strategy, offering up insights you’d never get otherwise.
Generating Social Media Previews
You know how a link looks way more appealing on X or Facebook when it has a great preview image? You can automate that. Instead of relying on a generic, static image for every page, you can generate dynamic Open Graph images on the fly.
The idea is simple: take a screenshot of the actual content being linked, maybe add a custom title overlay, and serve that as the preview. Suddenly, every shared link is relevant, compelling, and up-to-date, which does wonders for click-through rates.
Website Archival and Compliance
In some industries, like finance or healthcare, you're legally required to keep historical records of your website. Automated screenshots are perfect for this. They create a reliable, timestamped visual archive that serves as an irrefutable record for compliance audits or legal disputes.
You can prove exactly what your site looked like on any given date. The volume here can get pretty wild—some compliance teams have to archive over 10,000 pages weekly. An API-driven approach is really the only way to manage that kind of scale without losing your mind.
Frequently Asked Questions
When you start taking website screenshots programmatically, you'll inevitably run into a few common hurdles. I've seen these trip up developers time and time again. Let's walk through some of the most frequent questions so you can avoid those headaches from the get-go.
Can I Screenshot a Website That Requires a Login?
Absolutely, but it’s not as simple as just pointing to a URL. You have to handle the authentication piece. The service capturing the screenshot needs a way to log in, just like a real user would.
If you're using a library like Puppeteer or Playwright, this means scripting the entire login flow yourself. You'll need to code it to navigate to the login page, find the right fields, type in the username and password, and click the submit button before you can finally snap your picture.
A dedicated API often makes this much easier. The typical workflow is to log into the site in your own browser, grab the session cookie that the site gives you, and then simply pass that cookie along in the API request header. This tricks the website into thinking the API's request is coming from your already-authenticated session, giving it access to the content behind the login wall.
How Do I Handle Lazy-Loading Content?
Ah, the classic "my screenshot is missing images" problem. This is almost always caused by lazy loading. If you take the shot before the user would have scrolled down, you'll end up with a half-baked image full of blank spaces.
The key is to make sure the page has finished rendering everything before you capture it.
- With Self-Hosted Tools: You have to build the logic for this yourself. A common trick is to programmatically scroll down the page in chunks, pausing between scrolls, and then use a function like
waitForNetworkIdleto wait until the browser is no longer trying to download assets. - With an API: A good screenshot API will have solved this for you. Look for an option to add a simple delay (like
delay=3for a three-second wait) or, even better, an intelligent mechanism that automatically waits for the page to be fully loaded before taking the screenshot.
What Is the Best Image Format: PNG, JPEG, or WebP?
There's no single "best" format—it really boils down to what you're using the screenshot for. Each format strikes a different balance between image quality and file size.
There's no single right answer, so choose the format that aligns with your primary goal. For visual testing, accuracy is king; for web delivery, performance is the priority.
Here’s how I think about it:
- PNG: This is your go-to for perfect, pixel-for-pixel accuracy. Since it's a lossless format, it's the only real choice for visual regression testing, where even a tiny compression artifact could fail a test.
- JPEG: Need a small file size above all else? Use JPEG. It's a lossy format, meaning it sacrifices a bit of quality for great compression. This makes it ideal for things like social media link previews or website thumbnails where load speed is more important than perfect fidelity.
- WebP: This modern format is a fantastic all-rounder. It offers much better compression than JPEG and PNG for both lossy and lossless images. It often gives you the best of both worlds: high quality at a surprisingly small file size.
How Can I Avoid Getting Blocked or Seeing CAPTCHAs?
Welcome to the cat-and-mouse game of web scraping. Modern websites are incredibly good at spotting automated traffic. If you’re running a script from a single IP address, it won't take long before you're greeted with a CAPTCHA or just blocked outright.
To get around this on your own, you have to make your script look human. This means constantly rotating user agents and funneling your traffic through a massive pool of residential proxies. It's a complicated and expensive setup to build and maintain.
This is frankly one of the biggest reasons to use a specialized screenshot API. These services have already invested in the infrastructure to solve this problem. They use huge, sophisticated proxy networks and advanced browser fingerprinting techniques to bypass bot detectors, ensuring you get a clean shot nearly every time. You get to focus on your app, not on the arms race of bot evasion.
Ready to stop wrestling with headless browsers and start capturing clean, reliable screenshots in minutes? Try ScreenshotEngine. Our developer-first API handles all the complexity of rendering, ad-blocking, and proxy management so you can focus on your product. Get your free API key and start building today.