Automated testing for web applications is all about using software to do the heavy lifting—running tests, checking that features work, and spotting visual bugs. It absolutely demolishes the time it takes to do this manually, which is why it's a cornerstone practice for any team that wants to ship reliable software without slowing down. Frankly, it's moved from a "nice-to-have" to a fundamental part of building anything competitive today.
Why Automated Testing Is a Must for Modern Web Development
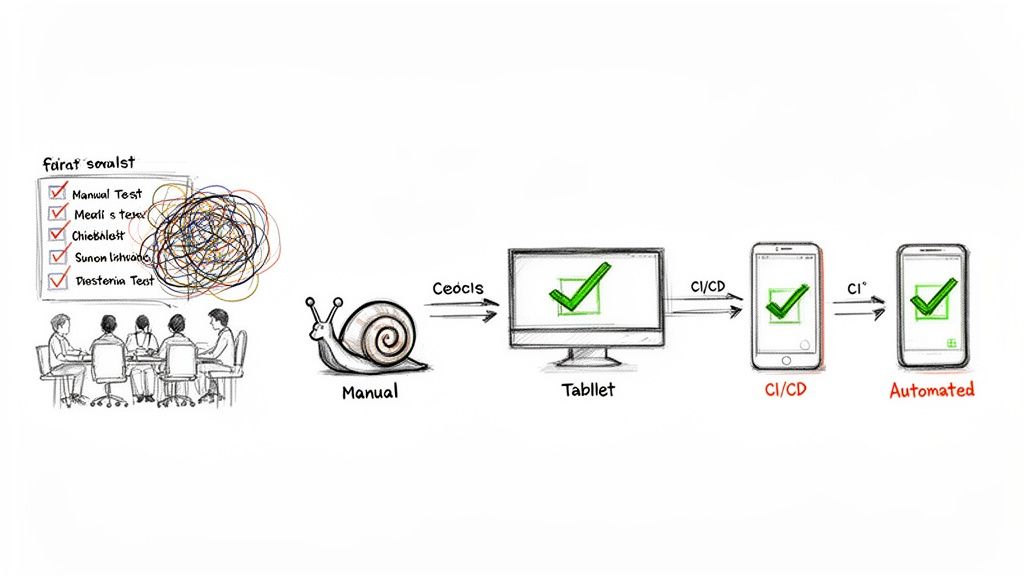
Let’s get real: manual testing can’t keep up anymore. We're living in a world of complex frontend frameworks like React and Angular, where CI/CD pipelines are the norm. Trying to rely on human testers in that environment is just creating a massive bottleneck.
Think about it. Users expect a perfect experience on a mind-boggling number of devices, browsers, and screen sizes. Manually validating every change across that matrix is not just impractical—it’s a recipe for human error. This is exactly where automated testing for web applications steps in and becomes non-negotiable.
The Shift from Manual Bottlenecks to Automated Efficiency
The fundamental problem comes down to speed and scale. A manual tester can only click through so many user flows on a handful of browsers before the release deadline hits. An automated test suite, on the other hand, can blaze through hundreds of checks across dozens of environment combinations, all in a matter of minutes. That shift is what allows teams to confidently deploy code multiple times a day.
This transition from a slow, manual grind to a smooth, automated CI/CD workflow is at the very heart of modern software development.
As the diagram shows, automation isn't just a separate step; it's woven directly into the development pipeline. It gives you that rapid feedback loop you need to enable true continuous delivery.
The numbers don't lie. The global software testing market is expected to explode from $55.8 billion in 2024 to $112.5 billion by 2034. Automation is a huge part of that growth, and for good reason. It’s been shown to cut the number of bugs that slip into production by up to 50% compared to manual-only approaches. That means catching those annoying UI glitches before your users ever see them.
Building a Practical Foundation
Before we get into the "how," it's crucial to really internalize the "why." I've seen firsthand the tangible benefits of automated testing, and understanding them is what gets a team truly invested. This guide is your roadmap to building a solid testing strategy, layer by layer:
- Unit Testing: Making sure the smallest pieces of your code work in isolation.
- Integration Testing: Checking that those different pieces play nicely together.
- End-to-End (E2E) Testing: Validating a complete user journey from start to finish.
- Visual Regression Testing: Catching accidental UI changes that break the look and feel.
By bringing automation into your workflow, you're not just moving faster. You're building a more robust, reliable, and ultimately more successful product.
Crafting Your Web Application Testing Strategy
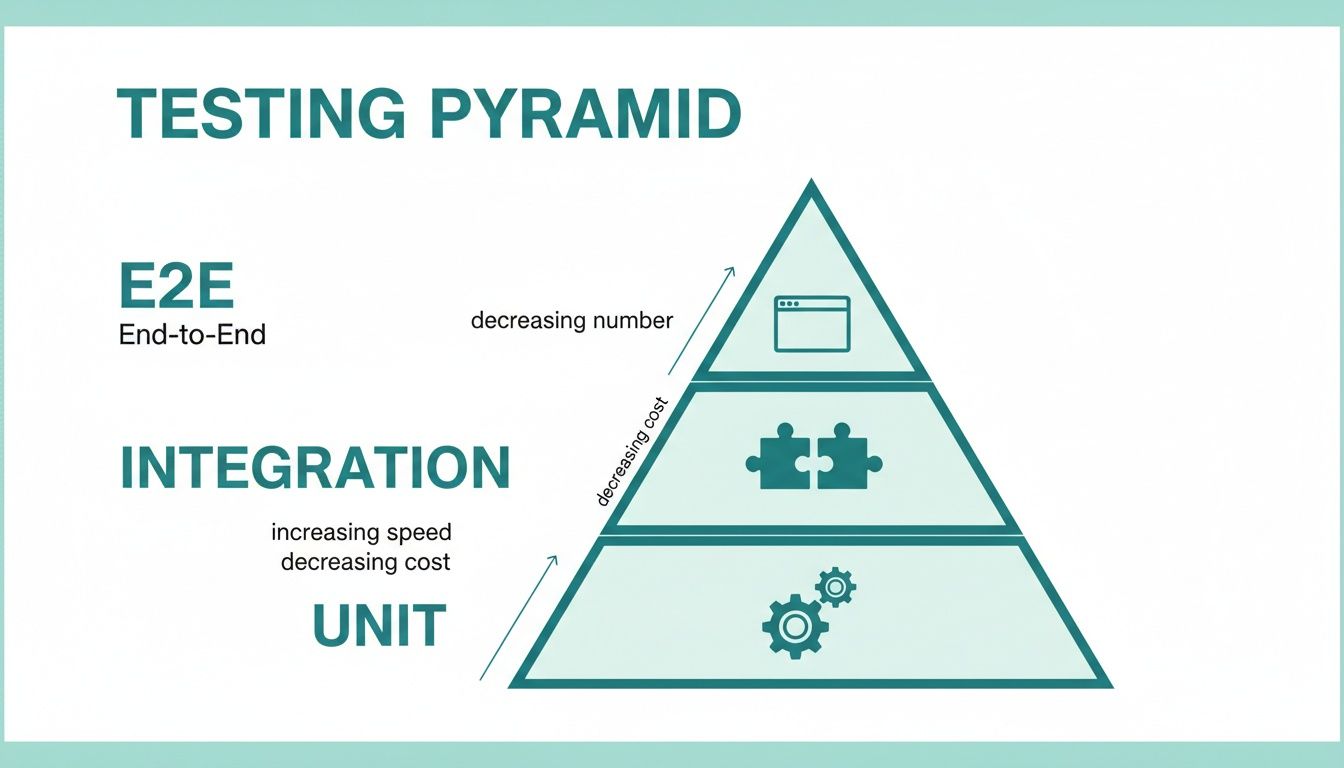
Jumping into automated testing without a clear plan is a surefire way to get tangled in slow, flaky tests that nobody trusts. The goal isn't just to write tests; it's to build confidence in your releases without grinding development to a halt. This is where the classic testing pyramid isn't just theory—it's a practical blueprint for success.
The idea is brilliantly simple: build a wide, sturdy base of fast, inexpensive tests and then layer on fewer of the slower, more complex ones as you move up. This structure gives you the rapid feedback you need at the code level while still making sure the entire user experience holds up. Let's walk through each layer.
The Testing Layers at a Glance
Before we dive deep, it helps to see how these testing layers stack up against each other. Each one has a specific job, a different speed, and a clear role to play in your overall strategy.
Comparing Web Application Testing Layers
| Test Type | Primary Goal | Execution Speed | Best For |
|---|---|---|---|
| Unit | Verify a single function or component works in isolation. | Milliseconds | Catching logic errors in individual pieces of code. |
| Integration | Ensure different parts of the application communicate correctly. | Seconds | Testing interactions between a component and an API, or a service and a database. |
| End-to-End (E2E) | Validate a complete user journey from start to finish. | Minutes | Verifying critical business flows like checkout or user registration in a real browser. |
| Visual Regression | Confirm the UI appears correctly and hasn't changed unexpectedly. | Seconds to Minutes | Catching visual bugs like broken layouts, style changes, or missing elements. |
This table gives you a quick reference, but the real magic is in understanding how they work together to create a comprehensive safety net for your application.
Unit Tests: The Bedrock of Your Strategy
Your first line of defense is always the unit test. These are tiny, focused tests that check one specific "unit" of code—think a single JavaScript function, a method in a class, or an individual React component—without involving external systems like a database or a live API.
Because they have zero dependencies and run entirely in memory, they are unbelievably fast and consistent.
For instance, if you have a helper function that formats a date, a unit test would simply pass in a date object and assert that the output string matches the expected format. It’s not concerned with where that date came from or how it's displayed, only that the formatting logic itself is solid.
A healthy test suite is built on a massive foundation of unit tests. They give developers an almost instantaneous feedback loop, catching simple mistakes moments after they're written.
Integration Tests: Connecting the Pieces
Unit tests are fantastic, but they can't tell you if the different parts of your application actually play nicely together. That’s where integration tests step in. They verify the contract between two or more components to make sure they communicate as expected.
These tests occupy the middle of the pyramid—they're a bit slower than unit tests but still much faster than firing up a whole browser.
A perfect real-world example is testing a login form. An integration test would verify that when a user hits "submit," your frontend code correctly calls the authentication API with the right payload. You’re checking the interaction—the "integration"—between the UI component and the backend service. It doesn’t need to simulate a full user journey; it just confirms the connection point is solid.
End-to-End Tests: Validating the User Journey
Right at the peak of the pyramid are your End-to-End (E2E) tests. These are the heavy hitters. They automate a real browser, simulating a user’s entire journey through your application to validate a complete workflow from start to finish.
Think about a full e-commerce checkout. A single E2E test script might:
- Open the website in a live browser like Chrome.
- Search for "running shoes" and add a pair to the cart.
- Navigate through the entire checkout process.
- Submit the order and confirm the "Thank You" page appears.
Because E2E tests involve every part of your system—the UI, the network, APIs, databases—they are inherently slow and can be brittle. A small network hiccup or a minor UI tweak can cause a failure. That’s precisely why the pyramid model advises using them sparingly. Reserve them for your most critical, revenue-impacting user flows.
The Hidden Layer: Visual Regression Testing
The traditional pyramid is great for making sure your app works, but it has a huge blind spot: it doesn't know what your app looks like. A functional test can happily pass even if your CSS fails to load, leaving users with a broken, unstyled page.
This is where Visual Regression Testing slides in as an essential, parallel layer. It works by taking pixel-by-pixel snapshots of your UI and comparing them against a "baseline" image of how it’s supposed to look.
If anything changes—a button is misaligned, a font is wrong, an icon disappears—the test fails. Adding these visual checks ensures your application not only functions correctly but also looks correct after every single deployment. It’s the ultimate safety net for protecting your user experience, which sets us up perfectly for the tools we’ll cover next.
Choosing the Right Testing Frameworks and Tools
Once you’ve got your testing strategy mapped out, it’s time to pick your toolkit. The world of automated testing is flooded with options, and honestly, it can be a bit overwhelming. The secret isn't just finding a tool for the task; it's about matching it to your team's skillset, your app's architecture, and where you see the project going long-term.
Making a smart choice now will save you countless headaches down the line. You're looking for something that lets your team write solid tests without getting bogged down in a maintenance nightmare.
The testing pyramid is a great mental model for this. It helps visualize how we should balance our efforts, focusing heavily on the fast, cheap unit tests at the base and being more strategic with the slower, more complex E2E tests at the top.
This hierarchy is your guide for tool selection, ensuring you have the right tool for each layer of your strategy.
Selecting Your E2E Testing Framework
End-to-end (E2E) testing is usually the trickiest part of the automation puzzle, so your framework choice here really matters. The conversation almost always comes down to three big names: Selenium, Cypress, and Playwright. Each one has its own philosophy and trade-offs.
- Selenium: This is the old guard, the long-standing industry standard. Selenium is incredibly powerful, supporting a ton of languages (Java, Python, C#, JavaScript) and just about every browser you can think of. The downside? Its setup can be a pain, and tests can feel a bit clunky to write compared to the newer kids on the block.
- Cypress: Known for its fantastic developer experience, Cypress is a JavaScript-only tool that runs right inside the browser. This gives it lightning-fast, reliable execution and a brilliant interactive test runner that makes debugging a breeze. Its main drawback used to be limited cross-browser support, but they've made huge strides in that area.
- Playwright: The newer contender from Microsoft has quickly become a favorite by blending the best of both worlds. It boasts excellent cross-browser automation (Chromium, Firefox, WebKit), speaks multiple languages (JavaScript, Python, Java, .NET), and comes packed with slick features like network interception and device emulation right out of the box.
Sometimes, seeing how others have tackled similar problems can offer real clarity. Checking out case studies like this one on Browser Testing Using Wallaby can provide some great, real-world perspective.
Your team’s primary programming language is often the deciding factor. A team of frontend developers will feel right at home with JavaScript-based tools like Cypress or Playwright, leading to faster adoption and better test maintenance.
Tools for Unit and Component Testing
Moving down the pyramid, we hit the foundation: unit and component tests. If you're building a modern JavaScript app with something like React, Vue, or Svelte, the choice usually boils down to Jest or Vitest.
- Jest: For years, Meta's Jest has been the undisputed king of JavaScript testing. It's an "all-in-one" package with a test runner, assertion library, and mocking tools built-in, which makes getting started pretty simple.
- Vitest: This is the modern challenger, built to work perfectly with the Vite build tool. Vitest is known for its incredible speed. Because it has a Jest-compatible API, switching over from an existing Jest setup is surprisingly painless.
The decision here often lines up with your project's build system. If you're on Vite, Vitest is the obvious—and faster—choice. For almost everything else, Jest is still a rock-solid and reliable option. To get a broader view of what’s out there, you can explore our guide on automated website testing tools.
Specialized Tools for Visual Regression Testing
Functional tests are crucial, but they’re completely blind to how your app looks. A test can pass with a perfect score even if a CSS bug has made your "Buy Now" button completely invisible. This is exactly where visual regression testing tools come into play.
You could try to cobble together a custom solution with a headless browser and an image comparison library, but that path is full of pain. Managing browser versions, dealing with dynamic content, and getting the infrastructure to scale is a massive engineering project in itself.
This is why dedicated screenshot APIs like ScreenshotEngine are the smarter move. These services take all that browser rendering and infrastructure complexity off your plate.
With just a single API call, you get a clean, reliable screenshot of your web app, with ads and cookie popups automatically blocked. This lets you slot pixel-perfect visual checks directly into your E2E tests with very little fuss, ensuring your app doesn't just work right—it looks right, every single time.
Writing Your First Automated and Visual Tests
Okay, enough theory. You've picked your tools and mapped out a strategy. Now it's time to actually write some code, make the browser do our bidding, and lock in what our application is supposed to look like.
I'm using Playwright for these examples because its API is clean and modern, but honestly, the principles are the same whether you're using Cypress, Selenium, or something else. The real goal here is to write a test that checks a core user journey and then layer on a visual check to catch sneaky UI bugs. That one-two punch is what makes for a truly solid testing suite.
A Real-World Test Scenario
Let's start with a classic: logging into a dashboard. A good functional test needs to prove that a user can type in their credentials, hit the login button, and actually land on the dashboard, seeing their name in a welcome message. Anything less, and the app is broken.
Here’s what that looks like in code. This script fires up a browser and runs through the entire login flow, making sure the key pieces work.
import { test, expect } from '@playwright/test';
test('should allow a user to log in and view the dashboard', async ({ page }) => { // Go to the login page await page.goto('https://yourapp.com/login');
// Find the form fields and type in the credentials await page.locator('input[name="email"]').fill('[email protected]'); await page.locator('input[name="password"]').fill('securePassword123');
// Click that login button await page.locator('button[type="submit"]').click();
// Make sure we landed on the right page await page.waitForURL('**/dashboard'); expect(page.url()).toContain('/dashboard');
// Check for a welcome message to confirm we're logged in const welcomeMessage = page.locator('h1:has-text("Welcome, Test User!")'); await expect(welcomeMessage).toBeVisible(); });
This is great. It automates a critical check and tells us if the login logic is sound. But it's also completely blind. It has no idea if the CSS failed to load, making the text white on a white background, or if a rogue popup is blocking the entire screen.
Adding Visual Regression Testing
This is exactly where visual regression testing comes in. It answers the question: "Does this page still look right?"
By adding a single step to our test, we can snap a picture of the page at that critical moment. This becomes our source of truth.
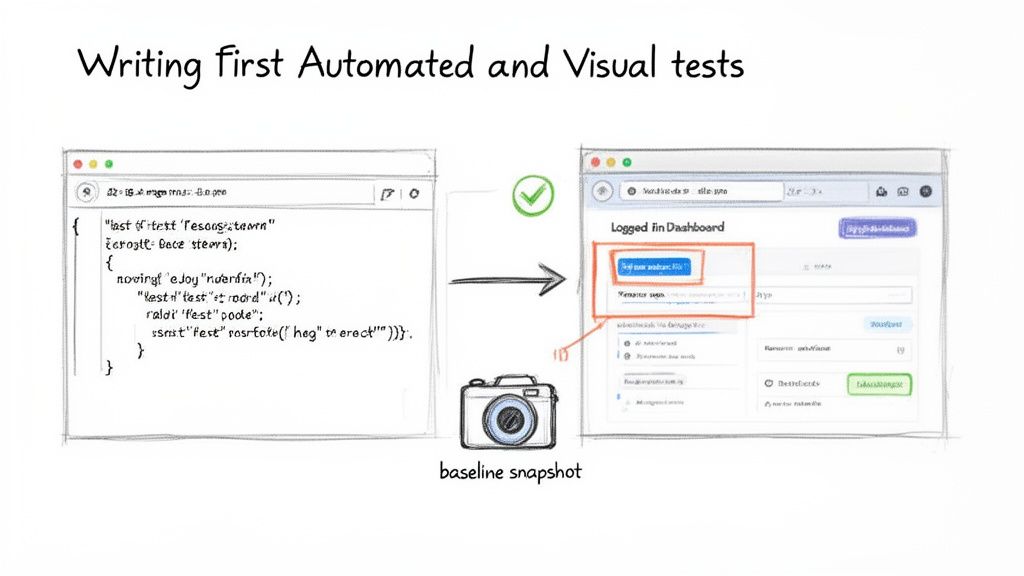
The image above really captures the essence of it—our code is directly driving actions in a real browser, giving us a powerful way to validate how the app behaves and looks.
Now, let's add that visual check. You could try to build a screenshotting system yourself, but trust me, it's a rabbit hole of complexity. A much smarter move is to use a dedicated service like ScreenshotEngine. A specialized screenshot API takes care of the browser farm, blocks annoying cookie banners, and just gives you a clean, perfect screenshot every time with one API call.
Let's update our test to include a visual snapshot right after the user lands on the dashboard.
import { test, expect } from '@playwright/test'; import axios from 'axios'; // We'll need this to make the API call import fs from 'fs'; // And this to save the image file
test('should log in and visually match the dashboard baseline', async ({ page }) => { // ... all the login steps from the previous example ... await page.goto('https://yourapp.com/login'); await page.locator('input[name="email"]').fill('[email protected]'); await page.locator('input[name="password"]').fill('securePassword123'); await page.locator('button[type="submit"]').click(); await page.waitForURL('**/dashboard');
// -- Here's our new visual test step -- const screenshotEngineUrl = 'https://api.screenshotengine.com/v1/screenshot'; const apiKey = 'YOUR_API_KEY'; const targetUrl = page.url(); // Grab the URL of the page we're on
const response = await axios.get(screenshotEngineUrl, { params: { token: apiKey, url: targetUrl, full_page: false, // We only care about what the user sees }, responseType: 'arraybuffer' // This is crucial for handling image data });
// Save the screenshot from this test run fs.writeFileSync('tests/screenshots/dashboard-latest.png', response.data);
// In a real test suite, you'd now compare 'dashboard-latest.png' // with a pre-saved 'dashboard-baseline.png' using a library like pixelmatch. });
Establishing and Comparing Baselines
The very first time you run this new test, the dashboard-latest.png it saves is special. This is your baseline. You'll want to open it up, make sure it's absolutely perfect, and then rename it to something like dashboard-baseline.png.
Key Takeaway: Think of the baseline screenshot as a visual contract. It's your declaration of "This is exactly how this page should look." Any deviation is a potential bug.
From then on, every time the test runs, it will snap a new picture and compare it against that baseline, pixel by pixel. If anything is different—a button changed color, an icon vanished, the layout shattered on a certain screen size—the test fails.
You've just built an incredible safety net. You're catching bugs that traditional automated testing for web applications can't even see. This combination of functional and visual validation is how you achieve real confidence in your releases.
Integrating Automated Tests into Your CI/CD Pipeline
Writing automated tests is a fantastic start, but the real magic happens when they run on their own, guarding your application without any manual intervention. The ultimate goal is to build an automated quality gate that runs your entire test suite against every single code change. This is precisely what Continuous Integration/Continuous Deployment (CI/CD) pipelines are for.
When you hook your tests into a CI/CD pipeline, you’re essentially creating a proactive defense system. Every time a developer pushes new code, the pipeline springs to life, automatically running all your unit, integration, and end-to-end tests. This gives you immediate feedback and stops broken code dead in its tracks, long before it ever has a chance to reach production.
Setting Up a Basic CI/CD Workflow
Let's walk through how this looks in the real world with GitHub Actions, a super common choice for CI/CD. The whole process is controlled by a simple YAML file you place in your project’s .github/workflows directory. This file is just a set of instructions telling GitHub what to do when new code gets pushed.
Here’s a straightforward configuration to get you started. It checks out the code, installs all the project dependencies, and then runs the test suite.
.github/workflows/run-tests.yml
name: Run Automated Tests
on: push: branches: [ main ] pull_request: branches: [ main ]
jobs: test: runs-on: ubuntu-latest steps: - name: Check out repository code uses: actions/checkout@v3
  - name: Set up Node.js
    uses: actions/setup-node@v3
    with:
      node-version: '18'

  - name: Install dependencies
    run: npm install

  - name: Run all tests
    run: npm test
This simple file creates an incredibly powerful feedback loop. A developer pushes a change, and in just a few minutes, they know for sure if they broke anything. It's a foundational practice for any team serious about automated testing for web applications.
Best Practices for an Effective Pipeline
Once you have that basic workflow running, a few smart practices can make your pipeline way more effective. These aren't just minor tweaks; they can genuinely speed up your development cycle and keep your team in sync.
Run Tests in Parallel: Nobody wants to wait 20 minutes for a test suite to finish. That’s a massive productivity killer. Most CI/CD platforms let you run tests in parallel, splitting the work across several machines. This simple change can cut your feedback time from a long coffee break down to just a few seconds.
Set Up Failure Notifications: When a build breaks, you need the right people to know about it—immediately. Configure your pipeline to shoot a notification into your team’s Slack channel or an email group. This makes sure failures are jumped on right away instead of getting lost in the shuffle.
Gate Your Deployments: This is your final, non-negotiable safety net. Set up your pipeline to block any pull request from being merged if the tests fail. This is often called "gating," and it physically prevents broken code from ever being added to your main branch.
Key Takeaway: Your CI/CD pipeline should be more than a test runner; it should be a strict gatekeeper. By gating deployments, you automatically enforce your quality standards, making it structurally impossible for a known regression to slip into production.
By putting these strategies into practice, you’ll graduate from simply running tests to building a truly automated quality assurance process that works around the clock. If you’re running tests inside containers, optimizing that environment is key. A great next step is to learn how to create a smaller, faster Playwright Docker image to make your CI pipeline even more efficient.
The Future of Web Testing: AI and Self-Healing Automation
Let's be honest: the biggest pain point in automated testing has always been maintenance. We've all been there. A developer pushes a seemingly minor UI change—a button's ID gets updated, a CSS class is renamed—and suddenly, your CI/CD pipeline lights up red with a dozen failed tests. That constant churn of fixing brittle locators is exactly where AI is beginning to change the game.
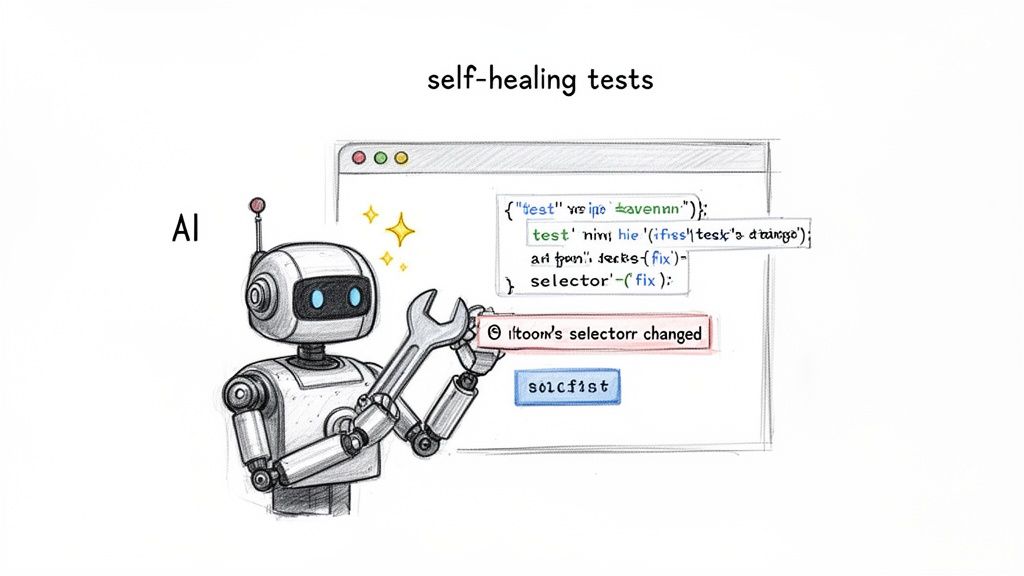
We're stepping into an era of self-healing tests. Instead of relying on a single, fragile locator, these new AI-powered tools understand an element's context. When a test fails because it can't find something, it doesn't just give up. It actively hunts for the element based on other attributes—its text, its position on the page, or accessibility labels—and intelligently updates the locator to keep the test from breaking.
For QA teams stuck in an endless cycle of script repairs, this is a massive leap forward.
How Self-Healing Automation Actually Works
The idea behind it is pretty straightforward. When a traditional test script can't find an element using its original selector (like #submit-btn), it fails. End of story. A self-healing test, on the other hand, kicks in an AI model that scans the page's structure and pinpoints the most likely replacement for the missing element.
For instance, the AI might spot a button with the text "Submit" in roughly the same spot on the form. It then makes an educated guess, updates the test step with a new, more stable locator, and lets the test run continue. This single capability can slash the maintenance burden that has plagued test automation for years.
This move toward AI-first quality engineering is more than just a passing trend—it's a fundamental shift in how we think about testing. The aim is to build test suites that are genuinely resilient and adaptive, freeing up engineers to tackle more complex quality challenges.
The industry is already moving quickly in this direction. Projections show that by 2026, a staggering 77.7% of QA teams will have adopted an AI-first approach. AI-driven self-healing tests are expected to cut maintenance time by 70% simply by fixing broken locators automatically—an issue responsible for 30-50% of all traditional test failures. Digging into recent software testing statistics, you'll find that by 2028, 75% of enterprise engineers will be using AI code assistants.
Beyond Just Fixing Things: Intelligent Test Generation
AI isn't just getting better at fixing broken tests; it's also getting smarter about creating them from scratch. We're seeing new tools that can analyze an application, map out its user flows, and generate meaningful test cases automatically. This is huge for uncovering those tricky edge cases and blind spots a human tester might easily overlook.
Imagine an AI that sees a change in your codebase and predicts potential bugs, suggesting specific tests to run before the code is even merged. This proactive approach turns testing from a reactive, bug-hunting chore into a predictive, quality-assurance process. The future isn't just about running tests faster; it's about building smarter, more resilient systems that anticipate and adapt to change, ensuring our products stay reliable in a constantly shifting digital world.
Ready to eliminate the headaches of visual regression testing? ScreenshotEngine provides a developer-first API that captures clean, reliable screenshots of any website without the complexity of managing headless browsers. Start for free and integrate pixel-perfect visual testing into your workflow in minutes. Get your API key at https://www.screenshotengine.com.